Abilities in Volleyball Ascended add a unique layer of strategy and excitement to every match. They allow players to pull off unexpected moves, shift momentum, and outsmart opponents in creative ways. From teleporting sets to directional spikes, each Ability offers a distinct tactical edge. Mastering these powers can be the difference between a good play and a game-changing moment. So follow along with our Volleyball Ascended Abilities tier list and guide to learn how.
Valleyball Ascended Tier List
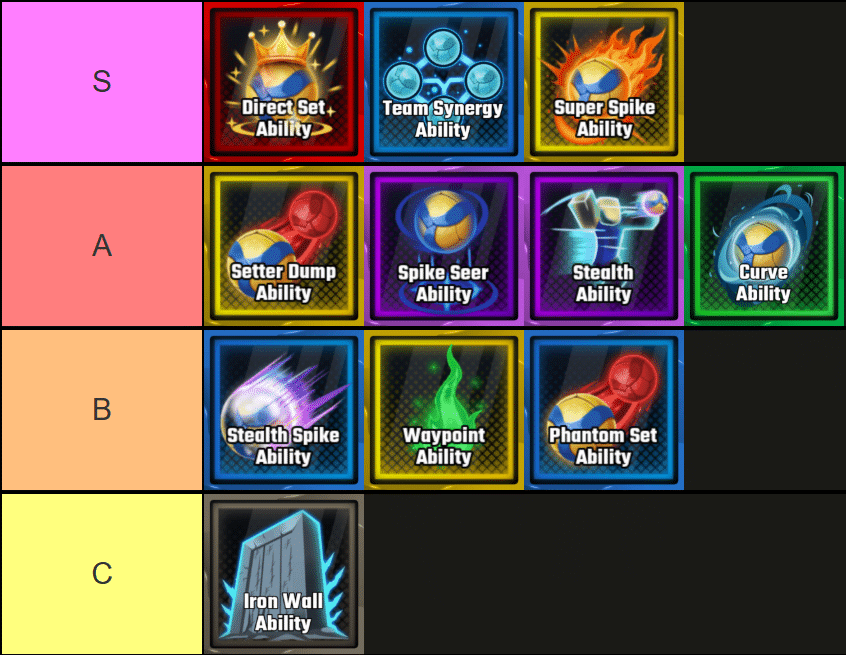
All Abilities in Volleyball Ascended ranked from best to worst — Image via TierMaker.
In the tier list above, we ranked all Abilities in Volleyball Ascendedbased on how good they are in the current meta. In general, rarer Abilities are stronger. However, as surprising as it may be, a Rare Ability is one of the strongest Abilities in Volleyball Ascended, and a Rival Ability is one of the weaker ones. After extensive testing, I found out that teleporting back with Waypoint is virtually useless compared to the increased team movement speed given by Team Synergy.
Volleyball Ascended Abilities List
Below is a complete and detailed list of all Abilities in Volleyball Ascended, sorted by their position on the tier list:
Ability
Rarity
Description
Tier
Legend
• When activated, your next set within 8 seconds will automatically teleport to the nearest teammate within 35 studs. If no teammate is within range, the set will instead go directly above you. + Amazing for any playstyle. + Easy points when coordinating with your team.
S
Rare
• When activated, your whole team gains a burst of movement speed for 5 seconds. + A Universal Ability that is amazing for any situation. + Best defensive Ability in the game. +It might as well be of Rival rarity or even higher.
S
Rival
• When activated, your next Spike within 8 seconds has significantly increased power. + Amazing for an offensive playstyle.
S
Rival
• When activated, your next set within 8 seconds will be dumped in the direction you are tilting, allowing for quick and unexpected plays. + Great for surprising the opponents.
A
Epic
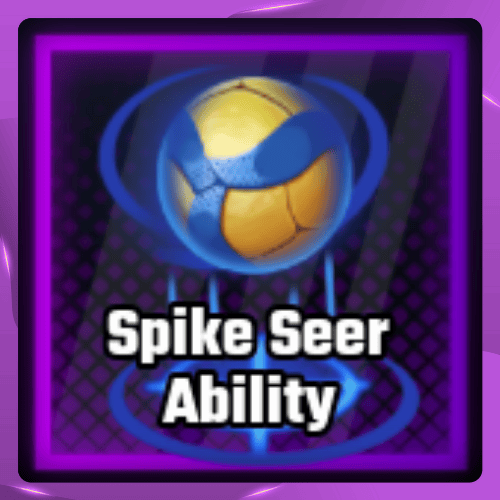
• Passively see all landing spots of spikes for both teams. + Great for controlling gameplay and learning.
A
Epic
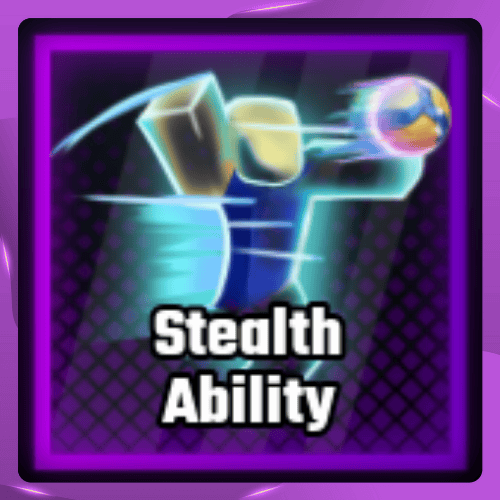
• When activated, you become invisible to all enemies for 0.6 Seconds. + Great for surprise Spikes.
A
Uncommon
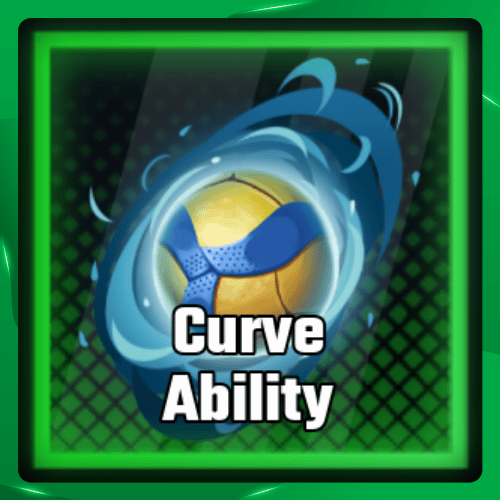
• When activated, your next Spike within 8 seconds will curve to the side. + Useful in all playstyles.
A
Rare
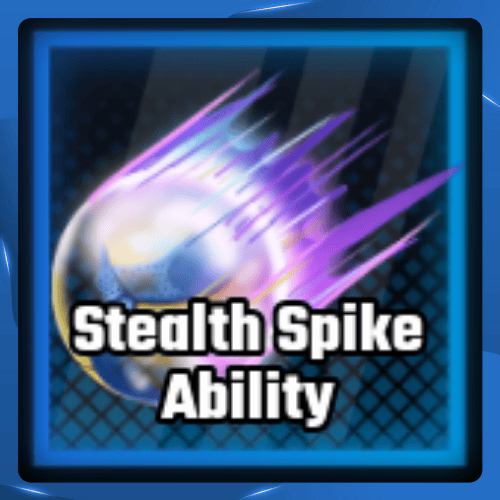
• When activated, your next Spike within 8 seconds will become invisible for a split second. + Great against experienced players.
B
Rival
• When activated, mark your current location. After 10 seconds, teleport back to it. − Man, this Ability is just sad. − Very rarely useful and only in niche situations. − It is a Rival rarity Ability, but it might as well be a Rare or Uncommon.
B
Rare
• When activated, your next set within 8 seconds will create a mirage ball. + Good when trying to confuse enemies.
B
Common
• When activated, increase your Block radius by 30% for 0.75 Seconds. − A very basic Ability with extremely limited use.
C
A good starting Ability in Volleyball Ascended would be Super Spike, if you can get it, or Spike Seer, as it allows you to see where Spikes will land. Seeing where they land means you can quickly learn how people play and develop a sense of where opponents usually aim.
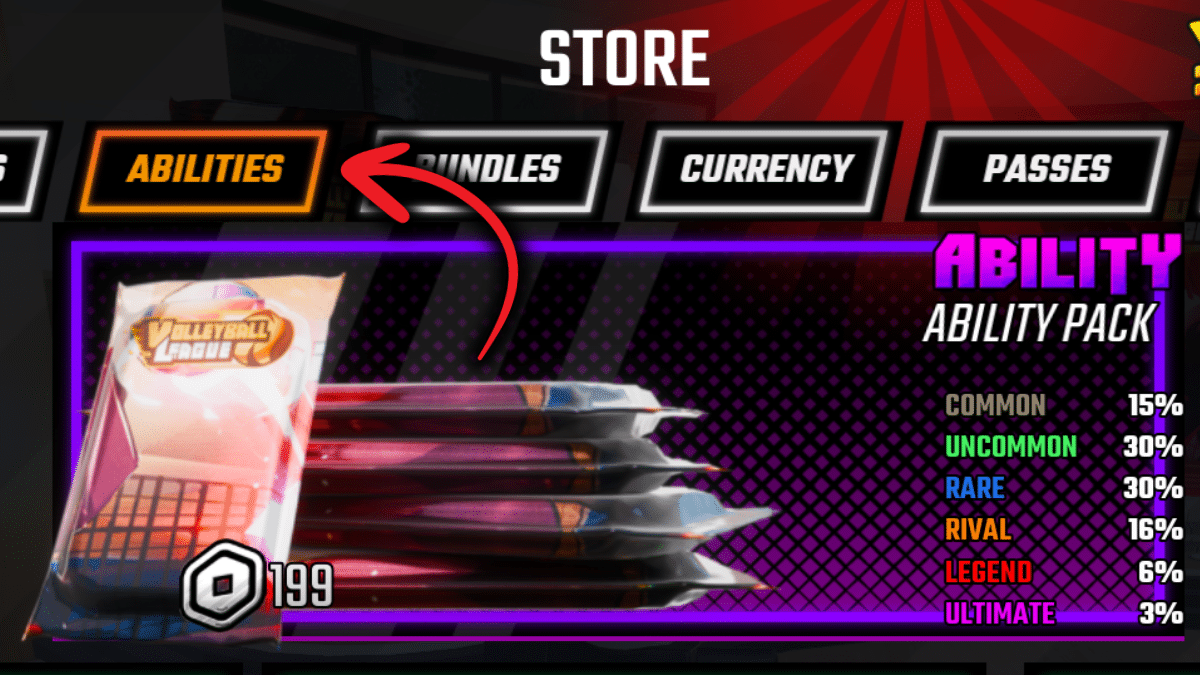
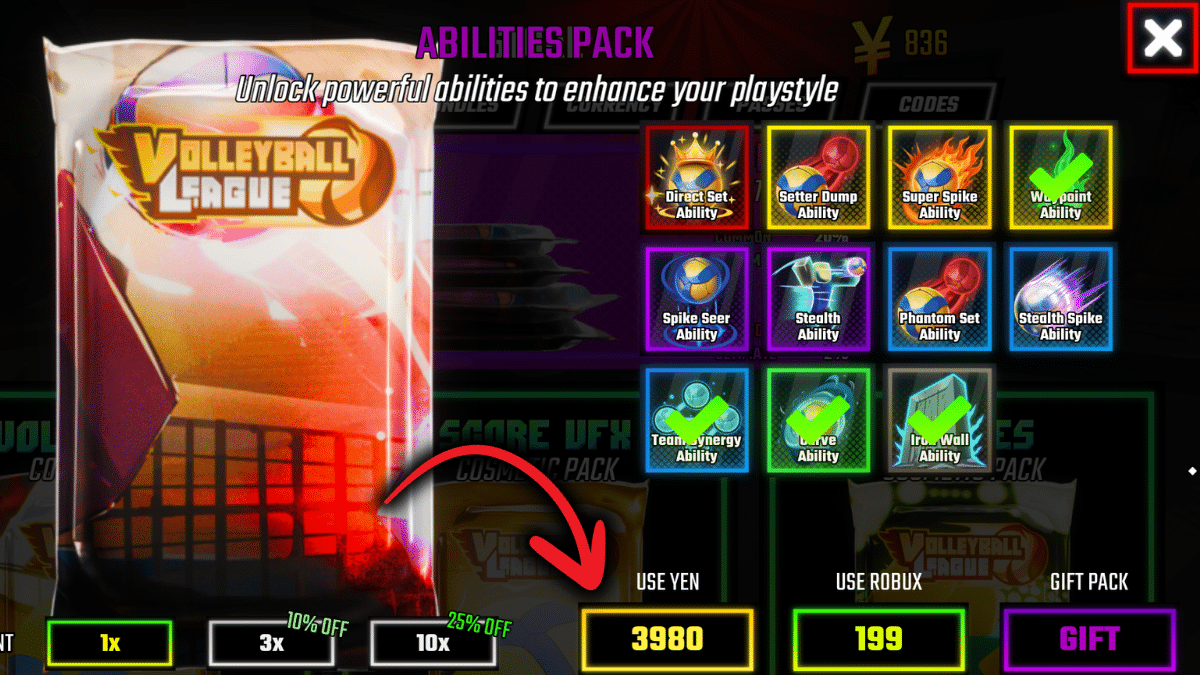
How to get Abilities in Volleyball Ascended
Click on the Shop icon.Go to the Abilities section.Open an Abilities pack.
If you want to get one of the Abilities from our tier list in Volleyball Ascended, you first need to collect enough Yen. You can collect them by playing or using codes from our Volleyball Ascended Codes page. Once you have 3980 Yen, you will be able to buy an Abilities Pack from the store. When you open it, you will get a random Ability from the list above. Some of the better Abilities have a lower chance of dropping, so make sure you have enough Yen to Reroll a few times until you get the one you’re looking for.
And that is all for my Volleyball Ascended Abilities tier list and guide. Check out more Roblox-related stuff on our Roblox Page.
The Escapist is supported by our audience. When you purchase through links on our site, we may earn a small affiliate commission. Learn more about our Affiliate Policy
With Chapter Six, Season Three, Fortnite is reliving the thrill of the Galactic Battle with Star Wars as its central theme. Despite being a short season, popular characters from the franchise are expected to arrive throughout the month-long celebrations.
Epic Games has finally revealed the roadmap for this season, including all the characters and the weapons that will arrive over the next few weeks.
What to Expect in the Fortnite Chapter 6 Season 3 Galactic Battle Roadmap
Galactic Battle is expected to be the shortest season so far, coming to a close in a little over a month. Here’s what Epic Games is adding to the island in the forthcoming updates:
May 8
Han Solo, Luke Skywalker, and Princess Leia skins will make it to the Item shop.
Mace Windu Holograms will give you the Purple Lightsaber and teach you the Force Pull ability.
Darth Maul Holograms will give you the Red Lightsaber and teach you the Force Throw ability.
May 15
Chewbacca is set to make a comeback to the island along with the Wookie Bowcaster and the CA-87 Jawa Scatter Blaster.
May 22
Mandalorian NPCs will join the battle. You will be able to recruit a Heavy, Scout, Supply, or Medic Mandalorian to your team.
Heavy Jetpack returns along with the Amban Sniper Rifle and the new dual-wield WESTAR-34 Blaster Pistols.
Image by Epic Games
May 29
You finally get to use a Star Destroyer in Fortnite during the Galactic Battle season. A portal to the control room will spawn in every match. In the control room, you take control of the turbolaser and obliterate your enemies.
June 7
This is the final showdown of the season and will include an in-game narrative live event where you go up against Emperor Palpatine. This could likely be followed by a downtime, leading into the new season.
Epic Games announcing the roadmap for Fortnite Chapter Six, Season Three Galactic Battle so early makes it unlikely that it will be extended or the schedule will change. We’ll be sure to update this page with more information if they announce any changes.
The Escapist is supported by our audience. When you purchase through links on our site, we may earn a small affiliate commission. Learn more about our Affiliate Policy
The MurderbotDiaries, Martha Wells’ popular series of darkly comedic science-fiction books, are coming to Apple TV+ in the form of a new series starring Alexander Skarsgård and created/written/directed by Chris Weitz and Paul Weitz. As with any adaptation, however, some pretty big changes are being made, and after watching the series, I wanted to know why. So when I got the chance to ask the creators, I did just that.
For anyone who has read the first Murderbot novella, All Systems Red, you know that the book is both short and yet somehow packed full of wonderful story moments and character traits. The story of Murderbot, a hacked rogue security bot who just wants to be left alone to watch TV shows but ends up being a hero, should fit perfectly into the length for a TV series or film, leading to the idea that the Weitz brothers had the opposite challenge of most adaptations. Whereas most require changes by cutting down the storyline, Murderbot needed fleshing out. Of course, any of those changes went through Wells first, and it was important to respect the source material.
“I think everything that’s in the book is in the show basically,” explained Paul Weitz. “We early on got in touch with Martha Wells kind of as fans and, so there are things that are added to the story, sort of like filling in the cracks, but anytime that we had an idea like that, we would call up Martha and say, ‘Hey, here’s what we’re thinking of, what do you think?’ And she’d either say, ‘Oh, that’s a cool idea’ or ‘Well, maybe think about this instead. That was a huge, huge relief.
“I think that part of the thing for us was never feeling like we were like we were padding stuff,” he continued as he explained why they made the changes they did.
To be clear, the series follows the first book’s story as a whole and does an incredible job adapting the tone and themes of the first novella, but there are a few major key moments that are different. This includes a very sudden and violent moment that’s a major change from the story. The Weitzs said they made such a big, impactful change to help maintain the tone of the books.
“Well, one thing that Alexander was very conscious of, even more so in a way than we were, was that you don’t want things to thaw completely,” Chris Weitz said when discussing the change. “Possibly ever, but even to appear to thaw until the very end. So I think at the very point at which everybody’s thinking, ‘Oh, it might not want to look at us or give us a hug, but it’s part of the team.’ Murderbot does something which reminds everyone that it’s a being that has done violence and that that’s part of their experience and their DNA.”
It wasn’t just the storyline of Murderbot that needed to be tweaked, however. The directors felt they should dive deeper into the lives of the rest of the characters, with particular attention given to fleshing out Garathin, who is played by David Dastmalchian.
“Part of it, in a way, was looking at the characters in the book, which might not have much said about them, and being like, ‘OK, these people exist, so why are they behaving this way? Why are they doing this?’” explained Paul Weitz.
“Doing a lot of work on that,” Chris Weitz commented. “Like, Garathin has a backstory in this, but we checked with Martha whether that was cool, and we also checked with David (Dastmalchian) whether that was cool because it’s trading on a little of his personal, you know, his personal experience. Just playing with the characters with utter respect and belief that they actually exist. (The characters) act in worthy ways, but they have neuroses, they have idiosyncrasies, and that was part of the interest (making changes).”
Murderbot will premiere on Apple TV+ on May 16.
The Escapist is supported by our audience. When you purchase through links on our site, we may earn a small affiliate commission. Learn more about our Affiliate Policy
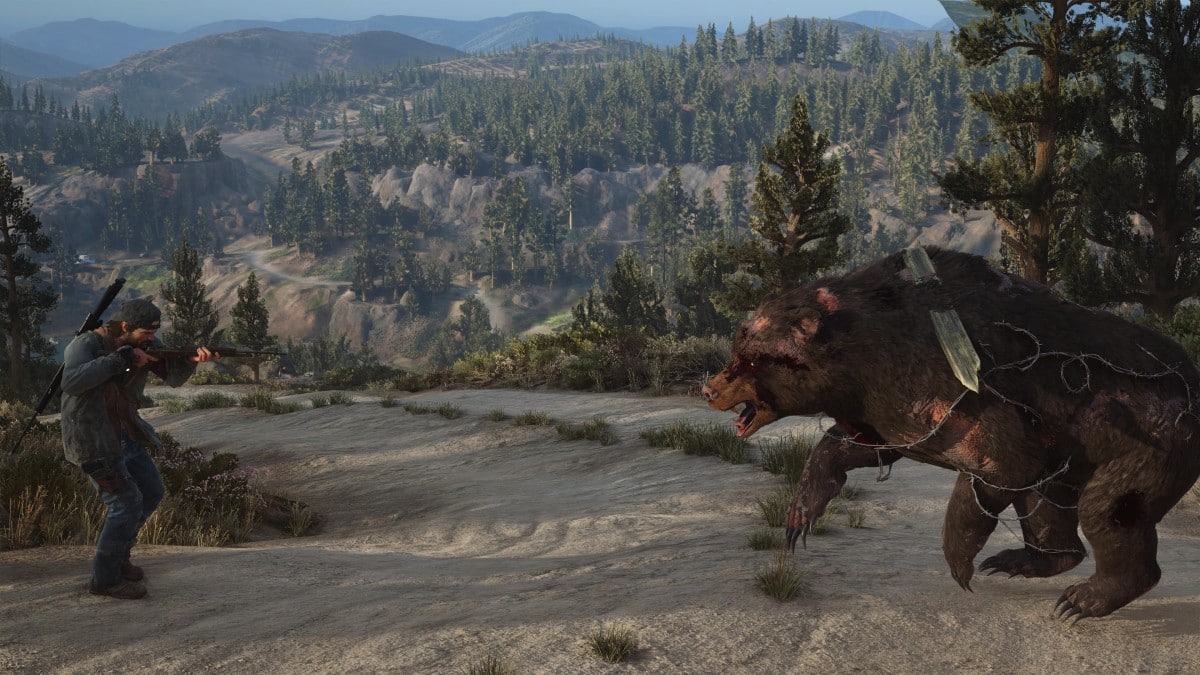
Days Gone occupies a weird place in gaming culture. It sold nine million copies, but barely made a dent in day-to-day culture and gaming discussions. In a strange way, that makes it perfect for a remaster. Old fans get to replay the game optimized for PS5, while new ones can discover it for the first time.
A common criticism – and one that rings true, to an extent – is that Days Gone has an identity crisis. The open world exploration brings to mind Red Dead Redemption. The focus on biking is very Sons of Anarchy. The zombie apocalypse and day/night cycle bring to mind Dying Light, while the emotional beats are reminiscent of The Last of Us. However, Days GoneRemastered manages to feel distinct from all of these.
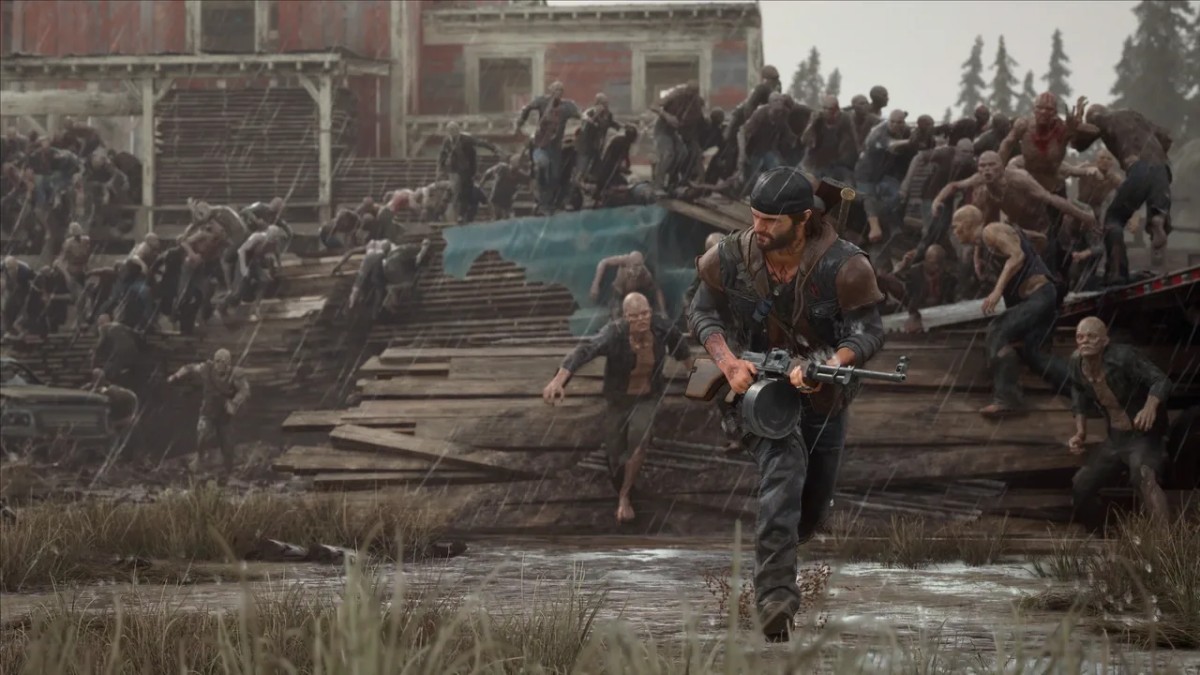
Image Source: Sony Interactive Entertainment via The Escapist
You play as Deacon St. John – a violent but ultimately good-hearted biker whose beloved wife, Sarah, dies in the opening hours of a zombie outbreak. Two years later, Deacon ekes out an existence living in the wilderness of Oregon, doing jobs for the various survivor camps dotted around the wilderness.
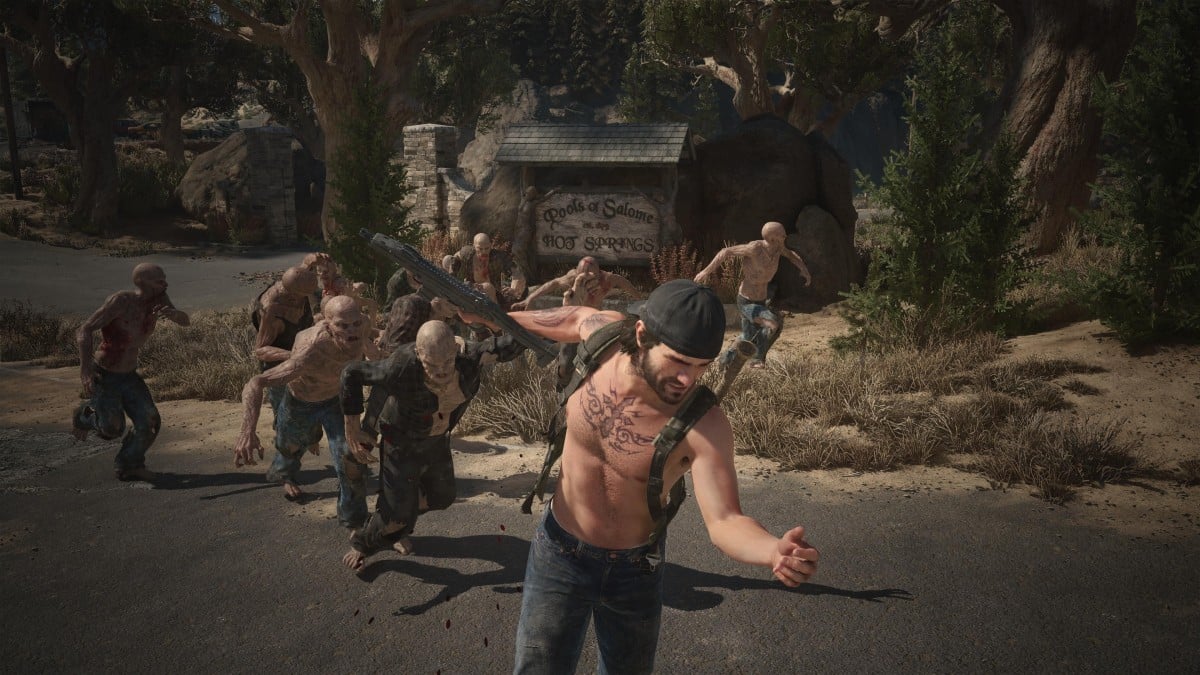
A Bloody Good Time
Gameplay largely consists of travelling around the countryside and abandoned towns, fighting freakers (Zombies, in classic “Not-using-the-Z-word” fashion) and human enemies, ranging from marauders to the deadly Rippers. There’s plenty of side content to enjoy, ranging from clearing outposts to taking down hordes of up to 500 freakers.
While taking down hordes seems impossible at first, it’s a huge moment when you clear your first one. It’s always fun to race through obstacles, waiting for the perfect moment to spring a trap.
Along the way, you’ll find various encampments filled with survivors, which offer an interesting, if ultimately shallow, morality system. Most camps will offer either guns or upgrades to your bike, and early on, you’ll be forced to choose whether to send any survivors you find to a work camp or one under martial law and run by a conspiracy nut. It’s a dilemma, but one that’s instantly solved as soon as you unlock the third camp. Lost Lake offers bike upgrades and guns, and quickly cements itself as the good option. While you might need to send survivors elsewhere from time to time, sending them here just feels right.
Image Source: Sony Interactive Entertainment via The Escapist
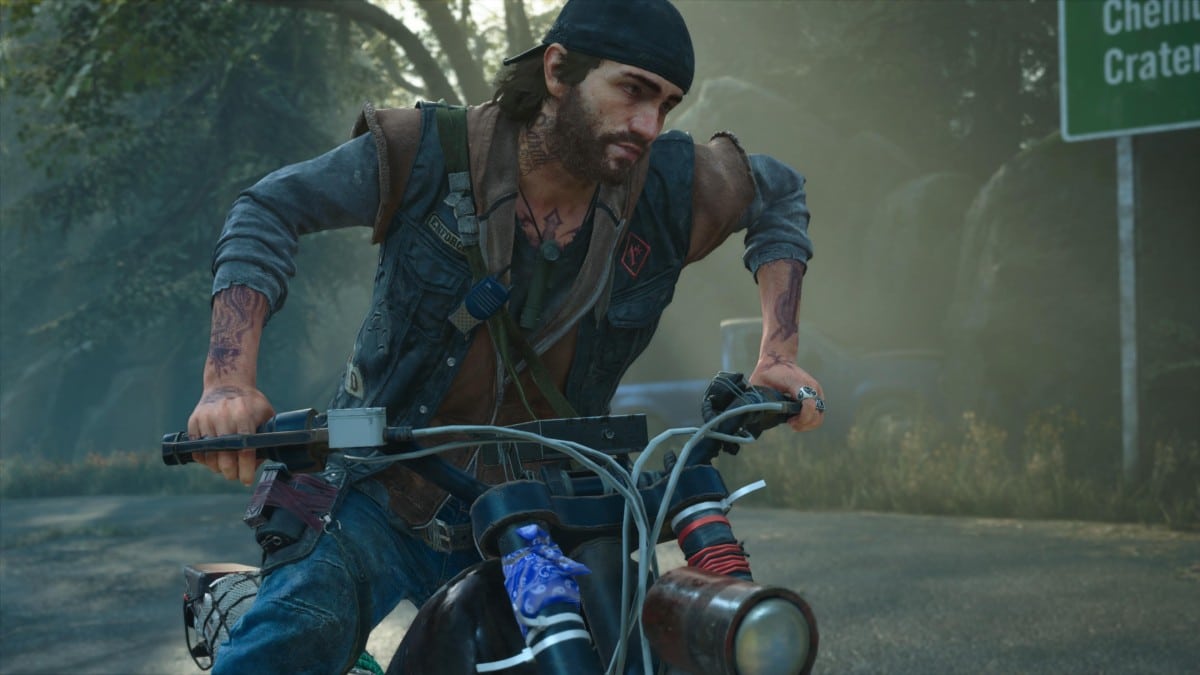
Compared to a lot of post-apocalyptic worlds, the Farewell Wilderness feels alive. Everywhere you go, you’ll see deer darting across the path, enemy camps, or survivors to rescue. Deacon will meet plenty of people he can interact with and do missions for. While none of the bonds feel as strong as one like Joel and Ellie’s, these characters still feel important and deep. You’ll see his annoyance at a happy-go-lucky addict, or his protectiveness of a mentally broken young woman. Missions are separated not just into what they are but who they focus on, so you can see these relationships progress; however, there are no choices to make here, and many of them are story-mandated, so you’ll complete most of them as you play the game.
Blood, Bikes, and Booms
The best new addition is Horde Assault mode, an endless game mode where you’ll face progressively bigger and bigger hordes until you eventually die. There are different zones for the mode, each of which thrusts you into a different section of the map. Unlike something like The Mercenaries it’s a frankly huge chunk of the map, and there’s no time limit – you just keep going until your inevitable death.
However, Days Gone Remastered isn’t quite as beautiful or as detailed as many of its contemporaries. It’s pretty, but doesn’t look as good as the games it emulates. The remaster improves the lighting, the number of enemies on screen, and the skybox is gorgeous, but it doesn’t quite look as good as it wants to. There are a few floating textures from time to time, or somewhat cheap visual effects.
Image Source: Sony Interactive Entertainment via The Escapist
As good as the story is, it does make an odd habit of cutting things out. Cutscenes will occasionally jump from Point A to Point C, going from cause to effect without showing us the action. Deacon will frequently discuss the bounties he’s picked up as if we’re supposed to know who they are.
There were also a few glitches – nothing major, but it was annoying to see an aura around a character. A few times, I saw freakers flying through the air or fighting with nothing while I took potshots at them. Most annoyingly was a recurring glitch where the music would play so loudly that it drowned out the dialogue. It only happened a few times, but it was always frustrating, despite the gorgeous soundtrack.
Overall, Days Gone Remastered is a fantastic, if flawed, game. It isn’t quite as good as the games it emulates, but if “It’s not The Last of Us” is a valid complaint, then it’s one you can throw at most titles. It’s a game that absolutely deserves your time, either as a replay or for the first time.
The Escapist is supported by our audience. When you purchase through links on our site, we may earn a small affiliate commission. Learn more about our Affiliate Policy
Beaks just had its first major update, and with it came Quests. These are completely optional, but still a great way to earn some extra XP, currency, and even darts. We’re going to tell you how to start and complete every single one in this All Roblox Beaks Quests Guide.
All Benny Beaks Quests in Roblox Beaks
Screenshot by The Escapist
When you first start playing the game, you’ll be at Beakwoods Camp. On the Right of the sign, you should see Benny Beaks, who has a few tutorial quests for you. Even if you already have a high-level character in Beaks, you should still do these because they take less than a few minutes, and they give you a bunch of darts. You have to finish these in order.
Capture 10 birds Quest
Screenshot by The Escapist
Just like it sounds. Equip your gun and capture 10 birds. Any will do, so feel free to capture 10 Pidgeons or 10 Parrots, which are all over the place. Go back and talk to Benny when you’ve captured 10.
Reward: 50 Coins, 20 XP
The Bird Collector
Screenshot by The Escapist
After catching your 10 birds, Benny tells you to sell them to the Bird Collector. Walk up to the Bird Bazaar NPC (it’s just next to you), and ask to sell all your birds (or if you want to keep a few, just sell 10). Return to Benny for your reward.
Reward: 50 Coins, 20 XP
The Dartsmith
Screenshot by The Escapist
This is actually a great way to see how the Beaks developers reworked the Dartsmith. Before the update, you had to pay 200 Coins to get around 4-5 random darts. Now, you can pick the darts you need, and buy them in sets from just one to up to 10.
Visit the Dartsmith who is next to the notice board and craft any dart. We recommend you get 10 Iron Darts, but you only really need one for the quest. Return to Benny for your reward.
Reward: 15 Steel Darts, 100 Coins, 25 XP
The Gunsmith
Screenshot by The Escapist
This one can take a few minutes. You need to have 1,500 Coins to buy the Hunter Rifle from the Gunsmith at Beakwoods. So, go into the field and start gunning down birds and then selling them to the Bird Collector. This is a great way to learn the loop of the game. Once you have 1,500 Coins, buy the gun from the Gunsmith. Return to Benny for your reward.
Now, if you already bought the Hunter Rifle before the quest was added, simply talk to the Gunsmith, then unequip and equip the Hunter Rifle again. You won’t get the progress, but with your Hunter Rifle equipped, talk to Benny, and that should finish the quest.
Jimmy is the innocent-looking NPC just outside Beakwoods camp (on your way to Quill Lake). He has a few quests that further teach you about different kinds of birds.
Jimmy’s First Quest!
Screenshot by The Escapist
Jimmy wants you to collect 5 common and 2 uncommon birds. You’ve probably already figured out that birds like Parrots and Pigeons are really common, while Bulbuls, Sparrows, and Goldflinches are somewhat uncommon (but you really shouldn’t have a problem finding two of them). Once you capture the birds, talk to Jimmy for your reward and next quest.
Reward: 50 Coins, 25 XP
Beakwood’s Rare Birds!
Screenshot by The Escapist
Jimmy wants you to catch 3 rare birds. Rare birds (in Beakwoods) include: Crossbills, Woodpeckers, and Hummingbirds. Out of all of these, Crossbills and Hummingbirds are the easiest to notice. Just look for anything blue flying around or anything red flying somewhat high. If you can’t see them right away, try to shoot some common birds until these rare ones eventually spawn. It shouldn’t take you too long. Return to Jimmy for your reward and one more quest.
Reward: 75 Coins, 50 XP
Beakwood’s Mutated Birds!
Screenshot by The Escapist
Jimmy wants you to capture 3 mutated birds in Beakwoods. These can be of any rarity, so even 3 mutated Pidgeons are good. For this one, just look for any bird with weird colors or glowing eyes and gun it down. It shouldn’t take you much longer than the Rare Birds quest. Once you gun down the 3 mutated birds, report to Jimmy for your reward.
Reward: 30 Smoke Darts, 75 Coins, 50 XP
All Moon Quests in Roblox Beaks
Screenshot by The Escapist
Just before you arrive at the Quill Lake sign, you should spot Moon the Beakwoods Guardian.
Moon’s Quest
Screenshot by The Escapist
Moon wants you to complete the Beakwoods bestiary. Honestly, out of all bestiaries, the Beakwoods one is likely the easiest. Simply shoot birds until you fill it out (don’t forget about the birds that fly high above the trees) and return to Moon.
Reward: 25 Smoke Darts, 20 Golden Darts, 250 Coins, 100 XP
All Star Quests in Roblox Beaks
Screenshot by The Escapist
When you reach Quill Lake, you can find Star (Quill Guardian) standing on one of the elevated piers. She actually gives you a choice between two quests, and you can even repeat one (but you probably shouldn’t).
Lake Birds
Screenshot by The Escapist
Getting into some tougher quests. What you need to do is complete the Quill Lake Bestiary. Refer to our Roblox Beaks All Birds Guide for a list of all birds in the game. When you have the full bestiary, return to Star, and you can then accept the other quest. We recommend you pair this quest with other ones (such as Garden of Eden) because it can take a while.
Reward: 25 Golden Darts, 20 Smoke Darts, 20 Steel Darts, 25 Iron Darts, 1,000 Coins, 500 XP
The Wishing Well
Screenshot by The Escapist
This one is entirely luck-dependent. You need to use a regular bird on a Wishing Well and (hopefully) get the Bio-Luminous mutation on this same bird. Refer to our Ultimate Roblox Beaks Beginner’s Guide to learn where the Wishing Well is. Essentially, grab any common bird (a Swan worked for us) and dunk them until you get the Bio-Luminous Mutation. Needless to say, this can take a while, so just be patient and if you get bored, just go and do something else. It’s RNG after all.
Note: this quest is repeatable (for some reason)
Reward: No reward (because reasons)
All Laken Quests in Roblox Beaks
Screenshot by The Escapist
Find Laken in Quill Lake, who is just under the Camp NPC.
Garden of Eden
You need to capture 10 vibrant birds that reflect the beauty of nature. What the game actually means is that it wants 10 birds with nature-like mutations. These are the Cherry and the Mossy Mutation. This can take a while, so we recommend you pair it with the
All Vito Quests in Roblox Beaks
Screenshot by The Escapist
Vito the Quill Lake Veteran is stationed in Silverstone Camp (the place where you can get the Night and Thermal Vision Goggles).
Big Birds of Quill
Vito’s first quest is for you to capture bigger birds. Pretty much, anything bigger than a Swan is considered a big bird on Quill Lake. So go and hunt down Flamingos, Storks, Sandhill Cranes, Pelicans, and Great Egrets. This shouldn’t take you too long.
Reward: 750 Coins, 500 XP
The Wishing Well (Vito)
Screenshot by The Escapist
After you finish the quest above, Vito wants you to “sacrifice” a bird to the Wishing Well, so go and do just that. Simply put ANY bird into the wishing well, and once it comes back, you’ll get the progress. Simple as that.
Reward: 100 Coins, 75 XP
Double Trouble
Screenshot by The Escapist
Vito wants you to capture 5 different species of birds, each with two different mutations. Honestly, just do this one as you do any other quest because you should get it naturally. We recommend you just shoot everything at Quill Lake, and eventually you should have all of them. You can also just go for the common birds like Swans, Black Swans, Ducks, Parrots, and Pidgeons and just focus on them until you capture two versions of each.
Alex the Wanderer is an NPC on the cliff above the Mount Beaks campsite.
Eye on the Skies
Screenshot by The Escapist
Alex wants you to buy your first set of binoculars. You can buy Binoculars from the Glider merchant. Night Vision Goggles or the Thermal Vision Goggles do not count as Binoculars (we thought we could get away with them). A regular pair of Binoculars costs 1,500 Coins, and an Advanced pair of Binoculars goes for 2,500. You only need the basic ones. Buy it and take it back to Alex for your reward.
Reward: 100 Coins, 50 XP
A Small Ask!
Screenshot by The Escapist
Alex wants you to capture 10 small birds at Mt Beaks. Believe it or not, this actually isn’t that straightforward. Most Mountain Beaks birds are huge and fly really high. Only occasionally can you see the really tiny birds, and they tend to stick low. So simply aim around the trees until you spot them. These include birds like the Chickadee, the Mountain Bluebird, the Brown Creeper, and the Snowfinch. Once you capture 10 small birds, report to Alex for your reward.
So, here’s a ridiculous one. You need to capture 10 (or 5) high-flying birds with a Golden or Gold-spotted mutation. Here’s where we would post info on how to do it… IF WE HAD ANY! The quest is bugged. Yep, we took down several Golden and Gold-Spotted birds that were definitely flying high, but none of them counted towards the progression. Many other players have been complaining about this, so it’s only a matter of time before it’s fixed. It also seems like this quest is preventing further quest progression.
Reward: 50 Golden Darts, 25 Crystal Darts, 500 Coins, 250 XP
Those are all the quests we have so far. We’ll keep updating the list as we discover the rest. In the meantime, check out our Beaks codes, and to stay up to date with Beaks, check out our Official Beaks Trello and Discord Links.
The Escapist is supported by our audience. When you purchase through links on our site, we may earn a small affiliate commission. Learn more about our Affiliate Policy
Anime Power decided to give their players a real treat for this Easter: the Easter 2025 Easter Event is here, and below is everything you need to know about it. From new Champions to some amazing Accessories,
Anime Power Easter 2025 Event
The Easter 2025 Event in Anime Power is located on the Easter Island, a mysterious land covered in Easter Eggs of different colors and pink trees. It has a bunch of new enemies, new champions, and new items overall. First, we need to see how to get to the Easter Island.
How to go to Easter Island
Easy as pie.
To travel to the Easter Island, you simply need to click on the Teleport button and navigate to the Easter Island, which will be the first option from the top. Once you click on it, you will be instantly teleported to the Easter Island, where you can start your Easter adventure.
Good luck, indeed…
You will be greeted with a ‘Welcome!’ message that will explain that all of your power has been reset to 0 while you are on this island. But don’t panic, as this does not affect your Base Game level and power. You are allowed to bring your Champions, Swords, and Equipment, but your stats will be base-level. But do not worry, as leveling up on the Easter Island is fun and fast.
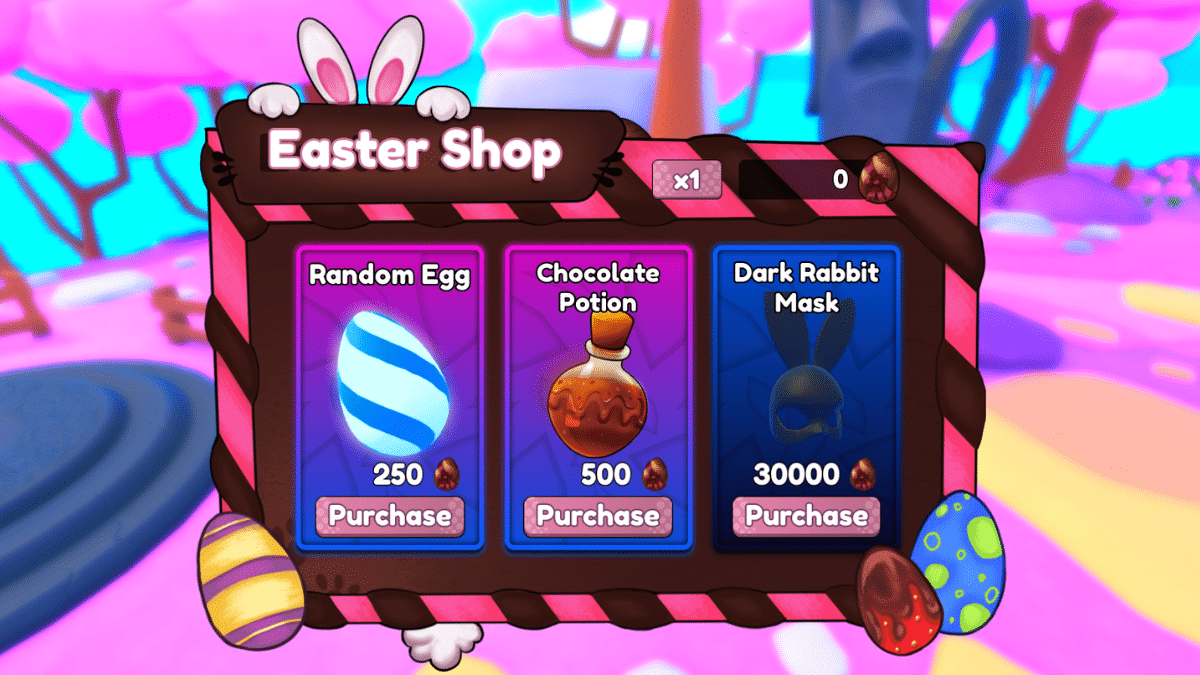
Easter Shop
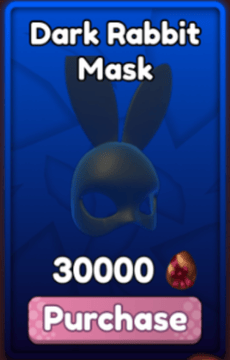
I know you’re here for the Mask.
When you get teleported to the Easter Island, on your left, you will be able to see the Easter Shop, offering unique and powerful items in exchange for Chocolate Eggs, which can be collected from playing on the island and from the Bunny Pass. Below is a detailed explanation of each item in the Easter Shop:
Random Egg
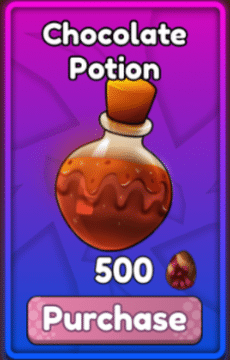
Chocolate Potion
Dark Rabbit Mask
◉ Gives a Random Reward.
◉ Boost all of your stats by 2x for 5 minutes.
◉ 5.5x Coins ◉ 7x Power ◉ 7x Damage ◉ 2.5x Luck
The possible rewards from the Random Egg include: Gems, Fingers, Grimoires, Shadow Stones, Haki Shards, etc.
Easter 2025 Bunny Pass (Battle-Pass)
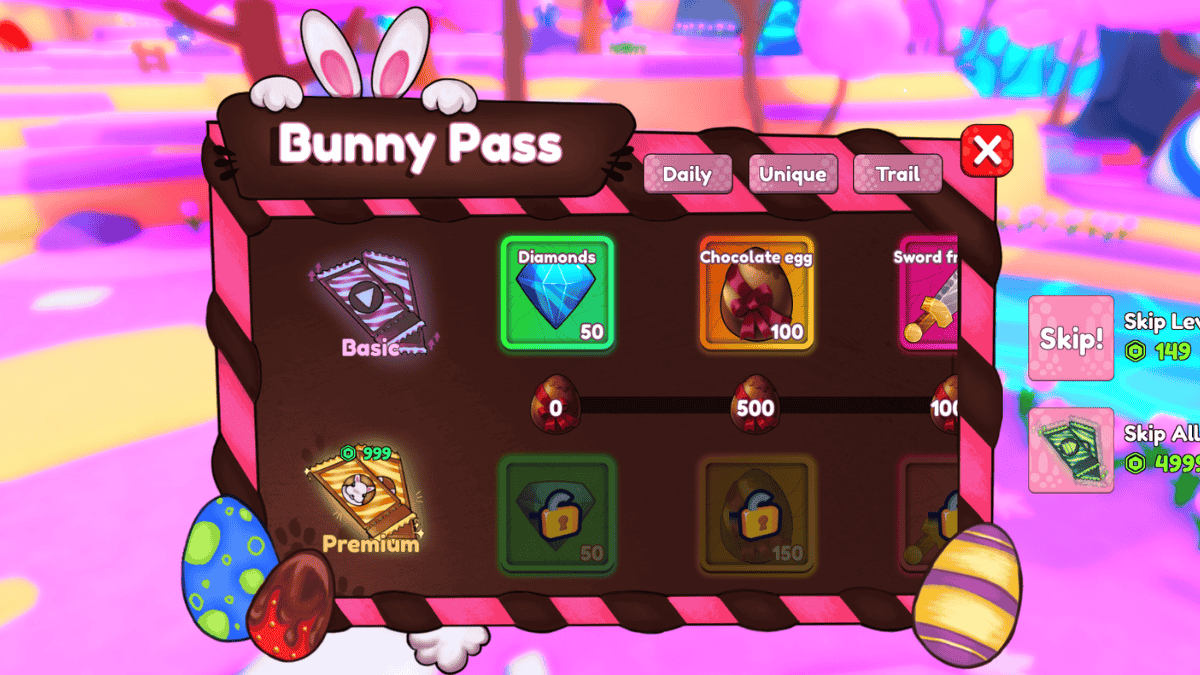
Some incredible rewards for the dedicated players.
Included in the new event is a unique new Battle-Pass, called the Bunny Pass. You can find this Battle-Pass right above the Power display on your screen by clicking on the icon. You can progress the Bunny Pass by completing Daily Quests, as well as Unique Quests. Here are the available rewards:
Gems
Chocolate Eggs
Sword Fragments
Haki Shards
Lineage Crystals
Shadow Stones
Fingers
Grimoires
Unique Accessories
Unique Champions
Wheel of Fortune Rolls (Normal & Easter)
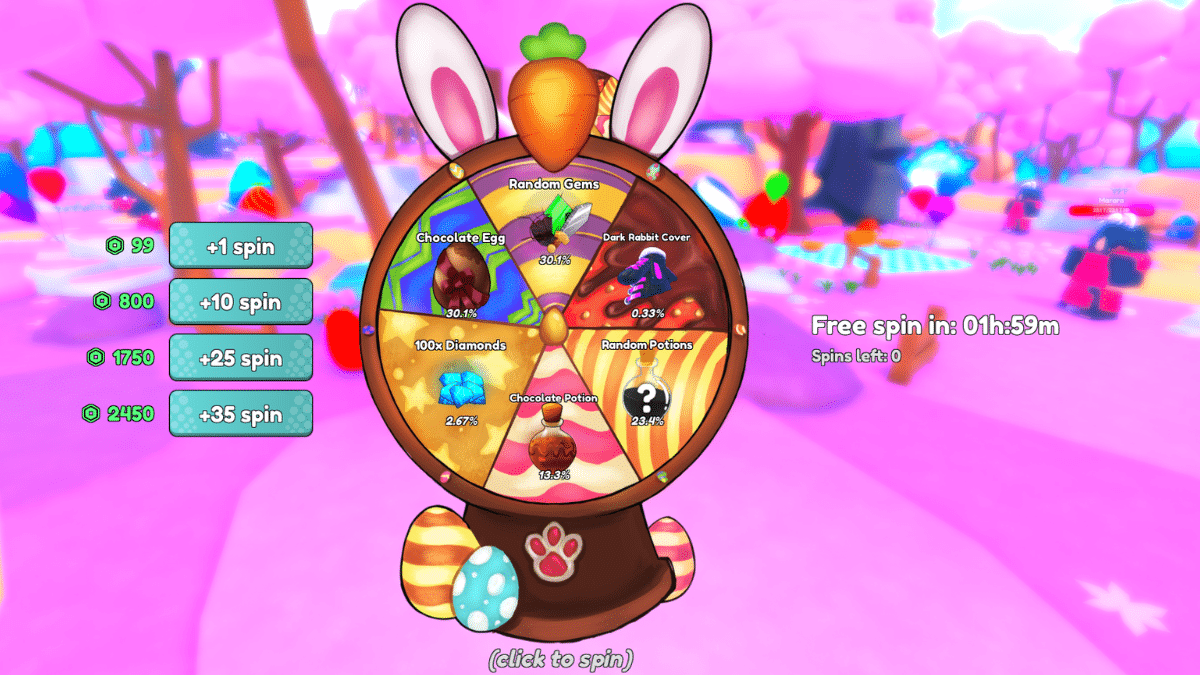
Easter 2025 Wheel of Fortune
These things are always rigged, right?
The Wheel of Fortune makes a return with this Easter Event. You get a free spin every 2 Hours, but you can also purchase them with Robux. Here are the possible rewards and their drop rates:
Reward
Drop Rate
Random Gems
30.1%
Chocolate Egg
30.1%
Random Potions
23.4%
Chocolate Potion
13.3%
100x Diamonds
2.67%
Dark Rabbit Cover
0.33%
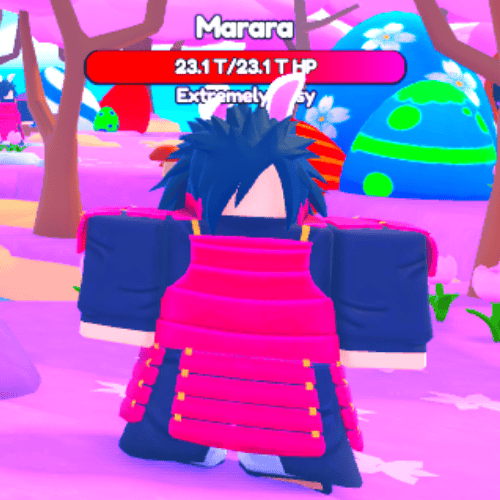
Anime Power Easter 2025 Enemies
The Easter 2025 Event in Anime Power introduces a bunch of new enemies to fight, but actually beating them is a challenge. As you start with zero power, you have to climb your way back up again in order to defeat them. But defeating them yields some very good rewards, so it is worth it.
Easter Island Enemy List
Below is a complete and detailed list of all new enemies on the Easter Island:
Enemy
Health
Marara
Extremely Easy 23,100,000,000,000 HP (23.1 Tr)
Obico
Easy 2,310,000,000,000,000 HP (2.31 Qq)
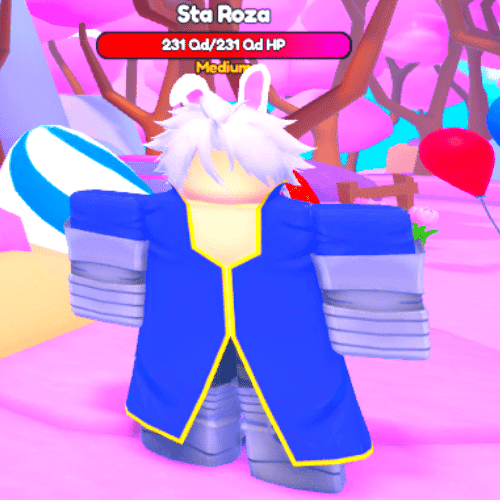
Sta Roza
Medium 231,000,000,000,000,000 HP (231 Qd)
Jigen
Hard 831,000,000,000,000,000 HP (831 Qd)
Brola
Insane 53,100,000,000,000,000,000 HP (53.1 Sx)
Some of these have a ludicrous amount of health for a normal enemy, so we recommend trying to kill them with some friends or other players who are on the island at the same time as you.
Easter Island Boss
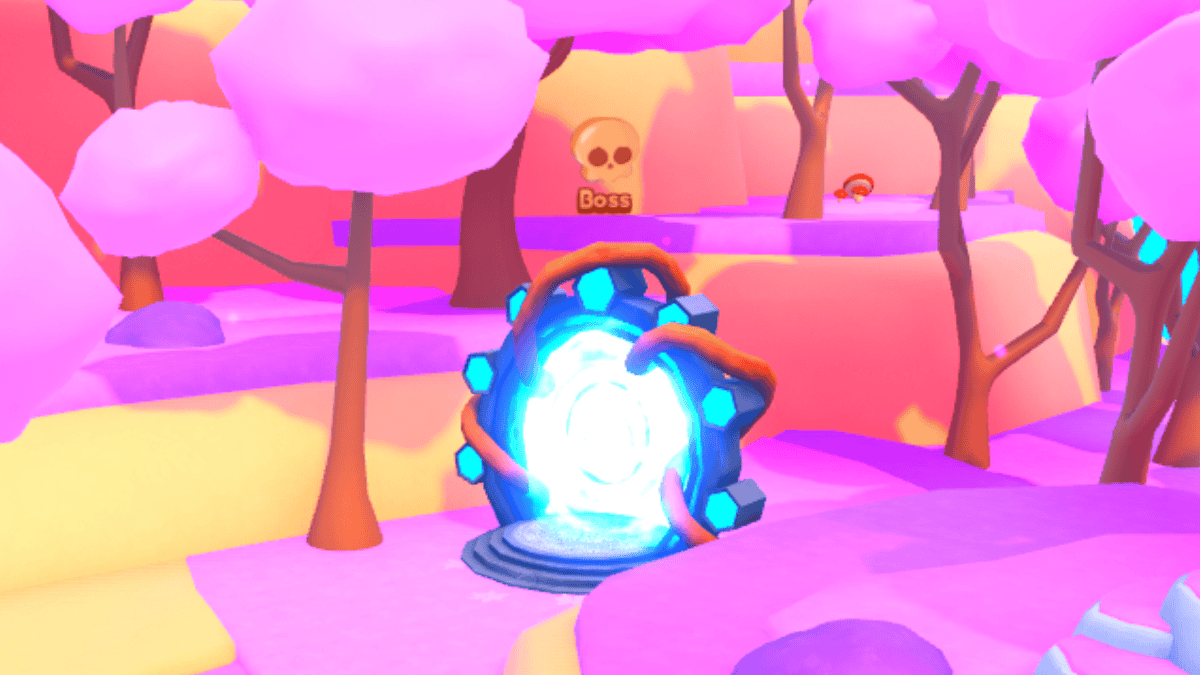
Follow the yellow-stone road.
There is, of course, a Boss. To find the Boss Arena, you have to follow the right path that you will see right after you spawn. After a few Marara fights on the Easter Island, you reach a blue Portal. Entering the portal will teleport you to the Soruke Boss arena.
Better being a friend for this one.
The Boss of the Easter Island is Saruke, a behemoth with an unbelievable amount of HP: 20,000,000,000,000,000,000,000,000 HP. Beating him usually requires 3-6 people fighting at the same time, unless you are a god of Anime Power and can solo it. After defeating him, you will have a chance to get one of his drops:
Easter Egg Necklace – 15%
Bunny Mask – 5%
Easter Bunny Hat – 1%
Anime Power Easter 2025 Champions
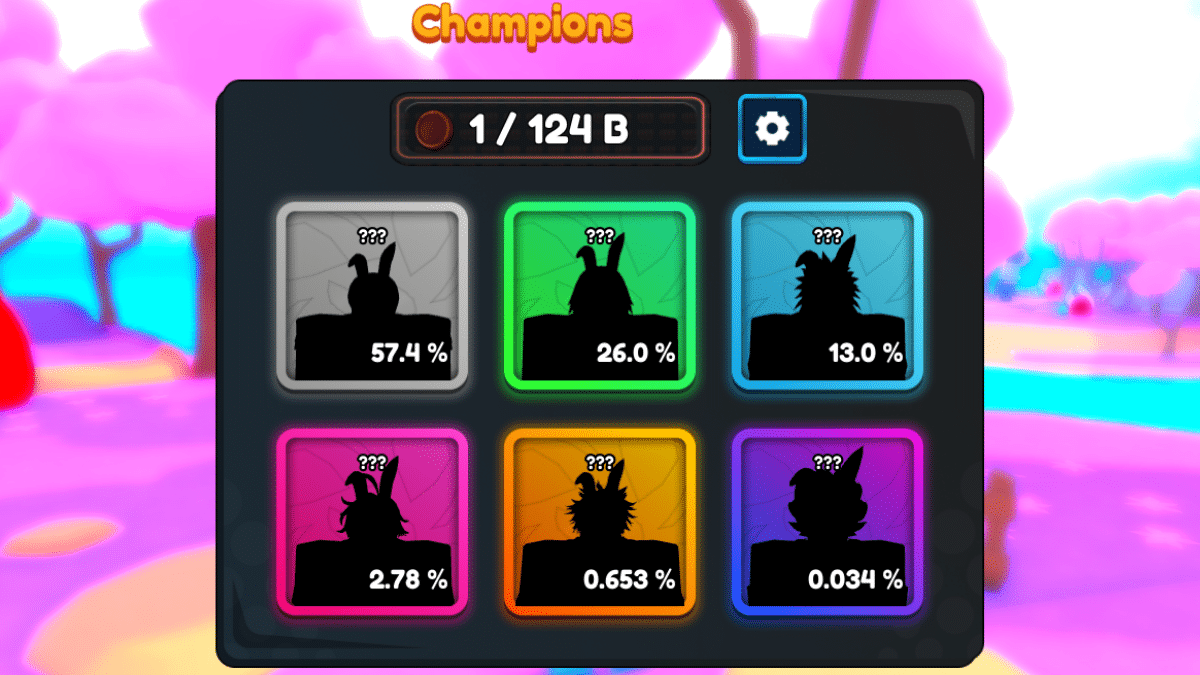
Who could they be?
As usual, the Easter Event brings us new Champions for which we can roll. They are, on average, better than their same-level counterparts from the base game. There is one that is the goal of everyone rolling: Vegega. He has a measly 0.034% drop chance, so if you want him, be ready to grind this area.
Easter Island Champions List
Below is a complete and detailed list of all the new Champions available on the Easter Island:
A weird mix, for sure.
Champion
Normal Luck Rarity
High Luck Rarity
Power
Namm
57.4%
42.9%
45
Sarura
26%
26.5%
60
Jivaya
13%
19.9%
110
Melioras
2.78%
7.67%
130
Ichito
0.653%
2.66%
150
Vegega
0.034%
0.197%
180
How do I Leave Easter Island?
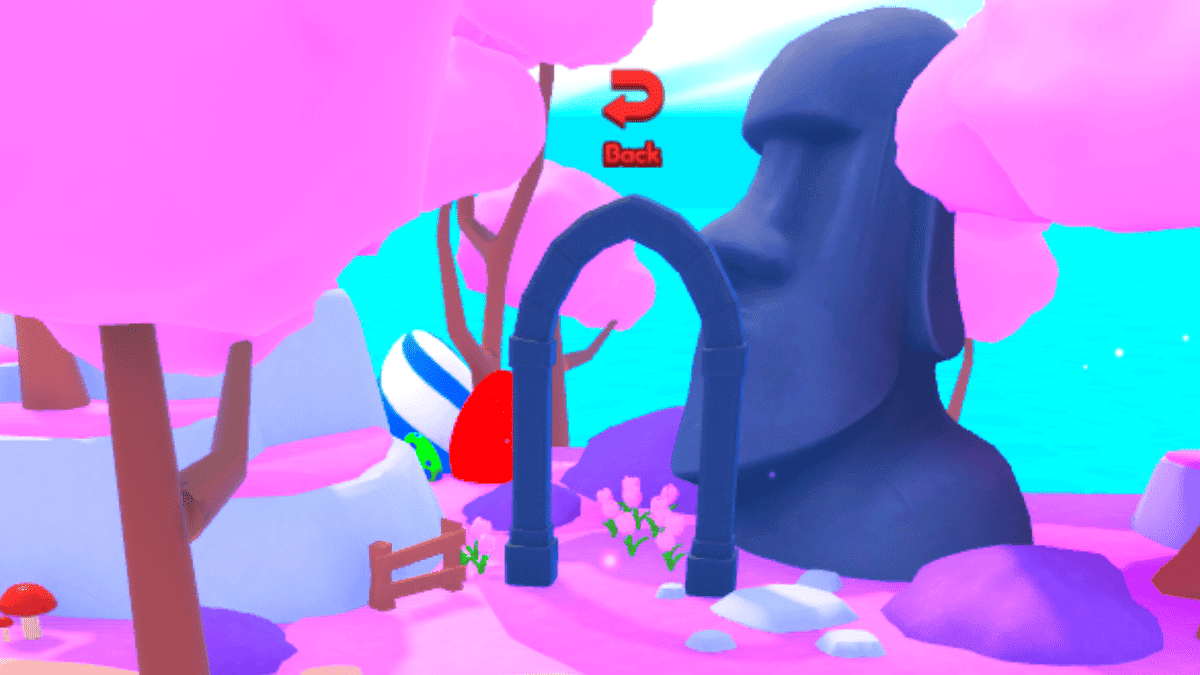
Time to go back!
After you finish farming or you get everything you want, you can head back to the Base Game. To return, you need to find the ‘Back‘ gate. It is located on the left side of the spawn, and it teleports you back to the Shinobi World. If you don’t feel like walking or are in a hurry, you can also press the Teleport button and select where you would like to go.
And that is all for our Anime Power Easter 2025 Guide. Check out our Anime Power Codes article to grab some freebies and goodies that can help you progress the Easter Event more easily.
The Escapist is supported by our audience. When you purchase through links on our site, we may earn a small affiliate commission. Learn more about our Affiliate Policy
To let players enjoy the Easter season, Big Games Studio has launched an exciting Easter Egg hunt within Pet Simulator 99. The goal of the event is to collect 12 unique Easter Eggs scattered across the various worlds in the game, with helpful clues provided to guide you along the way. Whether you’ve already discovered a few Eggs or are just getting started, this comprehensive location guide will show you where to find each one.
All 12 Easter Egg Locations in Pet Simulator 99
Look at those cute eggs!
Below is a list of all 12 Easter Eggs in Pet Simulator 99, along with the fastest way to find each one. Just follow the steps, and you should be able to track them down without too much trouble.
Royalty Egg – Living like Royalty (Easy)
In Area 3 of Pet Simulator 99, you’ll come across a Castle on the left side. Once you go inside, look to the right of the entrance, where you’ll see a black egg with a crown hovering above a pile of gold. That’s the Royalty Egg, and you can collect it from there.
Ocean Egg – Under the Sea (Easy)
You can find this Egg in Area 23 of Pet Simulator 99, which is also known as the Atlantis area. Once you arrive, look for a pedestal directly across from the portal you used to enter. The Ocean Egg will be sitting right on top of it.
Tree Egg- Chop Chop (Easy)
Head to Area 233, also known as Nebula Forest, and go through the Woodcutting Portal. Once you spawn in the Woodcutting area, look to the left of the portal to spot the Forest Egg.
Rocket Egg – One Small Step for Dogs (Easy)
Make your way to Area 133, the Spaceship Dock in World 2. There, you’ll see a large grey and orange rocket on the left side. Just to the right of that rocket, you’ll find a red and grey rocket-shaped egg.
Magma Egg – Little Toasty (Medium)
Go to Area 209, also known as Volcano Island in World 3. Climb the small steps around the volcano, following them like an obby course, to reach the top of the first volcano. From there, jump to the second one, and then make your way to the third mountain. Near the boiling lava, you’ll find the Magma Egg waiting.
This one’s pretty easy. Just send a Huge Pet through the Mailbox to a friend or even to one of your own accounts, and you’ll receive the Paw Egg.
Lucky Easter Eggs – Odds Increased
You can find Lucky Easter Eggs by breaking regular objects throughout the game. Collecting these eggs increases your chances of getting the Huge Marshmallow Kitsune. It’s a good idea to keep an eye out for them as you play.
Hunt Easter Eggs – Huge Bunny?
During the Easter Egg Hunt event, you’ll come across special Hunt Easter Eggs scattered around the map. Picking these up increases your chances of hatching the Huge Basket Bunny, so it’s worth grabbing as many as you can while the event is active.
Secret Easter Eggs – Where is the room?
Secret Easter Eggs can be found in the Secret Easter Room, which you can access by using the Easter Secret Key. This key is randomly dropped during the event, and once you unlock the room, the Secret Easter Eggs will help increase your chances of getting the Huge Spring Griffin.
The Escapist is supported by our audience. When you purchase through links on our site, we may earn a small affiliate commission. Learn more about our Affiliate Policy
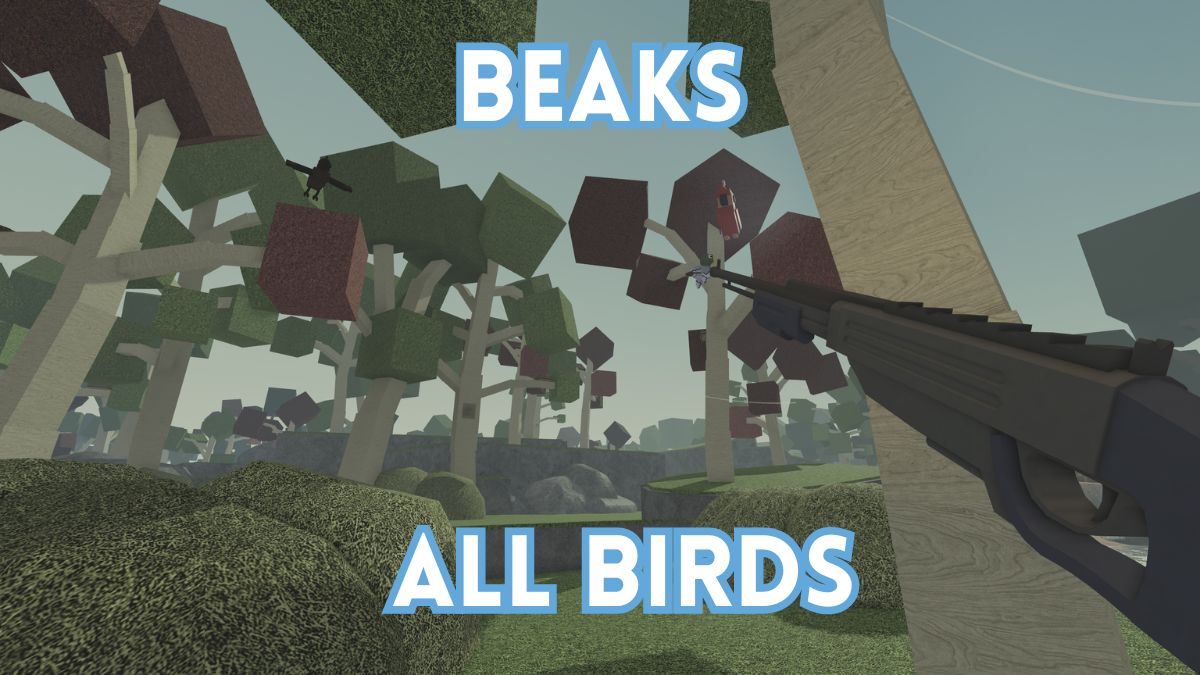
Beaks is a new relaxing Roblox game where you’re in a lush, tranquil forest where you can frolick around, listen to the wonderful melodies of birds chirping… before you gun them down for profit. Other than making a profit from the poor birds you sell, Beaks has several bestiaries that are fun to fill out and we’re here to help you. Here are All Birds in Roblox Beaks.
Beaks All Birds Beakwoods
All the birds in this zone are pretty easy to get, so just don’t forget to aim at those that fly high in the air.
Beaks All Birds Quill Lake
Quill Lake currently has two birds that can’t yet be obtained. You can capture most of these on the main lake. The only exception is the Ashwing, which flies really high in the sky.
Beaks All Birds Mt. Beaks
Unlike all other birds in the game, all birds at Mt. Beaks fly super high. We definitely recommend you get the level 15 Hunting Rifle from Quill Lake before you start hunting here.
Name
Prefered Time
Preferred Weather
Average Value ($)
Brown Creeper
Day
Sunny
44
Harris Hawk
Day
Sunny
60
Mountain Bluebird
Day
Rain
63
Chikadee
Day
Fog
29
Sparrowhawk
Day
Fog
98
Buzzard
Day
Rain
99
Snowfinch
Day
Fog
80
Falcon
Day
Rain
176
Harpy Eagle
Day
Rain
171
Goshawk
Day
Fog
338
Red Tailed Hawk
Day
Fog
462
Beaks All Birds Deadlands
Half of the birds still haven’t been added to Deadlands yet. Those that have are mostly just creepy versions of existing birds.
Name
Prefered Time
Preferred Weather
Average Value ($)
???
Night
Sunny, Rain
40
???
Day
Fog
41
Crow
Night
Sunny
40
Skeleton Crow
Day
Rain, Fog
56
Skeleton Pidgeon
Day
Fog, Rain
125
Skeletal Eagle
Day
Fog
189
???
Night
Fog
500
???
Night
Rain
409
Ghost Hawk
Day
Rain
494
That’s all there is to it. Once the new birds get added to the bestiaries, and after new zones get added, we’ll update the list. In the meantime, check out our Beaks codes for some cool in-game freebies.
The Escapist is supported by our audience. When you purchase through links on our site, we may earn a small affiliate commission. Learn more about our Affiliate Policy
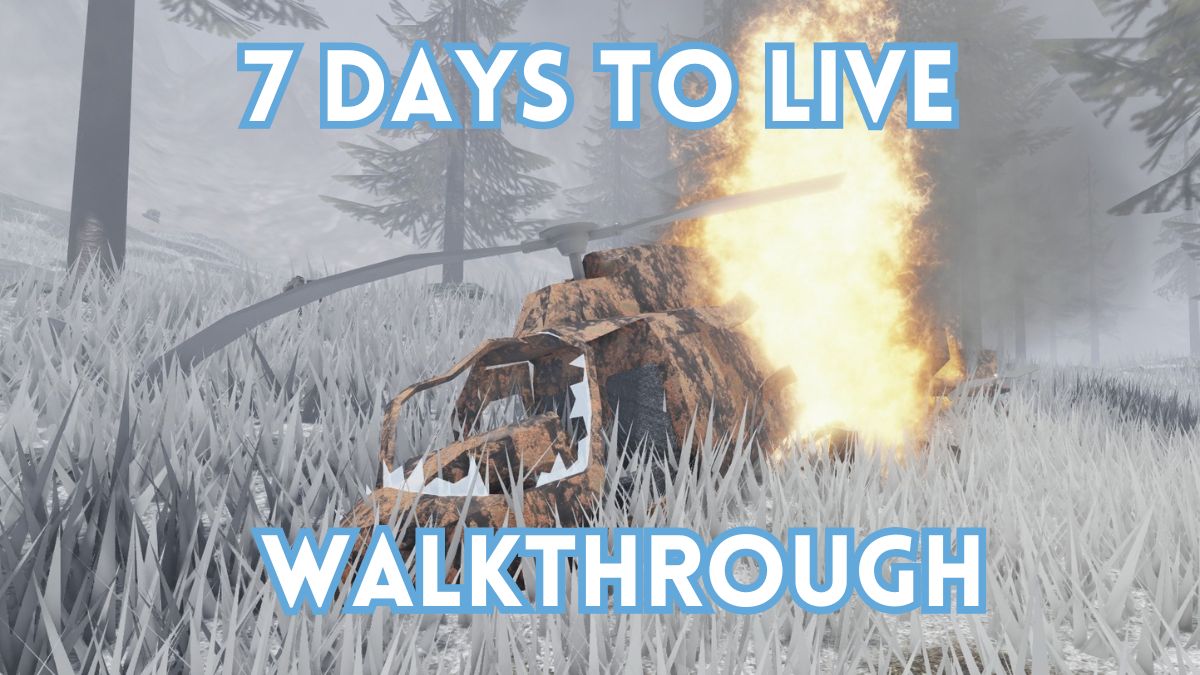
7 Days to Live is a very simple survival game where you need to craft and survive an onslaught of enemies for a whole week. If you’re having trouble surviving in this game, don’t worry because we’re here to help with our 7 Days to Live Walkthrough.
What to do each day in 7 Days to Live
Currently, there really isn’t much you can do during the day in 7 Days to Live. Regardless, each day, make sure you do the following:
Kill at least 2 deer (and gather their meat)
Gather as much Wood as you can
Make sure you are back in your base before nighttime
Screenshot by The Escapist
You can also gather Scrap along the way, but it’s not necessary if you just want to survive. It’s extremely important you get back to base before nighttime because if you’re out in the wild, you’ll be cooked. For some reason, as soon as nighttime begins, your character will fall asleep (even if you’re climbing a ladder). When you wake up, you’ll be where you fell, but if you’re out in the woods and can’t see your base, there’s a good chance your game is going to end there. So, keep an eye on that watch (second slot on the hotbar) and get back to base before sundown. If you’re feeling bold, you can also try to take advantage of the events that occur each day, but don’t make it your priority. Keep this up for 7 days, and you should be a-ok.
What to do each night in 7 Days to Live
Screenshot by The Escapist
Just like daytime, nighttime also has it’s own routine. At nighttime you should do the following:
Use all your wood to craft walls (either wall is fine, but we prefer the smaller one)
Eat until your hunger is full (Cooked Deer Meat)
Place your newly crafted walls
(During nights 1 – 3) Get to higher ground
Kill any monster that pops in for a visit
At night, it’s important to stay at your base because your view is limited, and, more importantly, you’re going to get some nasty uninvited guests. To welcome your guests, you need to place proper barricades. During the first few nights, simply climbing on top of your base is good enough to make it until thenext day, but when night 4 rolls around, this won’t be enough.
A great strategy to work towards is to take two walls and build barricades with a gap that’s big enough for you to fire your gun through. A simple fence also works on the first few enemies, but not for the stronger ones. You should build one such structure by night 4. If you’re running low on wood, remember you can always take apart your main base and use the materials for the barricade.
All this aside, don’t forget to eat and stay warm. If you hold Raw Deer Meat next to a fireplace, you can turn it into Cooked Deer Meat. If you place a simple fireplace in your barricade, you’ll be golden. Personally, we always buy the Warm Coat before each match so we have one less thing to worry about, but you can do just fine without one.
Once you’ve built a structure you’re satisfied with, you should spend the rest of your time reinforcing the barricades with more layers, for extra protection. We know it seems like a lot, but if you follow this simple formula, you should have no problems making it until day 7 (at least until the game gets updated).
7 Days to Live Days 1 – 7 Walkthrough
Screenshot by The Escapist
Here’s a quick summary of what to do each day:
Day 1: Daily routine, Night: start crafting a simple fence (place a wall so it’s up to your character’s neck) around where you’d like your barricade to be, then head for the roof of your house and survive the night
Day 2: Daily routine, Night: try to finish the fence around your barricade, and again, climb on top of your house to survive the night
Day 3: Daily routine (and replace any damaged walls if any), Night: start building the top fence (above your character’s head; it should look like in the images), survive the night on the roof
Day 4: If you think you won’t be able to finish your barricade, ditch the daily routine and take apart your base for materials. Otherwise, do the daily routine, Night: Hide in your barricade, which should be finished by now, and survive the night
Day 5: Repair your barricade and daily routine; Night: Reinforce your barricade and hide inside it until nighttime
Days 6 and 7: Repeat Day 5 (fix broken walls, reinforce barricades, survive)
That’s all there is to it. Have fun surviving the week until that chopper arrives. Stay up to date with The Escapist for more 7 Days to Live guides.
The Escapist is supported by our audience. When you purchase through links on our site, we may earn a small affiliate commission. Learn more about our Affiliate Policy
Remove Night Thorns (Dreamlight Valley), Splinters of Fate (Eternity Isle), and/or Inkies (Storybook Vale)
Any
10
10
Practice MINE-fulness.
Mine
Any mineral/gems
5
20
Tackle Royal Tasks.
Complete Royal Duties
Any
5
10
Get crafty!
Craft
Any
3
10
Give a villager their favorite gifts.
Give Favorite Gifts
Any
3
20
Whip up a 3-star meal.
Cook
Any 3-star meal
5
10
Go fish!
Fish
Any
5
20
Spend time with a villager.
Hangout
Any
5
15
Work a shift at either restaurant.
Serve Customers
Chez Remy or Tiana’s Palace
3
20
Make small talk.
Start Discussion
Any
3
15
Pick the fruits that put Snow White to sleep.
Harvest
Apple
25
10
Mine precious gems with a Royal Tool.
Mine
Any gems
10
20
Tackle Royal Tasks.
Complete Royal Duties
Any
10
10
Open up fresh Memories.
Collect
Memory Orb: Yellow, Red, Blue, Green, Purple
5
10
Delight a robot with his favorite gifts.
Give Favorite Gifts
Wall-E
4
20
Cook any 4-star meal.
Cook
Any 4-star meal
10
10
Catch fish somewhere peaceful.
Fish
Peaceful Meadow
10
20
Enter into a DreamSnaps contest.
DreamSnap
Submit a DreamSnap
1
15
Serve customers in Chez Remy.
Serve Customers
Chez Remy
5
20
Say “bonjour” to a tiny chef.
Start Discussion
Remy
2
15
Uproot Night Thorns.
Remove Night Thorns (Dreamlight Valley), Splinters of Fate (Eternity Isle), and/or Inkies (Storybook Vale)
Any
20
10
Mine for blue gems.
Mine
Aquamarine (Dazzle Beach, Forest of Valor), Blue Zircon (The Lagoon), Pure Ice (The Wild Woods, Teapot Falls, The Fallen Fortress, The Beanstalk Marhses), Sapphire (Vitalys Mines), Star Sapphire (The Wild Woods, Teapot Falls, The Fallen Fortress, The Beanstalk Marshes)
10
20
Tackle Royal Tasks.
Complete Royal Duties
Any
10
20
Spend time with a villager.
Hangout
Any
15
10
Give a stargazing wayfinder gifts.
Give Favorite Gifts
Moana
5
20
Cook a fairly fancy dinner.
Cook
Any 4-star entrée
10
10
Catch fish somewhere dazzling.
Fish
Dazzle Beach
10
20
Complete Boutique Challenges.
Daisy Challenge
Daisy’s Boutique
2
15
Serve customers in Chez Remy.
Serve Customers
Chez Remy
5
20
Have a chat with a demigod.
Start Discussion
Maui
2
15
Harvest canola.
Harvest
Canola
50
10
Mine for red gems.
Mine
Garnet (Plaza, Peaceful Meadow, The Plains, The Wastes), Ruby (Vitalys Mine, Mythopia), Spinel (The Promenade, The Grove)
10
20
Tackle Royal Tasks.
Complete Royal Duties
Any
15
10
Open up fresh Memories.
Collect
Memory Orb: Yellow, Red, Blue, Green, Purple
5
10
Give Arendelle’s queen her favorites.
Give Favorite Gifts
Anna
5
20
Cook a fairly fancy appetizer.
Cook
Any 4-star appetizer
10
10
Fish somewhere valorous.
Fish
Forest of Valor
10
20
Enter into a DreamSnaps contest.
DreamSnap
Submit a DreamSnap
1
15
Serve customers in Chez Remy.
Serve Customers
Chez Remy
5
20
Chat with a powerfully frosty villager.
Start Discussion
Elsa
2
15
Uproot Night Thorns.
Remove Night Thorns (Dreamlight Valley), Splinters of Fate (Eternity Isle), and/or Inkies (Storybook Vale)
Any
20
10
Mine for yellow gems.
Mine
Topaz (Plaza, The Docks, The Courtyard, The Bind)
10
20
Tackle Royal Tasks.
Complete Royal Duties
Any
15
10
Spend time with a villager.
Hangout
Any
15
10
Give favorite gifts to a tiny Space Ranger.
Give Favorite Gifts
Buzz Lightyear
5
20
Cook a fairly fancy dessert.
Cook
Any 4-star dessert
10
10
Fish somewhere trustworthy.
Fish
Glade of Trust
10
20
Complete Boutique Challenges.
Daisy Challenge
Daisy’s Boutique
2
15
Serve customers at Tiana’s Palace.
Serve Customers
Tiana’s Palace
5
20
Chat with your favorite deputy.
Start Discussion
Woody
2
15
Harvest something white and fluffy.
Harvest
Cotton
50
10
Mine for green gems.
Mine
Emerald (Forest of Valor, Glade of Trust), Peridot (Peaceful Meadow, Dazzle Beach, The Grasslands, The Promenade), Jade (The Courtyard, The Overlook)
10
20
Tackle Royal Tasks.
Complete Royal Duties
Any
15
10
Open up fresh Memories.
Collect
Memory Orb: Yellow, Red, Blue, Green, Purple
5
10
Give favorite gifts to the queen of Pride Rock.
Give Favorite Gifts
Nala
5
20
Cook a perfect entrée
Cook
Any 5-star entrée
10
10
Fish somewhere that’s always sunlit.
Fish
Sunlit Plateau
10
20
Enter into a DreamSnaps contest.
DreamSnap
Submit a DreamSnap
1
15
Serve customers at Tiana’s Palace.
Serve Customers
Tiana’s Palace
5
20
Chat with the king of the jungle.
Start Discussion
Simba
2
15
Uproot Night Thorns.
Remove Night Thorns (Dreamlight Valley), Splinters of Fate (Eternity Isle), and/or Inkies (Storybook Vale)
Any
20
10
Mine for purple gems.
Mine
Alexandrite (The Oasis, The Wastes), Amethyst (Frosted Heights, Forgotten Lands)
10
20
Tackle Royal Tasks.
Complete Royal Duties
Any
20
10
Spend time with a villager.
Hangout
Any
15
10
Give a book-loving villager her favorite gifts.
Give Favorite Gifts
Belle
4
20
Cook a perfect appetizer.
Cook
Any 5-star appetizer
10
10
Fish somewhere frosty.
Fish
Frosted Heights
10
20
Complete Boutique Challenges.
Daisy Challenge
Daisy’s Boutique
2
15
Serve customers at Tiana’s Palace.
Serve Customers
Tiana’s Palace
5
20
Chat with Belle’s beau.
Start Discussion
The Beast
2
15
Dig up a root vegetable with many eyes.
Harvest
Potato
50
10
Mine for white gems.
Mine
Diamond (Forgotten Lands), Opal (The Bind)
10
20
Tackle Royal Tasks.
Complete Royal Duties
Any
20
10
Open up fresh Memories.
Collect
Memory Orb: Yellow, Red, Blue, Green, Purple
5
10
Give a curious villager her favorite gifts.
Give Favorite Gifts
Alice
5
20
Cook a perfect dessert.
Cook
Any 5-star dessert
10
10
Fish somewhere forgotten.
Fish
Forgotten Lands
10
20
Enter into a DreamSnaps contest.
DreamSnap
Submit a DreamSnap
1
15
Serve customers at Tiana’s Palace.
Serve Customers
Tiana’s Palace
5
20
Chat with a curious young villager.
Start Discussion
Alice
2
15
Give some feathered villagers their favorite gifts.
Give Favorite Gifts
Daisy, Donald, Scrooge McDuck
20
20
Open up fresh Memories.
Collect
Memory Orb: Yellow, Red, Blue, Green, Purple
5
15
Feed squirrel critters their favorite food.
Feed Critters
Feed peanuts to squirrels in the Plaza
5
20
Mine for square gems.
Mine
Amethyst (Forgotten Lands, Frosted Heights), Emerald (Forest of Valor, Glade of Trust), Ruby (Vitalys Mines, The Elysian Fields, The Fiery Plains, The Statue’s Shadow, Mount Olympus), Sapphire (Vitalys Mines), Spinel (The Promenade, The Grove), Topaz (Plaza, The Docks, The Courtyard)
10
25
Give a little robot their favorite gifts.
Give Favorite Gifts
Wall-E, Eve
10
20
Enter into a DreamSnaps contest.
DreamSnap
Submit a Dreamsnap
1
15
Serve some hungry customers.
Serve Customers
Chez Remy or Tiana’s Palace
10
20
Spend time with a villager.
Hangout
Any
30
20
Collect some shoreline shellfish.
Collect
Clam, Oyster, Scallop
25
25
Give gifts to a blonde.
Give Favorite Gifts
Alice, Elsa, Kristoff, Rapunzel
20
20
Craft Large Miraculous Elixirs.
Craft
Even More Miraculous Fishing Bait, Even More Miraculous Growth Elixir, Even More Miraculous Pickaxe Polish, Even More Miraculous Shovel Varnish
3
20
Open up fresh Memories.
Collect
Memory Orb: Yellow, Red, Blue, Green, Purple
5
15
Give the sea turtle critter their favorite food.
Feed Critters
Feed seaweed to sea turtles on Dazzle Beach
5
20
Mine for oval gems.
Mine
Aquamarine (Dazzle Beach, Forest of Valor), Blue Zircon (The Lagoon), Citrine (Sunlit Plateau, Glade of Trust), Garnet (Plaza, Peaceful Meadow, The Plains, The Wastes), Peridot (Peaceful Meadow, Dazzle Beach, The Grasslands, The Promenade), Tourmaline (Frosted Heights, Sunlit Plateau)
20
25
Give residents of Halloween Town their favorite gifts.
Give Favorite Gifts
Jack, Sally
10
20
Complete Boutique Challenges.
Daisy Challenge
Daisy’s Boutique
2
15
Serve some hungry customers.
Serve Customers
Chez Remy or Tiana’s Palace
10
20
Spend time with a villager.
Hangout
Any
30
20
Cast around for seafood.
Fish
Brilliant Blue Starfish (The Oasis), Crab (Frosted Heights), Hippocampus (The Elysian Fields, The Fiery Plains, The Statue’s Shadow, Mount Olympus), Lobster (Glade of Trust), Octopus (The Docks, The Overlook), Pretty Pink Starfish (The Oasis), Prisma Shrimp (The Grove), Sea Snail (The Docks, The Overlook), Shrimp (Dazzle Beach), Sorcerer Hat Hermit Crab (The Bind), Stygian Mudskipper (The Elysian Fields, The Fiery Plains, The Shadow’s Statue, Mount Olympus)
20
25
Give Hades or Maui their favorite gifts.
Give Favorite Gifts
Hades, Maui
10
20
Craft any Training Manual.
Craft
Fishing Training Manual, Foraging Training Manual, Gardening Training Manual, Mining Training Manual, Timebending Training Manual, Snippet-Catching Training Manual
3
20
Open up fresh Memories.
Collect
Memory Orb: Yellow, Red, Blue, Green, Purple
5
15
Feed the sunbird critters their favorite food.
Feed Critters
Feed flowers to sunbirds in the Sunlit Plateau
5
20
Mine for something shiny.
Mine
Any shiny gem
5
25
Give any restaurateur in the Valley their favorite gifts.
Give Favorite Gifts
Remy, Tiana
10
20
Enter into a DreamSnaps contest.
DreamSnap
Submit a DreamSnap
1
15
Serve some hungry customers.
Serve Customers
Chez Remy or Tiana’s Palace
10
20
Spend time with a villager.
Hangout
Any
30
20
Catch fish in gold ripples.
Fish
Any legendary fish or seafood
10
25
Give visitors from the Alice in Wonderland realm their favorite gifts.
![Volleyball Ascended Abilities Tier List and Guide [UPD]](https://histream.ir/wp-content/uploads/2025/05/volleyball-ascended-abilities-tier-list-and-guide.png)


![Anime Power Easter Event Guide (2025) [EASTER] – All Enemies and Rewards](https://histream.ir/wp-content/uploads/2025/04/anime-power-easter-2025-event-guide.png)
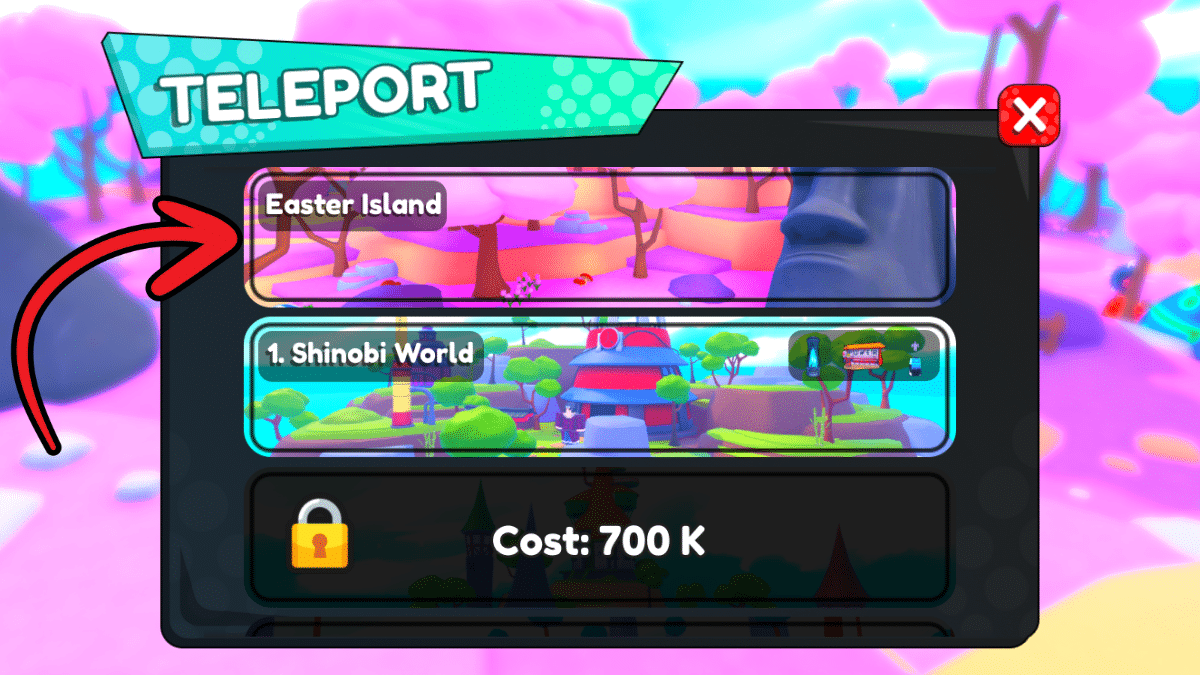
 button and navigate to the Easter Island, which will be the first option from the top. Once you click on it, you will be instantly teleported to the Easter Island, where you can start your Easter adventure.
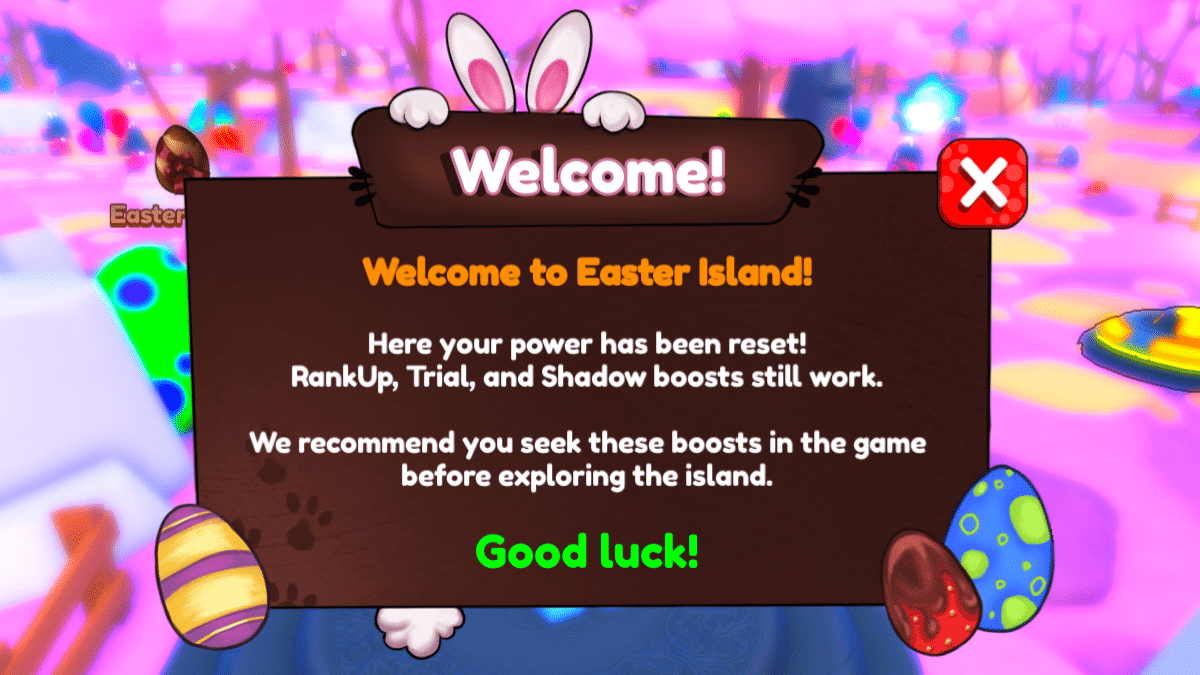


Published: Apr 30, 2025 12:01 pm