برچسب: Part

  • The Battle of Issus (Part II) – InsideGMT


    This article continues the case study of the Battle of Issus started in the InsideGMT article Great Battles of Alexander: The Battle of Issus (Part 1), picking up the action with Game Turn 2.

    The Persians have the bulk of their Light Cavalry across the Pinarus and poised for an assault on the rather disorganized Macedonian left flank. Meanwhile on the Macedonian right flank, the Macedonians have cleared the skirmishers guarding the “easy” Pinarus crossing and have a portion of the Companion cavalry on the Persian side of the river.  In the area right of center, the Macedonians have a couple of peltasts across the river having dispersed the skirmishers manning the abatis along the riverbank.

    As with the first Game Turn, Alexander will have the first Player Turn due to the Elite Initiative Orders phase. The next three Player Turns will go Rheomithres, Aristodemus and Darius with the Persians choice as to the order.  Thymondas has the next Player Turn followed by Nazarenes. The Macedonians follow with Player Turns for Parmenion and Craterus, Macedonians choice as to the order. Alexnader will have the last Player Turn.

    Elite Commander Initiative

    Movement and Missile Fire Segment

    Alexander takes the EIO Player Turn (neither subordinate is in command range anyway) so he can get the balance of his cavalry over the river and begin the process of regrouping his wing in preparation for his drive against the Persian left wing. He will need to move to put the three cavalry units already across the river into command range. His first of seven orders goes to move himself 4 MP to hex 4411. That position keeps his Hypaspists in range along with his cavalry and coverage for the area across the river where some of his cavalry will be at the end of this Orders Phase.

    His second is a Move order to Companion 4 (4608) which changes facing due east and moves across the river to 5007,  incurring 3 Hits (1 river, 2 up slopes). His third is a Move order to the Agema (4609) which follows the same path across river ending in 4907 facing northeast, incurring 2 Hits (river, up slope). Order four moves Companion 3 (4610) along that same tried and true path into hex 4808 facing northeast, garnering the same 2 Hits as its predecessor. With no room on the other side of the river, Alexander leaves the Paeonians where they are and uses his remaining three orders to recover 2 Hits each from Companion 2, Companion 1, and the Prodromoi.

    Since there is a crowd of units just over the river, I flipped the three Companions to their Moved side as a memory aid. This concludes the EIO Orders Phase.

    Rheomithres

    Movement and Missile Fire Segment

    Play now proceeds in Initiative order starting with one of the Persian 3-rated leaders. The three leaders are spread out over the battlefield so any one leader’s actions will have no effect on the other. So once again the Persians start the  Game Turn with Rheomithres.

    Rheomithres’ first order removes the 2 Hits on Asia Levy in 5018. He will need to move to be able to rally the routed Asia Levy in 5210. With his second order, he moves 6 MP into hex 5114 and stops there (the extra MP cost for Woods and slopes adds up fast). His last order goes to Rally the routed Asia Levy, and he succeeds (barely, 4 DR). However, the 6 DR on the Rally Table undoes this and the Asian Levy must rout move two hexes, first into 5209. The Sheer slope is impassable to infantry and prevents the unit from moving directly toward the Retreat Edge. The Asian Levy adjusts its facing and sidesteps into hex 5109.

    Decision time for the Persians. During Game Turn 1, the Persians were reluctant to attempt Momentum with the expectation that the Macedonians would jump at the chance to deny any further Momentum attempts by the Persians. On Game Turn 1, guaranteeing a Momentum chance for Nabarzanes, who is leading the Persian offensive, made sense. But are the Macedonians keen on taking the risk of a failed Trump? Losing the opportunity to act at all in the Game Turn can be critical.  To quote the Design Note from The Trump Option section (Alexander, 5.4) “… The non-Macedonian player will often find that, for him, its best application is when it backfires on the Macedonian player. For that reason, players should be aware that this option should not be used indiscriminately.

    Given that Alexander was a bit careless in leaving himself alone in a hex, it’s time to test the Macedonian’s resolve and the prowess of Alexander with some potential Personal Combat (Alexander, 9.2). Rheomithres makes a Momentum attempt … and succeeds (2 DR)! Decision time for the Macedonians. It seems clear that Rheomithres will take his chances with Personal Combat. A successful Trump by any of the Macedonian leaders will put a stop to such heroics but risks losing a Player Turn, and depending on who makes the attempt, the potential for Momentum, should the Trump attempt succeed. Alexander is not backing away from a fight, so no Trump.

    Momentum Orders Phase

    Rheomithres’ first order is another Rally attempt for the routed Asian Levy … but a 7 DR eliminates the unit. Here I mistakenly violated the Rally rule (Alexander, 10.27), in that a given leader is allowed only one Rally attempt per unit per Game Turn, one of those nuances in the rules that are often overlooked.  Rheomithres’ second order moves him to hex 4511 (7 MP), staying at the same elevation. Why not issue an order to one the two remaining Asian Levy units first?  His last order is kept in reserve should he survive the Personal Combat. He has 2 MP left which would allow him to move away, and should he have a second Momentum Orders Phase, move adjacent to Alexander again and force another Personal Combat.  

    The Personal Combat mechanics, which aren’t present most other GBoH games, are straightforward; each side rolls a die and adds the result to the respective leader’s Personal Combat rating. High total is the “winner”, insomuch as that the winner is unaffected while his opponent suffers the adverse effects. The difference between the two totals is used in conjunction with the Leader Casualty Table to determine the extent of the adverse effects. In our case, both sides rolled a 7, Alexander wins due to his 7 PC rating (Rheomithres has a 3 PC rating), the differential is four so  Rheomithres is Wounded (Ratings reduced by 1) and Finished.

    Aristomedes

    Aristomedes job is to shore up the Persian left flank so will go next. He orders the Sittaceni Archers 6, 5, and 4 in that order to hexes 4501, 4403, and 4203. These Skirmishers will serve as a screen and speed bump to slow the Macedonian advance. It will take some time to coax those cumbersome Cardaces into a defensive line, so Aristomedes will  go for Momentum. A 5 DR doesn’t cut it; Aristomedes is Finished.

    Darius

    Now to Darius. His generous eight hex command range makes him an asset in a support role in that he often need not expend an order to move into range. He will let Thymondas handle the pesky Peltasts. Order one tries to rally Persia 1, but an 8 DR sends the unit off the field – eliminated.   Orders two and three remove the Hits on the Syrian Archers (2213) and Cardaces 1 (2115-2016). Note that there is no requirement that the entire two-hex counter be in command range to receive an order.  None of the other in-range Persian units with Hits qualify for recovery.

    Time for a Momentum decision. The Macedonian left has issues. Parmenion’s  “crisis” left a gap between the left wing and center that is beckoning Nabarzanes’ cavalry to exploit. Sensing that the Macedonians are looking for chance to have Parmenion go before Nabarzanes, Darius decides to pass on the Momentum attempt. Aristomedes failure was perhaps a blessing.

    Thymondas

    Thymondas, the only 4-rated leader, is next in Initiative order. The two Thracian Peltasts on the Persian side of the river are within one Hit of routing, so Thymondas will use his Skirmishers to see if they can be driven off with missile fire.

    His first of four orders is a Fire order to the Arabian Archers in 2714 who fire at the adjacent Thrace 1 (recall the Skirmishers can fire through a flank hex) and hits. Thrace 1 faces the Macedonian retreat edge and rout moves into hex 2617.  So far so good for Thymondas. There are no other shots, so a Skirmisher will need to move into position to take one. Although the rules allow for firing over a friendly unit (Alexander, 8.14), the “blocking” friendly needs to be closer (not halfway) to the firing unit, so firing over a friendly at an opposing unit adjacent to that friendly is not possible. The hex with the abatis (2416) is open, so Thymondas issues a Move order to Syria 4 which proceeds into 2416 passing through Cardaces 3. There is no penalty when Skirmishers move through other friendly units (Alexander, Stacking Chart). Entering the abatis does cost a Hit (I’ll play this as written, though I suspect that the penalty was directed at the Macedonians). Unlike its compatriots, Thrace 3 has missiles, so it uses Entry Reaction Fire and hits (4 DR). The Syrians ignore Thrace 3 and shoot at Thrace 2 (love those flank shots) and hit (0 DR, +1 for moving). Thrace 2 faces toward its retreat edge and rout moves into 2517 moving through Thrace 3 (an enemy ZOC does not block the path if occupied by friendly unit).  Thrace 3 passes its “moving through” TQ  check, incurring the minimum 1 Hit (now has 4 Hits). Order three goes to Syria 1 (2412) which moves into 2515. Thrace 3 reacts again and hits again (2 DR). Syria 1 shoots and misses (7 DR, +1 moving), ending Thymondas’ hot streak.

    Unfortunately, Syria 3 (2213) is just out of range, so Thymondas is unable to use it to occupy hex 2615 (and, no I am not going to move the Royal Guard HC there). His last order removes the Hit on Cardaces 3. Thymondas declines the Momentum opportunity to ensure that Nabarzanes goes next.

    I flipped none of the Skirmishes that moved not by choice but based on an exception often overlooked. Skirmisher units do not incur a Hit for moving again during the Game Turn (Alexander, 6.13).

    Nabarzanes

    Movement and Missile Fire Segment

    Nabarzanes has eight LC within three hexes (his Line Command range) so issues a Line Command with Move orders to the group (as Wing Commander, using a Line Command is automatic in his initial Orders Phase).  His primary targets are the Amyntas and Ptolemy Phalanxes that have exposed flanks and the nearby damaged Thessalians and Thracians. Although some players may be tempted to use those horse archers to do away with the nearby routed Thracians, they would be doing away with some valuable assets. Routed units are as good as “eliminated” unless orders are expended to save them, and as happened with Parmenion’s rally attempts, a success is not a guaranteed outcome. Moreover, while they are headed for home, they can inflict Hits on their brethren on the way there. So why expend orders to help your opponent out unless you have nothing better to do with them?

    Here are the moves and fires in order:

    • Persia 5 (2219) moves to hex 2223, facing the two Macedonian units. The Thracians reaction fires and hits. Technically, I should hold off on the shots until after everyone moves (Alexander, 8.21), but since this is the only reaction shot there is no point in complying. Persia 5 is not Shock capable, so sitting astride Thessaly 4’s flank is not worth the hit to react. However, facing in the other direction could possibly block infiltration around Thessaly 4, but in doing so present a flank in the direction of the enemy. Thessaly 4 rotates to the west to block the infiltration, passes its TQ check and incurs the mandatory 1 Hit penalty. The archers fire at the Thessalians scoring a hit. Thessaly 4 closed the path to the flanks of the Thracian Peltasts and the Amyntas Phalanx
    • Hycarnia 1 (1719) moves to hex 1925 (7 MP);  Thessaly 2 changes facing, passes its check, and incurs the mandatory 1 Hit;  The Hyrcanians fire and miss; Missile Low. Shock Must Check TQ placed
    • Hycarnia 3 (2020) moves to hex 2521, facing east (6 MP);  fires at the Ptolemy Phalanx and misses, Missile Low . Shock Must Check TQ marker placed
    • Hyrcania 4 (1920) moves to 2522, facing Thessaly 5 (8 MP); fires and misses; Missile Low. Shock Must Check TQ marker placed
    • Hycarnia 2 (1820) moves to hex 2025, facing east (6 MP);  fires at Thessaly 1 and misses ; Shock Must Check TQ marker placed
    • Media 1 (1918) moves to hex 2122 (5MP); fires at Thessaly 4 and hits ; Shock Must Check TQ marker placed

    Nabarzanes has two horse archers and himself yet to move.

    • Media 5 (2019) moves to hex 2423 (7MP); fires at Thessaly 5 and misses. The hex chosen pins the Amyntas Phalanx.
    • Hyrcania 5 (2218) moves around the Thracian ZOC to hex 2419, facing the Thracians (7 MP). The archers are not Shock capable so making a facing change with a +3 DRM to the TQ check would be reckless. Hyrcania 5 fires and  hits.

    Nabarzanes (1919) has all units except for the two Media LC on the other side of the river in range, so remains where he is.

    Shock Combat Segment

    There are five Shock combats. Starting from the left side of the map, the Pre-Shock checks go as follows:

    • Hyrcania 1/Thessaly 2 – both pass
    • Hyrcania 2/Thessaly 1 – both pass
    • Media 1/Thessaly 4 – both pass
    • Hyrcania 3/ Ptolemy – both pass
    • Hyrcania 4/Thessaly 5 -Hyrcania 4 incurs 1 Hit

    Rather uneventful, but not overly surprising when good quality units are involved. As my usual practice, I will resolve steps 9.14 through 9.16 together for each combat. There are no leaders involved, so that step can be ignored.

    The Hyrcania 1 has a frontal attack on Thessaly 2. The combat is resolved on Shock CRT Column 5 (LC vs. HC, no SRD or terrain shift) with no adjustment for superiority. The result is 2(2). Hyrcania 1 (4 Hits), Thessaly 2 (3 Hits). The Hyrcania 2/Thessaly 1 combat is resolved on the same Column 5 with no adjustment for superiority, and with the same 2(2) result. Hyrcania 2 (3 Hits), Thessaly 1 (2 Hits).

    The Media 1 has a flank attack on Thessaly 4. The combat is resolved on Shock CRT Column 6 (there are no shifts). Media 1 has Position Superiority due to the flank attack and thus is Attack Superior (AS). Note that when cavalry fight cavalry, flank/rear attacks don’t move the Shock CRT column much. The result is another 2(2), adjusted to 2(4) for the AS. Media 1 (3 hits), Thessaly 4 (10 Hits). Here we have a Breakthrough situation; Thessaly 4 incurs 2 more Hits which is irrelevant in this circumstance.

    Hyrcania 3 has a flank attack on the Ptolemy Phalanx.  The base Shock CRT Column is 5 which will shift to Column 2 due to the Size Ratio Difference (SRD) and the slope. Note since the Hyrcanians move to the attack, the ratio is rounded in their favor.  The Hyrcanians have Position Superiority and so are AS, but the doubling of hits is halved when an LC attacks a Phalanx. The result is 3(2) with no adjustment (8 DR).  Hyrcania 3 (3 Hits), Ptolemy (3 Hits)

    Last combat. Hyrcania 4 has a frontal attack on Thessaly 5. We are back on Shock CRT Column 5 with no adjustments and another 2(2) outcome. Hyrcania 4 (3 Hits), Thessaly 5 (5 Hits).

    For the Collapse step there is one rout. Thessaly 4 faces south and rout moves to hex 2125. None of the other combatants are within 1 Hit of a rout, so no TQ checks. Media 1 advances into 2123, where the Thracians take an entry reaction shot and hit – Media 1 (4 Hits).

    Without hesitation, Nabarzanes will go for a Momentum Phase …  and succeeds. A timely success. Nabarzanes is in position for another round of mostly survivable Shock combats. The intent here is to inflict another couple of Hits on each of the engaged Macedonians before the inevitable counterattack, which in most cases would be Attack Superior, enough to rout most of the Persian engaged cavalry even if they did not attack.  The shock attacks require no orders, so those orders can be used instead to bring the Bactrians across the river and into a position to finish off the weakened Macedonians.

    Trump decision time for the Macedonians. Parmenion cannot afford to lose a Player Turn so won’t make the attempt. Craterus has no better chance of succeeding and will be needed to help put out any fires on the left flank. Alexander has the best chance to succeed but at the possible cost of a delay on his wing and the loss of Momentum opportunities for both Craterus and Parmenion.  Alexander will Trump …and succeeds (barely with a 7 DR). Nabarzanes is Finished.

    Alexander

    Movement and Missile Fire Segment

    Alexander uses six of his seven orders to remove Hits from the six cavalry units across the Pinarus: Companion 1 (1 Hit), Companion 2 (2 Hits), Companion 3 (None), Companion 4 (1 Hit), the Agema (None), and the Prodromoi (2 Hits).  Order seven is a Move order to Agriania 1 (4311) who has been loitering on the high ground since the start of the battle. The Agrianians face east and start to move toward Rheomithres who withdraws 3 MP to hex 4712. The Agrianians move into hex 4411 to keep Alexander company. No reason to risk another Personal Combat.

    Momentum Orders Phase

    Alexander succeeds in his Momentum attempt. Since he will have the first Orders Phase next Game Turn, there is no need to move the Companions now since some are already within striking distance of the Persians.  Rather, Alexander uses four orders to remove the Hits from Companions 1, 2, 4 and the Prodromoi. At some point, Alexander will need to cross the Pinarus since the Steep/Sheer slopes are impassible to leaders and thus obstruct the tracing of command range (Alexander, 4.21). That can wait till his next Orders Phase. His remaining three orders will go to move his Hypaspists in the following order.

    • Agema (3912) moves to 3511, 1 Hit for the slope – 2 Hits total
    • Hypaspist 2 (3813) moves to 3412, 1 Hit for the slope – 1 Hit total
    • Hypaspist 3 (3713) moves to 3413, 1 Hit for the slope – 1 Hit total

    The Hypaspist are positioned outside Slinger range and within Move distance for an assault on the Greek Hoplites. Alexander is Finished.

    Parmenion

    Movement and Missile Fire Segment

    The Macedonian player has the choice of either Parmenion or Craterus for this Player Turn. Knowing how Parmenion fares will determine what Craterus will do, so Parmenion goes next. And Parmenion’s options are limited since has only three units in command range that could receive a useful order. There is no benefit in having the Amyntas Phalanx wheel and incur the Hit(s) (Alexander, 6.45) since its attack would remain frontal (Alexander, 9.15).

    His first order is to move Thessaly 3 (2126) to 2124 (5 MP). Media 1 fires in reaction and hits. Shock Must Check TQ marker placed. With his second order, he has Thrace 6 fire at  Persia 5 and hits. Persia 5 uses Return Fire (Alexander, 8.23) and misses.  Order three is a Rally to Thrace 5. A 5 DR does the trick and breaks Parmenion’s Rally losing streak. A 9 DR on the Rally Tables leaves the Thracians with 3 Hits. The Thracians face north and receive a Missile No marker (Alexander, 10.27).

    Order four sees Parmenion move to 2325 placing the routed Mercenary Peltasts (3022) in range. His last order is a Rally order to that same unit and again Parmenion gets the job done (3 DR). Mercenary 5 ends up with 3 Hits from the Rally Table, then faces west, and receives Missile No marker.

    Shock Combat Segment

    Now for some additional Shock combats. Shock No TQ markers go on Thessaly 2 and Thessaly 1 which attack Hyrcania 1 and Hyrcania 2 respectively. Shock No TQ  markers are also placed on Thrace 6, Amyntas, and Thessaly 5 which attack Persia 5, Media 5, and Hyrcania 4.   

    Thessaly 4 must shock Media 1 which is the only Pre-Shock TQ check situation. The Thessalians pass, but the Medians incur 1 Hit (5 total).

    The attack by Thessaly 2 is resolved on Shock CRT Column 9 (Sizes are the same, no terrain effects). HC are Attack Superior against LC. The result is 2(3) adjusted to 2(6) for the superiority. Thessaly 2 (5 Hits); Hyrcania 1 (10 Hits). The attack by Thessaly 1 is resolved the same way with the same 2(3) result adjusted to 2(6). Thessaly 1 (4 Hits); Hyrcania 2 (9 Hits). Thessaly 3’s attack breaks the pattern with a 2(2) result adjusted to 2(4). Thessaly 3 (3 Hits); Media 1 (9 Hits) – breakthrough is irrelevant.  

    Thrace 6’s attack is resolved on Shock CRT Column 8 with no shifts or adjustments and a 3(2) result. Both Thrace 6 and  Persia 5 have 5 Hits. The Amyntas’ attack is resolved on Shock CRT Column 12 which includes the shift for the SRD but there is no superiority. The result is a 2(3). The Amyntas (4 Hits); Media 5 (4 Hits). For Thessaly 3’s attack it is back to Column 9, Attack Superior for a 2(2) result adjusted to 2(4). Thessaly 3 (7 Hits); Hyrcania 4 (7 Hits).

    Now the Collapse step. Hyrcania 1, Hyrcania 2, and Media 1 face northeast and rout move to 1923,  2023, and 2121 respectively. Both Thrace 6 and Persia 5 are right at their break point. A Thrace 6 advance would not cause any terrain hits, so by the tie breaker rule (Alexander, 10.15)  Persia 5 (the defender) routs, while Thrace 6’s Hits  are reset to 4. Persia 5 daces northwest and rout moves to 2221. There is a similar situation with Thessaly 5 and Hyrcania 4, both are at or over their break points, but Hyrcania 4 is over, so it routs, and Thessaly 5 has its Hits reset to 6. Hyrcania 4 faces northwest and rout moves first to 2521, passing through Hyrcania 3 which incurs 1 Hit, and moving to 2421, avoiding Ptolemy’s ZOC.

    Media 5 is within one Hit of its TQ and in an enemy ZOC so must make a TQ check (Alexander 9.18 #2). It passes and has its hits reduced to 3.

    The victorious Macedonians advance: Thessaly 2 into 1925, Thessaly 1 into 2025, Thessaly 3 into 2123, and Thrace 6 into 2223 now Missile No.  No facing changes. Thessaly 5 advances into 2522 where Hyrcania 3 reacts by changing facing, passes its TQ check incurring 1 Hit, fires (now Missile No) and hits, routing the Thessalians! Thessaly 5 changes its facing, and rout moves into 2624 avoiding Media 5’s ZOC.

    Aside from Thessaly 5’s rout, a successful counterattack though not unexpected given the heavy cavalry’s superiority. Parmenion is Finished – the price the Macedonians paid for the Alexander’s successful Trump.

    Craterus

    Craterus is next with the final Orders Phase of the Game Turn. Should he support Parmenion or recover Hits on the Hypaspists and position himself to assault the Persian Hoplites next turn? He cannot rally the Thracians next to the river or the nearby Thessaly HC since they are in Persian missile range and LOS. He can reach (barely) Thessaly 4 for a rally attempt and be able to recover Hits on two other units but then would be too far to put all the Hypaspists in range next turn – he does not have a Momentum opportunity.  Given the Persian disarray and the distance from the fresh Bactrians, Parmenion should have time to recover and reform his flank, so Craterus will  take command of the Hypaspists.

    Craterus’ first of five orders recovers the Hits on the Meleager Phalanx. With his second order, he moves himself to hex 3515 (3 MP) placing all the Hypaspists in range along with several Peltasts. His remaining three orders recover the hits on the three Hypaspists.  Ineligible for Momentum, Craterus is Finished.

    Rout and Reload Phase

    On to the Rout and Reload Phase. The first step is to remove the Rallied markers from Thrace 5 and Mercenary 5.  Next come the rout moves. Moving from left to right across the map, Persia 2 (1718) rout moves to 1708. Persia 4 (1814) follows suit and rout moves to (1806). Hyrcania 1 (1923) rout moves through Nabarzanes to hex 1915, followed by Hyrcania 2 (2023) which passes through Cardaces 1 into 2015. The latter passes its TQ check incurring the minimum 1 Hit. Media 1 (2121) and Thessaly 4 (2125) are in the same hex row. The Medians are furthest from the bottom edge so they will go first, not that it matters in this situation. Media 1 rout moves through Cardaces 1 and stops in Syria 2’s hex where it must move one more hex to 2112 (Alexander, Stacking Chart).  Cardaces 1 fails its TQ by one, so it still incurs only 1 Hit. The Syrians fail their check by two so incur 2 Hits.

    Thessaly 4 rout moves off the map and is eliminated. Persia 5 (2121) rout moves through Cardaces 2, stopping atop Syria 3 and moves one more hex to 2212. Cardaces 2 passes its TQ check and incurs 1 Hit while Syria 3 fails and incurs 3 Hits. Hyrcania 4 (2421) rout moves through Hyrcania 5, goes west to avoid Thrace 4’s ZOC and ends up in 2716. Keep in mind that routing units pay the MP costs for terrain.  Hyrcania 5 pass its TQ check and incurs 1 Hit,

    Thrace 2 (2517) is next, and rout moves around two different Persian ZOCs onto hex 2721. Ptolemy passes its TQ check and incurs 1 Hit. Thrace 1 rout moves through Ptolemy and skirting the Persia ZOC lands atop Thrace 2. Time to check the Stacking Chart. Thrace 1 moves one more hex to 2722.  Ptolemy once again passes and incurs a hit. Thrace 2 is eliminated. Thessaly 5 (2623) rout moves through the recently rallied Thrace 5, exits the map, and is eliminated. Thrace 5 fails its TQ check by three causing it to rout and move its two hexes off the map where it is eliminated. If by chance it stayed on the map, it would then rout move its full MA. That the unit routed in this phase does not exempt it from the rout moving (Alexander, 10.22).

    This segment was a bit messy, so here is a summary of the Hit count of those units impacted during this segment.

    Persians: Cardaces 1( 2 Hits), Cardaces 2 (1 Hit), Syria 2 (2 Hits), Syria 3 (3 Hits, and Hyrcania 5 (2Hits).

    Macedonians: Ptolemy (5 Hits) … and two Peltasts eliminated.

    Withdrawal Phase

    The Macedonians lost the two Thessaly HC (14 RP) and two Thrace LP (10 RP) for 24 RP this turn. Added to the 12 RP from the last turn the Macedonians have lost 36 RP.

    The Persians lost another Asia Levy (3 RP) and Persian LC (6 RP) for 9 RP. Added to the 17 RP from last turn the Persians have lost 26 RP.

    All somewhat misleading since the Macedonians have only one routed unit on the map due the nearness of their retreat edge while the Persians have seven.

    End of Game Turn Commentary

    Although the Persian Light Cavalry onslaught on the right flank was repulsed (five routed units), the damage to the Macedonian wing was significant with four eliminated units, one routed, and the remainder with three or more Hits. Aleander’s Trump prevented a follow up set of favorable Persian shock combats, but more importantly it denied the Persians the opportunity to bring the fresh Bactrian cavalry across the river and in range for another assault.

    On other fronts, the Persian skirmishers were able to drive off the peltasts that crossed the river, positioned more units to protect the Persian left flank, and the daring Rheomithres exploited a bit of Macedonian carelessness to engage Alexander in Personal Combat, coming out on the losing end.

    For the Macedonians, Alexnader’s Trump blunted the Persian momentum on the Macedonian left allowing Parmenion the opportunity to counterattack and send most of the Persians lights toward their side of the field. The Trump prevented any follow-up. On the Macedonian right, Alexander moved all his Companions and the Prodromoi across the river in striking distance of the Persian line and importantly removed all the hits incurred in the river crossing and combats.  With the Macedonian left temporarily stabilized, Craterus recovers the Hits on the Hypaspists, preparing them for cross river assault against the Greek Hoplites.  

    Both sides continued to pursue their overall battle plan. The Macedonian Trump was effective in minimizing the impact of the Persian assault without preventing the Macedonians from getting their right wing in order for offensive operations.

    To be continued ….


    Previous Article: Great Battles of Alexander: The Battle of Issus (Part I)


    Source link

  • Nintendo Switch Part Deux – The TouchArcade Show #611 – TouchArcade


    Welcome to the latest episode of The TouchArcade Show! We were short on time this week so it’s a bit of a short one, but we really wanted to discuss Nintendo announcing the Switch 2. Yes, if you haven’t seen yet they’ve officially unveiled the Switch successor’s hardware in a new video, and it looks pretty sweet. There’s also LOTS we don’t know yet so it’s fun to kind of speculate what we’ll be in store for when it launches this year. Don’t worry though if the new Switch isn’t your thing, we also talk about a handful of totally random topics just like we always do.

    Don’t forget to shoot us emails with any questions, feedback, or anything else relevant or irrelevant to [email protected]. We read ’em all, and love decoding messages written entirely in emoji. As always, you can listen to us with the links below… And if you like what you hear, please subscribe and/or drop us a review in iTunes. Much appreciated!

    As a companion to this audio podcast, we also do a video version of the same show that is exclusive to Patreon which allows you to see us playing the games we’re talking about. Backers can view the most recent video episodes of the TouchArcade show by clicking here. Be sure you’re logged in to see the latest content. For everyone else who is curious, you can check out our public patreon posts to see older episodes of the video podcast. If you like what you see, consider becoming a TouchArcade Patreon backer.


    Stitcher: The TouchArcade Show via Stitcher Radio for Podcasts
    RSS Feed: The TouchArcade Show

    Direct Link: TouchArcadeShow-611.mp3


    Source link

  • Foreign Intervention in Baltic Empires: Part Two – InsideGMT


    The Ottoman Empire

    The period covered by Baltic Empires saw the Ottoman Empire at the absolute height of its power. The steppes of southern Ukraine and Russia were controlled by the Tatars of the Crimean Khanate, who were vassals of the Ottoman Empire, while the southern border of the Poland-Lithuania was inhabited by semi-independent Cossacks federations. Tartar raids to capture loot and slaves were a common problem along this border. Most of the time the Tatars served as a buffer between the Ottoman Empire and Poland-Lithuania. The Ottomans generally had no direct interest in this region, as their attention was primarily focused on the Habsburg and Polish lands to the south and west of the Baltic Empires map, but Polish and Russian reactions to Tatar raids at times forced the Ottomans to come to the aid of their vassals which resulted in large scale wars between Ottoman and Russian or Polish forces in the region.

    Sultan Mehmed IV (1642-1693)

    Mehmed came to the throne of the Ottoman Empire at the age of only 6 after his father was overthrown in a coup. He would become the longest reigning sultan in Ottoman history after Suleiman the Magnificent and was known by contemporaries to be a particularly pious ruler. In a Baltic context he is mostly known for his wars against Poland and Russia in the 1670s. The greatest of these was the War of the Holy League or Great Turkish War of 1683-99, which saw the legendary siege of Vienna in 1683 and the equally legendary relief of the city by allied forces led by the Polish king Sobieski with his winged hussars. Mehmed would be overthrown in 1687 by soldiers disenchanted with the course of that war.

    Getting the Mehmed IV card into your court in Baltic Empires represent your Power securing an alliance with the Tatars and/or the Ottoman Empire. He thus represents not only himself but also the Ottoman Empire and other associated peoples more generally. By later discarding the card, you are calling on the Ottomans to intervene in the region with a major army. Placing three Independent units at once and allying with them all for one turn (as well as with any other units that might already be in the Ottoman & Tartar Lands) can be truly devastating for the unfortunate target. But once the blow has been struck the effect is over and the region might then be filled with Independent units that anyone can ally with, which can cause of lots of problems for both the Poles and the Russians. This card is obviously of major value for both the Russian and Polish players, but can be just as valuable for any power fighting against Russia and/or Poland as it allows them to devastate their enemies or at least force them to spend scarce resources to defend against Mehmed. Indeed historically the Swedes allied with the Tatars on several occasions and Charles XII even sought refuge in the Ottoman Empire after his disastrous defeat at Poltava in 1708.

    As the card is lost when used it is worth considering the timing of its play, as there can be many circumstances where the continued threat of unleashing Mehmed can be at least as useful as actually using the card.   

    The Habsburgs and the Holy Roman Empire

    Compared to the Maritime Powers and the Ottomans the interests of the Holy Roman Empire and the Habsburg dynasty that controlled them were mostly defensive in nature when it came to Baltic matters. The religious divide across Europe in general, and Germany in particular, caused by the Reformation just prior to the start of the game was however a cause for conflict, as the Catholic Habsburgs wanted to restore the true faith throughout the Holy Roman Empire (as well as centralizing Habsburg power in the process). These religious conflicts culminated in the Thirty Years War of 1618-1648, which became intertwined with Baltic affairs as first Denmark and then Sweden saw an opportunity to expand their realms into the wealthy German lands by intervening into the war on the Protestant side. As Sweden was simultaneously fighting a war with Poland, who was allied with their fellow-Catholic Habsburgs, and Prussia-Brandenburg was being steamrolled by the armies of both sides, Northern Germany had suddenly become the focal point for most Baltic rulers.

    The period from the end of the Thirty Years War in 1648 to 1721 (the end of the period covered by Baltic Empires) saw Sweden entrenched as a major power in Europe with holdings in Germany, and with a firm alliance with France – the Habsburg’s main rivals. This situation naturally led to more Habsburg involvement in Baltic matters, such as when an Imperial contingent was sent to Denmark to fight against Sweden. In Baltic Empires the Independent provinces in Northern Germany are very attractive. They mostly start the game with their full complement of Cities and Workshops and several of them produce rare Goods or even, as is the case for Hamburg, contain one of the three super valuable Trade Centers. Compared to the similarly rich, but completely undefended, Independent provinces in the Livonian region (the modern day Baltic states) the provinces of Northern Germany are not easy pickings, however, as most of them start out with enough Fortresses and other Independent units to rival the starting strength of most of the player’s armies.  

    Emperor Leopold I (1640-1705)

    Elected in 1658, Leopold became the longest ruling Habsburg emperor, and the first to understand that the Treaty of Westphalia in 1648 meant a marked decrease in importance of the role of Holy Roman Emperor. To compensate he sought to strengthen Habsburg authority within their own lands along absolutist lines. His reign saw many large wars against both France and the Ottomans, but in the Baltic context he is mainly known for the direct Imperial intervention against Sweden in the Northern War of 1655-60, which saw Imperial troops campaigning as far as Denmark as part of a Danish-Polish-Imperial coalition army. The infamous “Habsburg jaw” was most prominent in Leopold, and after his jaw was depicted unusually large on a 1670 silver coin, he was nicknamed “the Hogmouth”.

    In Baltic Empires Emperor Leopold I represents the advantages of securing a firm alliance with the Habsburgs and their network of vassals and/or rulers within the Holy Roman Empire. You get to produce Independent units in Independent Provinces  each Production Phase, an ability otherwise restricted to the Prussian player. You also get to ally with a unit in the Habsburg Lands for free during the War Phase, so by using the ability to place in the Habsburg Lands you in effect get a free unit you can throw after the other Powers each turn if they cause trouble for you. This is obviously very powerful if you are involved in securing Provinces for yourself in the area, but can also be used by Powers such as Russia, who are normally far removed from the Habsburg Lands, as constant attacks from the Habsburgs can be a great way of distracting other players who would otherwise cause trouble in your lands.

    Albrecht von Wallenstein (1583-1634)

    A Bohemian military entrepreneur, Wallenstein was Born into a poor Protestant noble family but converted to Catholicism in 1606 and married a rich widow. Wallenstein made an enormous fortune and a name for himself as a mercenary captain in the service of the emperor in the early part of the Thirty Years War, where he was awarded confiscated estates for his services. His massive armies were instrumental in first defeating the Danish, and then slowing the Swedish, during their interventions in the war. His meteoric rise to power and growing independence from the emperor would prove to be his undoing as he was assassinated in 1634 by army officials with the emperor’s approval.  

    Technically speaking Wallenstein didn’t intervene directly into Baltic affairs but only fought against Danish and Swedish intervention into German affairs. As this happened within the area covered by the map of Baltic Empires, he is however included in this article and the game.
    In the game, as in history, the coming of Wallenstein will pose great problems for whoever is trying to take control of the independent areas in Germany. The player who gets Wallenstein into their Court gets to place a total of five Independent units within the German lands (as defined by being adjacent to Hannover). As befits Wallenstein’s historical conquering army these units can be placed in any of these areas and not only in friendly or Independent-controlled areas, and can therefore really set back an opponent who has spent lots of effort and expense to carve out an empire in Germany. As in history Wallenstein only works for the Emperor (and himself) and not for the player who got him in their Court, so he won’t directly help the player gain a foothold in Germany. On the contrary, the second part of Wallenstein’s card text even specifies that no Protestant powers may ally with Independent units for the rest of the Round, as well as the next, so the arrival of Wallenstein often shuts down players’ ambitions in Germany for some time. 


    Previous Article:

    Foreign Intervention in Baltic Empires: Part One

    The Women of Baltic Empires Series:

    The Women of Baltic Empires: Part One

    The Women of Baltic Empires: Part Two


    Other Baltic Empires InsideGMT Articles


    Source link

  • Foreign Intervention in Baltic Empires: Part One – InsideGMT


    The historical power struggles occurring during the period covered by Baltic Empires (1558-1721) did not happen in a vacuum, but were of great importance to the interest to major powers on the edges of the map of Baltic Empires: England, France, the Netherlands, the Habsburg-controlled Holy Roman Empire, and the Ottoman Empire. Each of these powers were in their own way affected by affairs in the Baltic region, and in turn attempted to influence events there to their own advantage by various means. The scale of this ranged across the spectrum from minor trade deals to outright invasions and attempts at dictating foreign policy.
    The focus on this article is therefore on these foreign powers and how their interference and intervention in Baltic affairs are represented in the game.

    The map of Baltic Empires has many areas that are uncontrolled by the playable powers at the start of the game. These are called Independents, and most can be conquered by the players. Along the edge of the map there are also some special areas that can never be entered or controlled by the players. These are the “Habsburg Lands”, the “Ottoman & Tatar Lands”, and in the North Sea, the “Maritime Powers” – an amalgamation of France, England and The Netherlands. Independent units start in these areas and more can be placed each round by the Prussian player (see my previous article on Prussia in Baltic Empires for an explanation on how and why). During their turn, players may spend thalers (the money resource of Baltic Empires) to ally with Independent units and control them during their turn. This simple mechanism in itself does a great job at representing the minor interventions in Baltic affairs, where rulers could secure outside assistance in their wars.

    The Dramatis Personae (DP) mechanism, where players add a card to their Power Mat and gain the abilities of that card, adds another layer of showing the actions of admirals, rulers, and diplomats from these foreign powers that played a major role in the history of the Baltic region. In addition to the DP cards mentioned in this article, there are several other DP cards representing individuals from outside the Baltic region who were not representatives of these major powers, but rather of the major banking houses of Europe or simply individuals whose deeds as merchants, industrialists or military thinkers had a big impact on the events covered by the game.

    The Maritime Powers (The Netherlands, England, and France)

    The Sound Due was a source of immense wealth to the Danish kings, as the flow of trade between the Baltic ports and England and the Netherlands all had to pass through the narrow Danish-controlled waters. It was collected at Kronborg Castle in Elsinore (of Hamlet fame) and was from 1548 onwards based on the value of a ship´s cargo. In order to combat fraud, the local authorities there were authorized to buy a cargo at the declared price if they had a suspicion that it was deliberately set lower than the market value (the effect of the Sound Due in Baltic Empires, and how it generates thalers for Denmark is described in detail in my earlier article on Denmark-Norway). This toll was a source of immense irritation to the maritime powers who were heavily dependent on their Baltic trade for timber, flax, hemp, grain and various other goods to sustain their fleets and growing urban populations.

    In Baltic Empires this trade with the Dutch and English is represented in the “Maritime Trade Phase”, where players may trade a number of their collected goods depending on their position on the Mercantile Hegemon Track, and in exchange draw an equal number of special Maritime Trade Goods. These are either rare Goods types not found on the map (and thus valuable for the players since you pay for things with sets of different Goods) or Thalers (which are even more valuable as they are wild-card goods and are the only resource you can use to pay upkeep and repay loans). Besides its economic importance, the Baltic region was an integral part of the European balance of power. As such the region was of interest to major powers such as France, whose very active policy of subsidies and alliances meant that several of the wars fought in the Baltic during the period covered by the game (1558-1721) were to a large degree proxy wars or parallel wars to those fought by Louis the XIV in western Europe.   

    Cornelis Tromp (1629-1691)

    Tromp was a Dutch naval officer sent to Denmark during the Scanian War against Sweden (1675-79) to serve as an admiral in the Danish Navy. He performed well in this role and was instrumental in the victory in the battle of Öland in 1676. As an officer Tromp was infamous for his insubordination. He was a very aggressive commander who relished the fight, and as a result often had to change ships during battle, but he was nevertheless popular with his crews despite the danger he put them in. At home, without fighting to distract him, he had the reputation of being a heavy drinker, so much so that many inns at the time were named after him.

    In Baltic Empires, the Tromp card represents an alliance with the Dutch, rewarding you with a special Leader unit. Leader units move and fight as normal units of their type (in this case a Ship of the Line), but with some benefits that either effect the unit or all friendly units with it, as detailed on the card. Tromp´s skill as a successful naval commander is represented by an ability which transforms one enemy “Probably Hit” result into a “Miss”, thus potentially reducing friendly losses when Tromp. This might seem counterintuitive considering Tromps record of daring and danger, but these exact qualities also ensured that naval battles would be decided far quicker and in a more decisive manner, which ensured overall lower losses than those seen in a protracted battle.

    Another benefit to this Leader unit is that, for most Powers, the cost of a Ship of the Line unit is higher than the cost of a Dramatis Personae card, so if you were considering building ships anyway, the draw of a card that gives you an even more potent unit for a lower cost is often a welcome bonus.

    A painting of the battle of Öland (1676), showing Dutch and Danish ships fighting against the Swedish navy

    Coenraad van Beuningen (1622-1693)

    Van Beuningen was the Dutch Republic’s most experienced diplomat, burgomaster of Amsterdam for many years, as well as the director of the Dutch East India Company. He keenly understood the importance for the Dutch Republic of not having a single power controlling the entrance to the critical Baltic region and is credited with saying that: “The keys of Öresund lay in a dock in Amsterdam”. Van Beuningen was a highly intelligent man with interests in art, theology and natural sciences, but also with a strong interest in mysticism, astrology, dream-interpretation, and supernatural wonders. The shock of losing his fortune through speculation in shares in 1688 made him bipolar, and he was locked up after writing letters to the ecclesiastical authorities about the coming apocalypse and painting Kabbalistic signs on his house. He died in poverty, leaving only a cape and two dressing gowns, a few pieces of furniture, and “a man’s portrait” by Rembrandt valued at seven guilders (three dollars).

    In Baltic Empires, Coenrad van Beuningen directly reflects Dutch foreign policy and the goal of opening up the Sound to Dutch trade. This would happen by creating a situation where no single power held both shores of the Sound. By aligning your Power with the Dutch views on the Sound (in game terms, having van Beuningen in your Court) you are rewarded with beneficial trade deals and access to lots of capital. This is represented with the +2 modifier to the Mercantile Hegemon track, as well as increasing your Loan Limit. Should the situation in the Sound be resolved in favor of the Dutch you are rewarded even further with annual subsidies.

    Van Beuningen can be useful to all players, as there is no requirement for your power to be actively part of events in the Sound, although he will likely appeal more to those powers who are already heavily committed to the affairs of the Sound: Denmark and Sweden. For the former, Beuningen is obviously mostly interesting if you fail to keep your control of Scania, in which case he helps cushioning the blow of losing the Sound Due Thalers and let you pursue other paths to victory – which is more or less exactly what happened in the Baltics after Sweden acquired control of Scania in 1658 and Dutch policies shifted from supporting Sweden to one of supporting Denmark defend their islands from the Swedes.

    George Rooke (1650-1709)

    Goerge Rooke was an English naval officer who saw extensive action against the Dutch, French, and Spanish during his long career. In the Baltic context he is mainly known for commanding the Anglo-Dutch Squadron that cooperated with the Swedish fleet in 1700. This squadron attacked Copenhagen and made it possible for King Charles XII to land and knock Denmark out of the Great Northern War (1700-21) in its opening phases. After the short Danish campaign Rooke would fight in the War of Spanish Succession (1701-14). Here he would capture the Spanish treasure fleet in the Battle of Vigo Bay in 1702 and command the Allied naval forces that captured Gibraltar in 1704, where a statue of him was raised in 2004.

    The Baltic Empires version of George Rooke closely mirrors the historical Rooke. He is represented as a Ship of the Line Leader unit that gives you control over Independent units in the same sea area and must enter the game in the in the North or Norwegian Sea.
    Due to his entry restrictions Rooke will likely only be interesting for the Danish player, or for Powers that want to contest Denmark’s control of the seas. His benefits are highly situational, and if the North Sea is empty of Independent ships or if Denmark´s naval situation is too strong and secure he will likely be passed over for the other four cards available that round, or any other pressing concerns troubling the players at the time. But if the English offers of naval support come at a critical time and the conditions are right the questions of who gets George Rooke will cause lots of angst in the Production Phase, and will be one of the most talked about events after the game.

    Thomas Roe (1581-1644)

    Thomas Roe was an English diplomat whose voyages ranged from Central America to India, and who worked as ambassador to the Mughal Empire, the Ottoman Empire. and the Holy Roman Empire. During the Thirty Years War (1618-48) he brokered a peace between Sweden and Poland and strove to get Denmark and Sweden to join the Protestant anti-Habsburg coalition.

    In Baltic Empires, Thomas Roe is shown more as an abstract representation of British diplomatic and economic pressure in general, and less as a representation of Roe’s personal achievements specifically. He allows the Power allied with Britain (represented by having Roe in your Court) to choose any one of the other powers in the game and effectively cripple their Maritime Trade Phase by limiting them to only trading a single Good. As a side benefit, he also increases your Power’s position on the Mercantile Track to represent increased trade with England. During a game the former is a hugely interesting power to wield as it can be used both to hurt enemies but also as a tool for diplomacy/blackmail, and it is my experience that Thomas Roe is a card that increases the intensity of the table talk.

    King Louis XIV (1638-1715)

    Louis XIV, the “Sun King”, was king of France from 1643 and his reign of 72 years is the longest recorded reign of any monarch in European history. Louis’s France was emblematic of absolutism as exemplified in the quote: “L’état, c’est moi” (“I am the state”). His revocation of the edict of Nantes in 1685 abolished the rights of the Protestant Huguenots and the resultant stream of Huguenot refugees to the Baltic region brought with them valuable technical skills. In the Baltic context he is mainly known for thoroughly intertwining Baltic power politics with the greater European power politics, as he sought to distract his Habsburg enemies by subsidizing the standing army of his ally Sweden.

    No game on early modern power politics and war would be complete without Louis XIV! In Baltic Empires, the Louis XIV card reflects the massive impact on the Baltic scene of the Sun King’s many wars against his English, Dutch, and Habsburg rivals. His effects are two-fold, and one of only a handful of multi-category cards (Immediate and Permanent effects in this case). Upon getting Louis in your court the strong French armies will cause an abrupt diversion of Habsburg attention away from the Baltic and towards the borders with France, as represented by the removal of all independent units in the Habsburg Lands at that time. As with George Rooke above, the impact of this effect is largely situational. His other effect, representing the substantial subsidies Louis offered Sweden to maintain a large army at all times (so France’s German opponents would always have to watch their back), is a permanent effect. A -2 reduction of your Power’s upkeep costs is a significant boost, and especially so since upkeep costs can only be paid using ever scarce Thalers. Just as in history, an alliance with Louis XIV will allow your Power to maintain a far larger army without going bankrupt.

    That’s all from the Netherlands, England, and France! In the second part of this article we will look at some personalities from the Ottoman Empire and the Holy Roman Empire who played an important role in Baltic affairs.


    The Women of Baltic Empires Series:

    The Women of Baltic Empires: Part One

    The Women of Baltic Empires: Part Two


    Other Baltic Empires InsideGMT Articles


    Source link

  • F1 25 hands-on preview, part three: Braking Point 3 brings more Drive To Survive-ish drama, this time out front

    F1 25 hands-on preview, part three: Braking Point 3 brings more Drive To Survive-ish drama, this time out front


    The F1 series’ Braking Point modes have always been an interesting thing to dip into, getting more refined as the TV-drama elements of the sport itself become more prominent. The mode may not be what you’re looking for if you’re in the mood to go all-in on the real-world simulation aspect of the game, or just stick to being out on track as much as possible, but there’s a place – and an audience – for it.

    Drama’s always been part of the draw, don’t get me wrong, but it feels more central to how we all interact with our watching of cars going round in circles today. That’s for better or worse, depending on who you are, but if you’re looking for a bit of the dramz to spice up your Sundays, the third instalment of Braking Point in F1 25 sounds pretty promising.

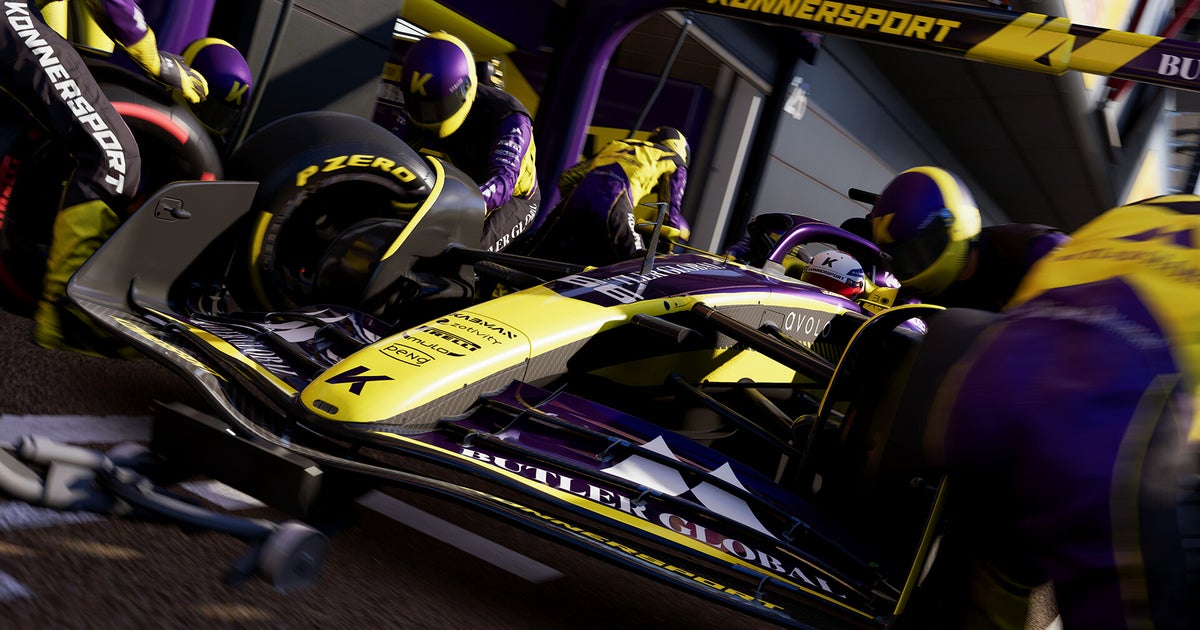
    “When we introduced characters of Braking Point in ’21, and then when we introduced Konnersport – the team – back in ‘23, it was kind of really important to us that it felt authentic,” creative director Gavin Cooper explained when introing this year’s mode. “It didn’t feel realistic that those characters could come in and start winning championships right from the outset.”

    Braking Point 3 changes that. Konnersport is now at the front following a winter with some fresh investment and a strong opening test, set to take on the existing real-world frontrunners of F1. Cooper alluded to a “key event that happens early in the story which throws the team into chaos”, and from the brief bit I played, it looks like the ongoing drama of the Butler family long-time players’ll be familiar with is set to still be a key cog this time around.

    Following the events of Braking Point 2, Aiden Jackson and Callie Mayer are the driver pairing, and you’ll be able to choose which of them to race as for key races and events in the story.

    Codemasters says it’s put a bigger focus on this offering more player agency this time around, with some “different on-track objectives and narrative elements” popping up depending on who you pick. You’ll also get an “alternative ending” to the story depending on which you’ve raced as more often, so we’ll have to see whether those feel distinct enough to be worth trying both.


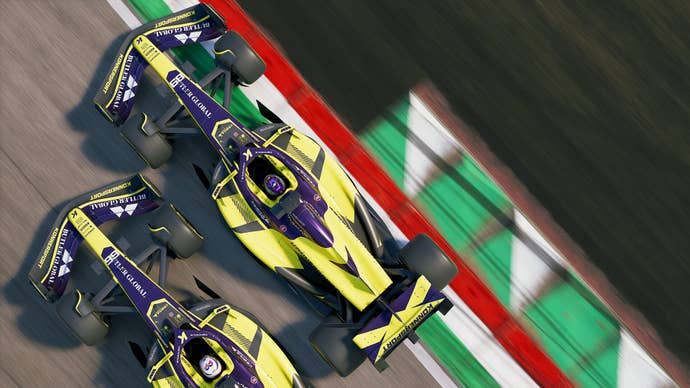
    A pair of teammates battling in F1 25.
    Jackson or Mayer – it’s your call. | Image credit: EA/Codemasters

    I picked Mayer for the first two events I got time to play through, one of which was just testing in Bahrain and took the form of your standard ‘do a few laps to get comfortable with the car and nail a certain lap time’ affair. The first proper race at Imola was a bit more exciting, with you being plunged into the action mid-race after losing ground in a turn one collision with a certain Dutch Red Bull driver (points for accuracy to Codemasters there).

    Starting from about seventh, the goal was to get back the podium by the chequered flag and earn some additional points by getting back past Verstappen prior to a certain lap in the process. Since this was the first bit of the game I played, I wanted to get a feel for the car and so opted for about the most minimalistic level of driver aids I can generally cope with alongside a pretty steep difficulty.

    It’s fair to say that with the cars up ahead already well strung out given the late stage of the race, I really struggled to make any ground. Knocking things back down made it thoroughly doable though, so more than anything, this was a lesson in how much the higher-level AI is tuned to face either folks running on rails with plenty of aids, or the elite of the elite.

    Codemasters says it’s rebalanced the difficulty levels this year, with the addition of a fourth hardness rung to the existing three supposedly having the aim of making it easier for everyone to find their ideal setting. However, in this brief hands-on, the cut-off between too hand and too easy did still seem to be missing in-between that’d constitute the exact best match for my pace. That said, such a thing is nearly impossible for developers to help you nail down without endless tweaking, since everyone’s pace will vary from track to track and condition to condition.


    Callie Mayer in F1 25.
    Where will Callie’s story lead? I’m quite keen to find out. | Image credit: EA

    Going back to the off-track drama of Braking Point, that new investment I mentioned has come from the mode’s long-time rich guy Davidoff Butler, father of both Callie Mayer and Devon Butler, the latter of whom is now a sort of team advisor after being forced to retire from racing in BP2. Jackson’s in there too, as is team boss Casper Akkerman, but it looks like the relationships between Davidoff and his kids are going to be key to a lot of the drama.

    While I’m not all that invested in the tale Braking Point’s been weaving to this point, I’m at least interested to see how this year’s edition advances Mayer’s story as a fictional first female F2 champion; now stepping up for a full season in the big time. Real-world F1, lest we forget, hasn’t had a female driver actually be entered for a full race weekend since Giovanna Amati back in 1992 (though there has been testing and development work done for teams much more recently by the likes of Jamie Chadwick, Jessica Hawkins, and Tatiana Calderón). Shout-out, also, to the all-female F1 Academy series that’s been a part of the F1 support series package for a good couple of years, now.

    To bring the tale to life, Codemasters has invested in some Nvidia Audio2Face facial animation tech, which feeds into a more detailed and realistic setup for press conferences and interviews, allowing you to actually watch your driver deliver the answer you’ve picked. Plus, once you’ve run through the story, you’re now given the option to import your Konnersport team into the MyTeam 2.0 mode, so you can carry on beyond the single season of Braking Point, though obviously in that mode’s regular team management fashion.

    Though, whether you’ll be engrossed enough to want to do that once you reach the end of Braking Point 3, or whether you’ll have had your fill of the Drive To Survive-ish drama, remains to be seen.


    Source link

  • Play GMT Games Anytime, Anywhere! (Part 2) – InsideGMT


    More of GMT’s Digital Offerings that allow you to “Play GMT Games Anytime, Anywhere.

    As I noted in our first article, we have created, in cooperation with individual programmers and digital game platforms, numerous ways for customers to experience our boardgames on your digital devices. We’ve done this for one large, underlying reason: We want players to be able to engage with and experience the learning, fun, challenge, and historical insights of our boardgames with other players from around the world on digital platforms where they can play the games generally much more quickly than they can on their physical game tables.

    The Pyramid of Digital Game Options GMT Offers:

    • Computer Games. We discussed these in our last installment of this series.
    • Online Multi-player Games that enforce the boardgame rules but have no solo AI opponents. We’ll talk about these today.
    • Traditional VASSAL and TableTop Simulator Game Modules. We’ll feature these in our next installment of the series.

    Free-to-Play Online Games

    Today we’ll talk about all of the Free-to-Play Games that we have authorized to be published on Popular Online Platforms. First, a few notes about these games:

    • Most GMT Games on online free-to-play platforms look and play like the boardgame. You can play them multi-player with friends or multi-handed “hot seat” solo, but there is no AI built in, so there is no “against the computer” solo play.
    • A nice feature of Rally the Troops, one of the platforms listed below, especially if you want to familiarize yourself with gameplay before you play yourself, is that you can “Watch” a game in progress or “Review” a completed game.
    • All we ask for those of you who play our games online is that at least one of you who are playing owns the physical boardgame. That’s how it would be if you were meeting friends face to face to play – ONE of you would bring the game. But there’s no requirement that all players own the game to play online. We WANT you to use online free-to-play options to “try before you buy” our boardgames.

    Here’s the list of games we have authorized that are currently available on free-to-play online platforms:

    Rally the Troops.com

    GMT Games Available to play for free on Rally the Troops as of April 21, 2025:

    1989: Dawn of Freedom (2-player Card-driven game (CDG) set in Eastern Europe in 1989)

    Andean Abyss (1-4 player COIN series game on the struggle for power in Columbia in the 1990s )

    Nevsky (1-2-player Levy & Campaign series game about the clash between Latin Teutonic and Orthodox Russian powers along the Baltic frontier in the mid-13th-Century.)

    Plantagenet (1-2-player Levy & Campaign series game of the War of the Roses)

    Red Flag Over Paris (2-player Card-driven game on the Rise and Fall of the Paris Commune, 1871. )

    Time of Crisis (1-4 player Strategy game of Ancient Rome)

    Vijayanagara (1-3 player Irregular Conflict Series game of Medieval India, 1290-1398.

    Washington’s War (Strategic 2-player CDG about the American Revolution.)

    Wilderness War (Strategic 2-player CDG about the French & Indian Wars)

    BoardGame Arena

    GMT Games Official Implementations that you can play FREE on BoardGame Arena

    A Gest of Robin Hood (2-player game in our Irregular Conflict Series)

    Bayonets & Tomahawks (2-player strategic CDG on The French and Indian War)

    Space Empires (1-4 player 4X Space game. One of our all-time best-sellers.)

    Talon (1-2 player game of Tactical Space Combat)

    Unconditional Surrender (1-3 player game of WWII in Europe)

    TableTopia

    GMT Games that you can play FREE on TableTopia:

    A Gest of Robin Hood

    Down in Flames

    Paths of Glory (just released!)

    Red Dust Rebellion

    Tank Duel

    The Plum Island Horror

    GMT Games that you can play FREE on 18xx.games

    I should note that we also have a couple GMT Games that you can play as PREMIUM experiences on TableTopia (these are not free):

    Dominant Species

    Thunder Alley

    I hope this article and “all in one place” listing of games gives you insight into what’s available to you for our free-to-play digital games offerings. We want all of you to have plenty of options to find your favorite ways to “Play GMT Games Anytime, Anywhere.”

    Next Time: VASSAL, TableTop Simulator Module, Cyberboard  for almost all of our games, plus Solo Apps!

    Enjoy the games! – Gene


    Source link

  • From Prototype to Publication – The Bazaar Diaries Part 3: Preparing to Playtest

    From Prototype to Publication – The Bazaar Diaries Part 3: Preparing to Playtest


    [Read our full Froggy Bazaar series here: www.pineislandgames.com/bazaar-diaries]

    As I wrote about last week (in a regular blog post), as a game evolves through the development process the goals of your playtests, as well as the target playtest audience will change.

    We’re now at the point for Froggy Bazaar where I need to broaden our play tester base (beyond my immediate circle), and so have a few important questions to answer.

    1. What is the medium of playtesting?

    2. Who is playtesting?

    3. What are our goals for playtesting?


    Playtesting Medium

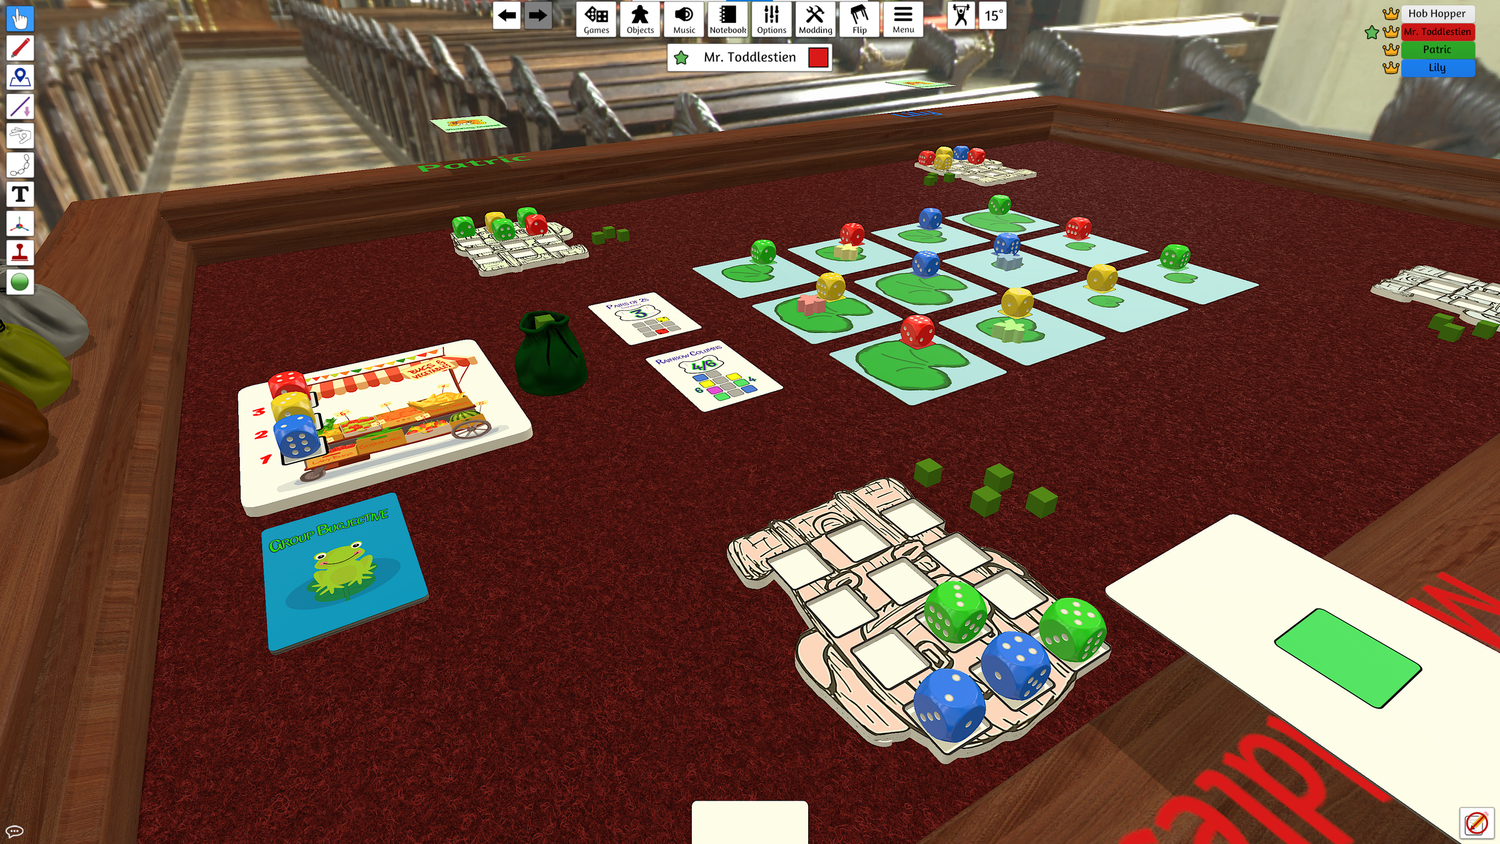
    We enlisted the help of Tabletop Simulator wizard Alexei Menardo to script our Froggy Bazaar mod. Alexei is great at getting TTS to do what you want including what could otherwise be fiddly set up [if you’d like to commission Alexei to build a mod for your game, you can reach him at pixelandboard@gmail.com].

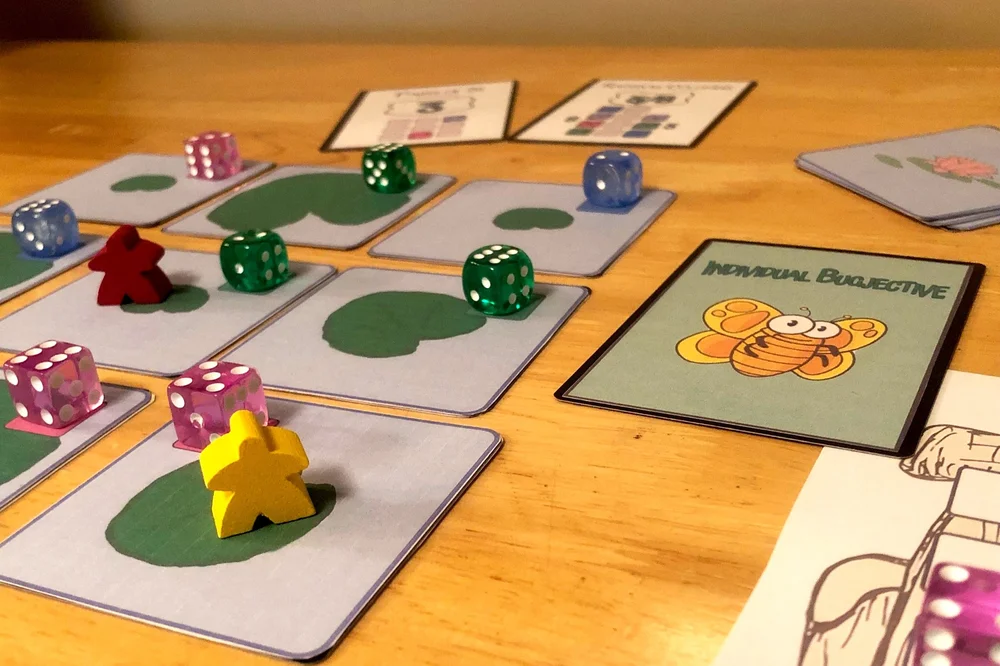
    As such, most of our playtesting in the near term will be online through Tabletop Simulator. That said, if you’d like to print out your own version of Froggy Bazaar, we have PNP materials here, and very rough written rules here.


    Playtesters

    Since we’ve been through this process a couple of times, I am fortunate to have an audience of Pine Island Insiders who are excited to play our upcoming games. Over time I’ll be reaching out on the various forums to source an even broader audience.

    If you are looking for playtesters for your game, check out last week’s article Playtesting & Playtesters.


    Playtesting Goals

    These first rounds of playtesting are aimed at tightening up the game mechanically, finding pain points, and making sure every inch of the game is fun. Since this series focuses on a specific game, I’m going to go into a little more detail of my primary goals for this round of playtesting

    1. Make sure that the BIG HOP action is balanced.

    2. Figure out if we have the best end of game trigger (a player filling their rucksack).

    3. Balancing group bugjectives & figuring out whether we should separate them into separate color and number bugjectives.

    You can check out my full playtesting feedback form here. What I also love about these early rounds is that I run the playtesting, so can talk with players in real time about how they feel about different aspects of the gameplay.

    While I think each playtest should have a focus, it’s always helpful to have some level of consistency in what you are asking your play testers. JT Smith over at The Game Crafter put together a pretty decent starting point for a playtesting form. You can download a free pdf or buy printed booklets of it here.

    The Game Crafter Playtest Form

    I prefer to come up with my own forms rather than use a template, as the specifics of the playtest and game will determine the kinds of questions that are relevant. But, JT’s form is definitely a good starting point for inspiration.


    Do you want to playtest Froggy Bazaar?


    Source link