برچسب: Walkthrough

  • Full AOONI Nightmare Walkthrough Guide – All Classes

    Full AOONI Nightmare Walkthrough Guide – All Classes


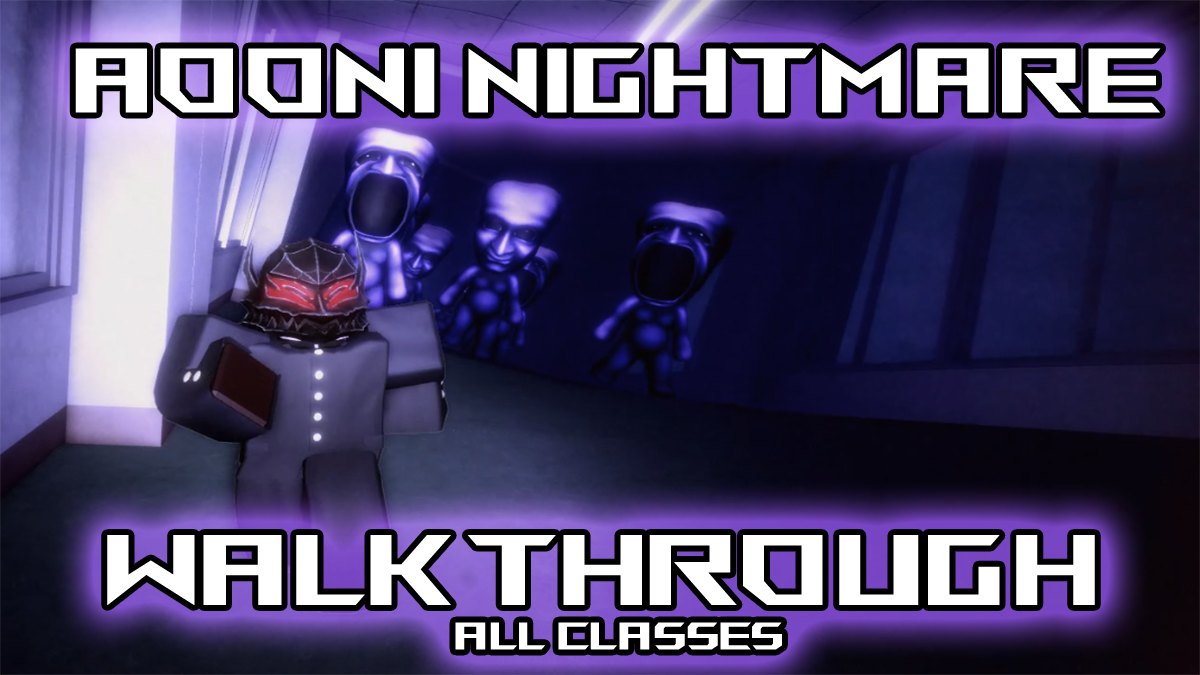
    Roblox’s AOONI Nightmare takes you through four levels/classes of horror as you get chased by blue monsters. I’m here to guide you through all levels as well as give you some general tips and tricks. Here’s my full AOONI Nightmare Walkthrough Guide.

    AOONI Nightmare First and Third Class Guide

    aooni nightmare first and third class search guide
    Image by The Escapist

    The first and third classes/levels “Search” are similar since you have to find Dolls for the first one and Flasks for the third one while the monster chases you. Here are some tips and tricks for AOONI Nightmare first and third classes:

    • Hiding: You can hide in lockers (can spawn in classrooms) so that the monster can pass you by safely. You can hide as long as you want since there’s no time but your teammates can eject you from lockers if they attempt to hide in the same one.
    • Aggro Outplay: A good general tip that’s easy to do if you’re on voicechat is that someone should aggro the monster in front of the starting classroom/safe zone and then go into the safe zone as the monster reaches them. Once the monster loses aggro, aggro it again and rinse and repeat. This will keep your team safe as the monster is stuck in one place in a cycle of aggro and de-aggro.
    • Tunnels: The monster leaves tunnels behind when it breaks through walls, it can usually spawn from these tunnels so pay close attention when approaching one and keep your stamina high so you can spring away.
    • Hiding Warning: If the monsters sees you by spawning in a classroom you’re in or has line of sight when you hide, don’t hide. The monster will just approach the locker, knock you out of it, and eat you. Only hide when the monster has no line of sight on you by breaking line of sight via running into a classroom. You can outrun the monster in all stages as long as you have stamina.
    • Stamina Tip: Always save some of your stamina for sprinting away, never use it all when not in danger. A general rule is to use 25% to 35% to move faster between classrooms and then let it recharge as you’re looking for Dolls and later Flasks. This is so that you can quickly use the rest to sprint away if the monster spawns near you.
    • Locker Tip: Always have a locker in mind that you can retreat to. If you’re going from classroom to classroom note which ones have lockers and which ones do not so that you can go back to the ones that do if the monster spawns near you.
    • Collectables: Besides Dolls and Flasks which you can find in classrooms both left and right from the safe room and down the stairs, you can also pick up AoZeni. You also earn them passively by finding Dolls and Flasks. AoZeni currently do nothing but Omochi will add a shop in the future so that you can spend them on cosmetics and power-ups judging from how they did it with PETAPETA.
    • Third Class Red Lines: Avoid red lines when you see them in the third level since the monster charges down these red lines incredibly fast.
    aooni nightmare search guide

    AOONI Nightmare Second Class Guide

    The second class in AOONI Nightmare is the “Gym” platforming survival challenge. There are a few variations but it ultimately comes down to not falling down. Here are some tips depending on the challenge:

    • Spiketrap Variation: This variation starts with a rotating spike trap in the middle. Players will randomly get marked with a red light throughout the challenge and the rotating spike trap will rush towards them breaking the platforms you’re standing on along its path. In general stay away from the trap and the marked player by taking a wide berth around them while jumping when right at the edge of your current platform. A general rule is to always look for bigger platforms so that you have more room to maneuver. If you get marked, stand on the edge of your current platform, wait a bit before the spike approaches you and then move to the opposite side so that you can dodge it.
    aooni nightmare bomb gym class guide
    Image by The Escapist
    • Bomb Variation: In this variation players are randomly marked with bombs. If you get the bomb you can pass it to another player by touching them so it’s like a survival game of tag. Avoid players with bombs. To get the “Sacrifice with Bomb” achievement all you have to do is survive the first class with more than 6 people and clear the bomb version of class 2 ”Gym”. Go for the Blue power ups that speed you up and avoid red debuffs that slow you down. The question mark power ups are randomly either a speed buff or debuff.
    aooni nightmare bomb gym class guide
    Image by The Escapist

    AOONI Nightmare Fourth Class Guide

    aooni nightmare fourth class escape guide
    Image by The Escapist

    This is currently the final class/level in AOONI Nightmare called “Escape”. You’ll be put into auto-run mode where you can only move left or right and you can jump. Avoid vertical obstacles to the left or right and jump over horizontal obstacles. Make sure to only jump when you’re just near a horizontal obstacle. Note that the speed of the game will randomly change so be ready at all times to adjust your timing. Hitting an obstacle costs you health so you can make mistakes, just make sure to not make several. Eventually, you’ll reach a white light and escape which finishes the game.

    That’s it for my full AOONI Nightmare walkthrough guide. Check out our other Roblox guides for more walkthroughs. And if you want more horror like this then PETAPETA is for you.
    The Escapist is supported by our audience. When you purchase through links on our site, we may earn a small affiliate commission. Learn more about our Affiliate Policy


    Source link

  • Roblox School Time Walkthrough Guide – Kit Tier List, Item Guide & More

    Roblox School Time Walkthrough Guide – Kit Tier List, Item Guide & More


    To beat Roblox School Time Chapter 1 you’ll need to know all the mechanics for each level as well as the best items and kits to use. I’m also going to walk you through each level and the best strategies for all of them. Here’s my complete School Time walkthrough guide, item guide, and kit tier list.

    School Time Beginner’s Guide

    To beat Roblox School Time you’ll have to go through a series of levels collecting different items in each one and bringing them to the art room to progress. The teacher Mrs. Klock and the principal Mr. Jenkins (starting level 2) will chase you and instantly knock you down on contact. Other players can revive you and then you have to heal with consumable items you find. Let’s start with some basic tips and tricks:

    • Disable Mrs. Klock and Mr. Jenkins: You can find and buy items to disable the teacher and principle like the bear trap snare that will stun them on contact or the paper ball you can throw to stun them by clicking on them with it equipped. Check out the full list of items below.
    • Coins & Gems: You’ll find coins each level that you can spend at the end of the level to buy items for the next day. Also, there are Gems to pick up which are used in the Lobby to unlock kits which are item presets that refresh each run and they also give you permanent movement speed and health boosts. Check out the best kits below.
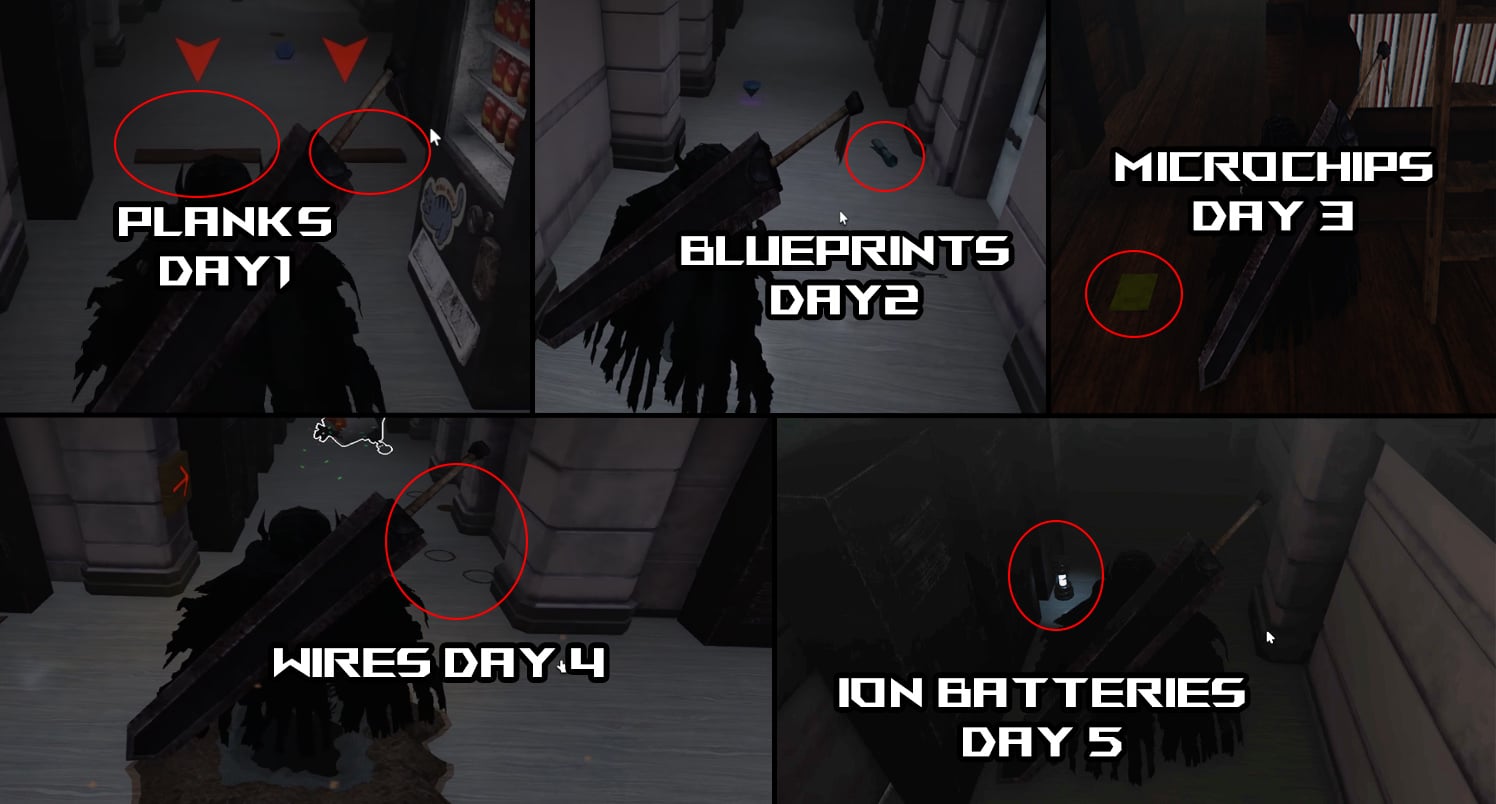
    • Progression Items: In the first level you’ll need to pick up a certain number of planks and bring them to the art room to go to Day 2. This repeats for different items each day with Blueprints on Day 2 and so on. These items are randomly placed around the school and they even spawn during the level so keep looking. They’re hidden in various rooms on the floor and on the tables in classrooms but not in lockers which you need a key to open.
    • Red Arrows: Whenever you need to reach the art room go into any hallway and find the red arrows and then follow them. They’ll lead you to the art room which is helpful until you learn the level layout yourself.
    • Spread Out and Watch the Floor and Tables: The best strategy is to spread out into the cafeteria, gym field, and temple as well as the class rooms. Each day the level is the same so learn the layout and pay attention to the tables since the items can be on tables as well as the floor.
    • Certain Item Effects Persist: You can dig holes with Shovels to teleport around the level or place snares and these items persist throughout all levels so feel free to place them in earlier days so you can use them later as well. I recommend digging a Shovel hole near the art room so you can quickly come back to it.
    • Reviving Players: You can see a player who is downed through the walls so quickly rush to revive them before they run out of HP or else they’ll be eliminated and kicked from the game. You can drop healing items like Bandages and Medkits with Backspace to allow them to heal.
    • Max 10 Items: You can only carry 10 items at a time so use Bandages and drop Traps to free up space for better items.

    All Items Guide in School Time

    school time shop guide and all items
    Image by The Escapist

    You can find all of these items on the ground during each day in School Time or you can buy them at the end of a day. Below you’ll find a list of them all and a brief guide for each one on how best to use it or should you buy it.

    All Days Walkthrough in School Time

    all progression items in school time all days guide walkthrough
    Image by the Escapist

    When it comes to Roblox horror games School Time is pretty simple since there are no puzzles. You just collect all items each day, bring them to the art room, and avoid getting downed by the teacher and principal. That said, there’s a special mechanic each day so let me give you some tips for all of them:

    • Day 1 Tips: This day is really easy once you get a Trap, Soda, or Ball to escape when the teacher starts chasing you. Look for planks and bring them back to the art room, the red arrows will guide you. The most important part of Day 1 and any day for that matter is to always go to downed players to revive them. The more players pass the easier the later days will be. At the end of Day 1 and all days after you’ll get a shopping phase where you can buy the items we mentioned above. Make sure to stock up.
    • Day 2 Tips: This where Principal Jenkins shows up so you’re basically twice as likely to get chased. Just make good use of retreating, hiding, and using the escape/stun items and you’ll be fine. Always have at least one escape/stun item on you. If you don’t, don’t risk going into open spaces without cover.
    • Day 3 Tips: This is where both the teacher and principal can drink Soda for a speed boost. It’s more crucial than before to keep to the at least one escape/stun item strategy since they’ll catch you fast if you don’t have an escape plan.
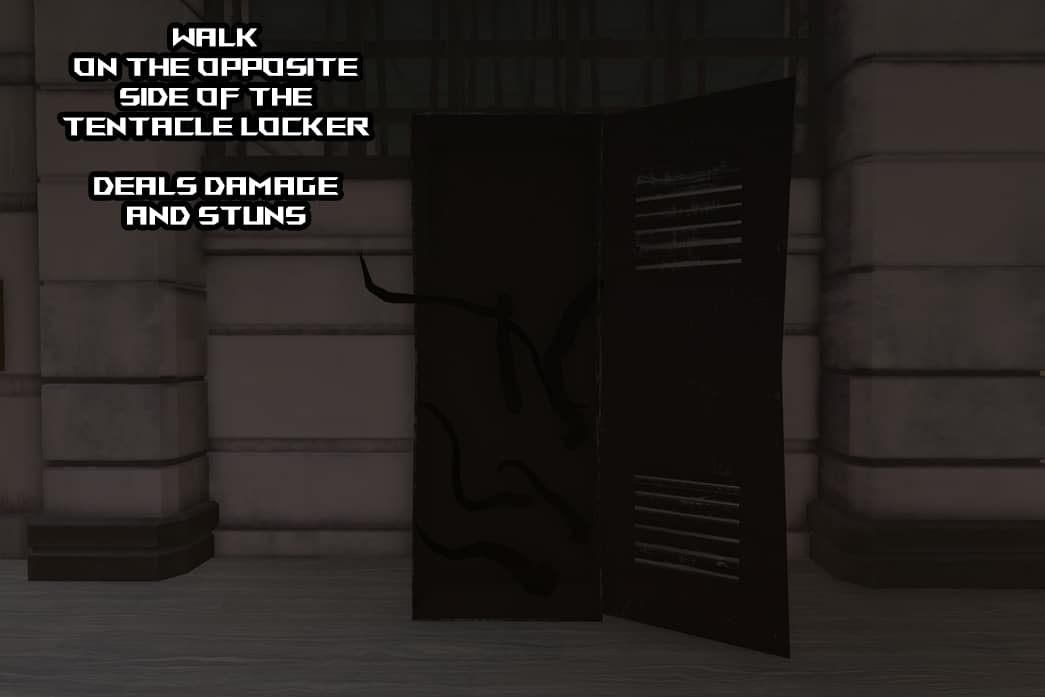
    • Day 4 Tips: This is where certain lockers will have tentacles coming out of them that will damage and stun you on contact. You can still pass them by just make sure to walk on the furthest opposite side of the tentacle locker in a hallway. Otherwise, strategy from days before apply. Make sure to buy the Lantern at the end of Day 4 for Day 5.
    school time day 4 tentacle locker
    Image by The Escapist
    • Day 5 Tips: This is the last day where lights go out. Make sure you have a Lantern from one of the shopping phases before. Otherwise, strategies from Day 4 and before apply and nothing else changes.
    school time day 5 lights out
    Image by The Escapist

    Once you beat Day 5 you’ve beaten School Time Chapter 1. Congratulations! Now we wait for Chapter 2.

    School Time Kits Tier List

    school time kits tier list best kits
    Image by The Escapist

    You can buy all items from all kits eventually during the game so the best kits in School Time are the ones are that give you permanent bonuses or lots of coins. The permanent bonuses are useful for all days whereas the one-time items are a short term boost. Movement speed is much better than health as a stat boost so you’ll notice kits with it are ranked higher. Health isn’t that valuable since the teacher and principle one shot you anyway. Also, kits with coins are also powerful since you can establish a Shovel hole system earlier or be flexible in what you buy depending on how the game is going. You can check what all kits do in the lobby.

    That’s it for my complete School Time walkthrough guide with an item guide and kit tier list. Check out our Roblox guides page for more walkthroughs like our PETAPETA and 7 Days to Live guides.


    The Escapist is supported by our audience. When you purchase through links on our site, we may earn a small affiliate commission. Learn more about our Affiliate Policy


    Source link

  • 7 Days to Live Walkthrough

    7 Days to Live Walkthrough


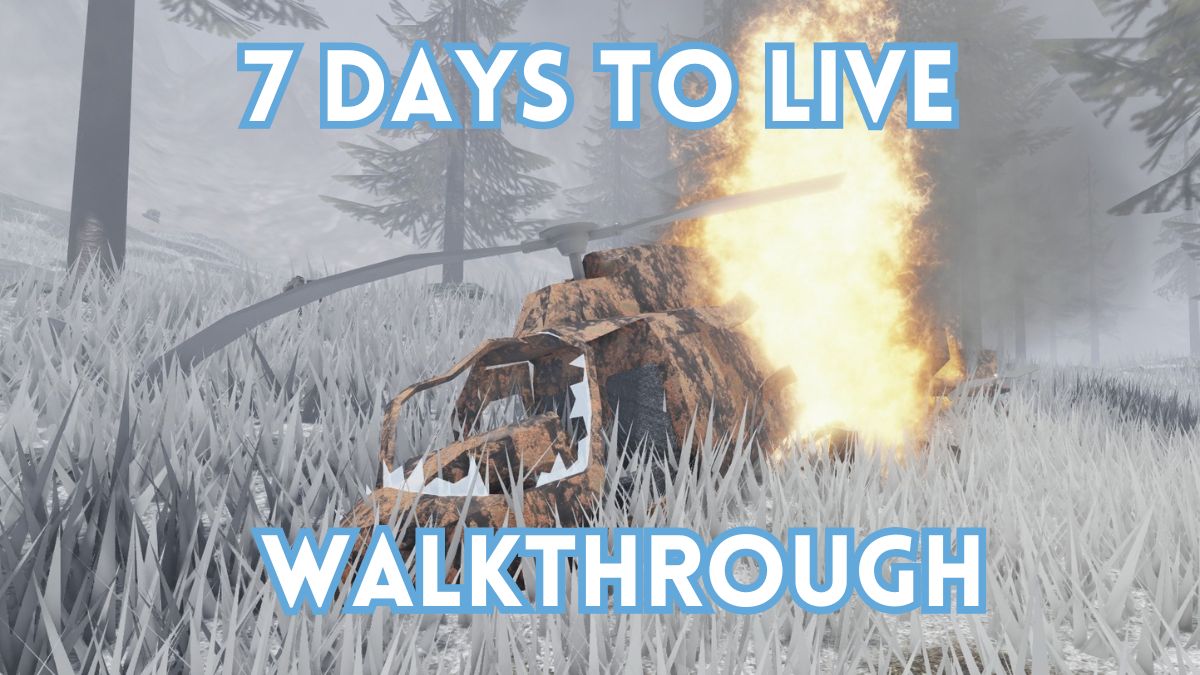
    A crashed helicopter in 7 days to live with the title on top and bottom of the screen

    Screenshot by The Escapist

    7 Days to Live is a very simple survival game where you need to craft and survive an onslaught of enemies for a whole week. If you’re having trouble surviving in this game, don’t worry because we’re here to help with our 7 Days to Live Walkthrough.

    What to do each day in 7 Days to Live

    Currently, there really isn’t much you can do during the day in 7 Days to Live. Regardless, each day, make sure you do the following:

    • Kill at least 2 deer (and gather their meat)
    • Gather as much Wood as you can
    • Make sure you are back in your base before nighttime
    A 7 days to live player is chopping wood
    Screenshot by The Escapist

    You can also gather Scrap along the way, but it’s not necessary if you just want to survive. It’s extremely important you get back to base before nighttime because if you’re out in the wild, you’ll be cooked. For some reason, as soon as nighttime begins, your character will fall asleep (even if you’re climbing a ladder). When you wake up, you’ll be where you fell, but if you’re out in the woods and can’t see your base, there’s a good chance your game is going to end there. So, keep an eye on that watch (second slot on the hotbar) and get back to base before sundown. If you’re feeling bold, you can also try to take advantage of the events that occur each day, but don’t make it your priority. Keep this up for 7 days, and you should be a-ok.

    What to do each night in 7 Days to Live

    A 7 days to live player is looking at a deer corpse
    Screenshot by The Escapist

    Just like daytime, nighttime also has it’s own routine. At nighttime you should do the following:

    • Use all your wood to craft walls (either wall is fine, but we prefer the smaller one)
    • Eat until your hunger is full (Cooked Deer Meat)
    • Place your newly crafted walls
    • (During nights 1 – 3) Get to higher ground
    • Kill any monster that pops in for a visit

    At night, it’s important to stay at your base because your view is limited, and, more importantly, you’re going to get some nasty uninvited guests. To welcome your guests, you need to place proper barricades. During the first few nights, simply climbing on top of your base is good enough to make it until the next day, but when night 4 rolls around, this won’t be enough.

    A player is using a barricade in 7 Days to Live

    A great strategy to work towards is to take two walls and build barricades with a gap that’s big enough for you to fire your gun through. A simple fence also works on the first few enemies, but not for the stronger ones. You should build one such structure by night 4. If you’re running low on wood, remember you can always take apart your main base and use the materials for the barricade.

    All this aside, don’t forget to eat and stay warm. If you hold Raw Deer Meat next to a fireplace, you can turn it into Cooked Deer Meat. If you place a simple fireplace in your barricade, you’ll be golden. Personally, we always buy the Warm Coat before each match so we have one less thing to worry about, but you can do just fine without one.

    Once you’ve built a structure you’re satisfied with, you should spend the rest of your time reinforcing the barricades with more layers, for extra protection. We know it seems like a lot, but if you follow this simple formula, you should have no problems making it until day 7 (at least until the game gets updated).

    7 Days to Live Days 1 – 7 Walkthrough

    A monster is clipping through the wall in 7 days to live
    Screenshot by The Escapist

    Here’s a quick summary of what to do each day:

    • Day 1: Daily routine, Night: start crafting a simple fence (place a wall so it’s up to your character’s neck) around where you’d like your barricade to be, then head for the roof of your house and survive the night
    • Day 2: Daily routine, Night: try to finish the fence around your barricade, and again, climb on top of your house to survive the night
    • Day 3: Daily routine (and replace any damaged walls if any), Night: start building the top fence (above your character’s head; it should look like in the images), survive the night on the roof
    • Day 4: If you think you won’t be able to finish your barricade, ditch the daily routine and take apart your base for materials. Otherwise, do the daily routine, Night: Hide in your barricade, which should be finished by now, and survive the night
    • Day 5: Repair your barricade and daily routine; Night: Reinforce your barricade and hide inside it until nighttime
    • Days 6 and 7: Repeat Day 5 (fix broken walls, reinforce barricades, survive)

    That’s all there is to it. Have fun surviving the week until that chopper arrives. Stay up to date with The Escapist for more 7 Days to Live guides.


    The Escapist is supported by our audience. When you purchase through links on our site, we may earn a small affiliate commission. Learn more about our Affiliate Policy


    Source link