دسته: چند نفره

  • What’s up with the uneven distribution of costumes in Mario Kart World?

    What’s up with the uneven distribution of costumes in Mario Kart World?


    Cow posing for a picture in Mario Kart Tour

    (Nintendo)

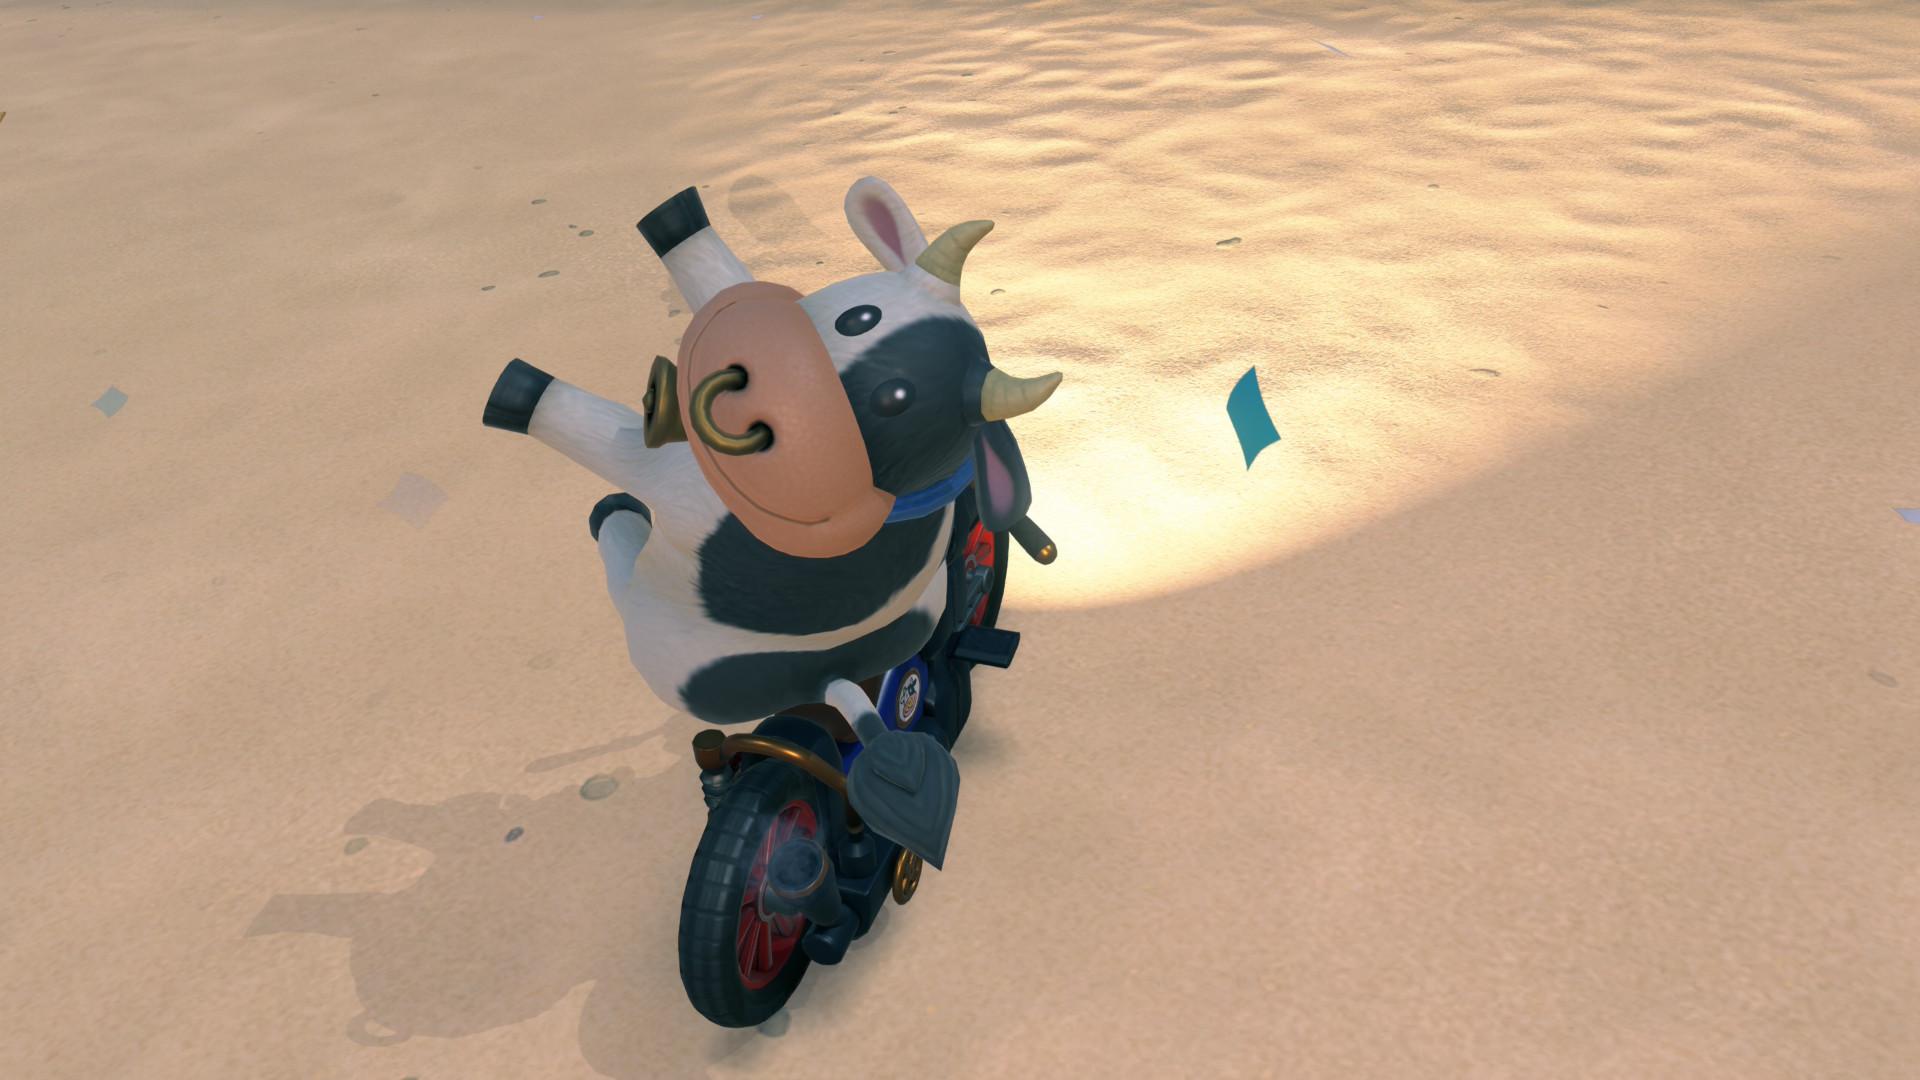
    When Mario Kart World was teased during the Nintendo Switch 2, in the brief and beautiful moments before we knew what the Switch 2 would cost, the internet immediately glommed onto one specific detail: Cow. You could play as a Cow.

    Now that the game’s out, the glory of Cow—and other delightfully absurd additions like Penguin, Snowman, and my personal favorite, Cheep Cheep—is everything we believed possible. Well … almost everything. Because another one of Mario Kart World‘s new conceits is a new item, a bag of take-out food which transforms the driver into a new costume. Imagine me, during my first Mario Kart World Grand Prix. I’m obviously driving as the Cow. I pick up a glowing doggy bag from Yoshi’s, and … nothing.

    Turns out, all the “creature” characters—like Cow, Penguin, Snowman, Goomba, even Dry Bones—don’t get costumes. And even among the main cast who gets fabulous outfit changes, there’s some major discrepancies. For example, Mario gets 10 outfits, the most in the game. Donkey Kong gets two.

    Everyone loves dress-up

    On the whole, Mario Kart World is a peak point in a beloved franchise. An open-world Mario Kart feels much more immersive than you’d think, and it makes for some epic tracks. New twists like the cut-throat Knockout Tour—where the bottom four racers are culled every lap—breathe additional new life into a franchise as old as Nintendo’s home console history.

    Still, polished as Mario Kart World is, the bizarre unevenness of the costumes makes it feel like a game that has an obvious opening for additional content out of the box. It makes it feel not quite finished.

    The idea that people have favorites and will want to play dress-up with them shouldn’t surprise anyone, least of all one of the biggest game producers in the world. Hell, popular games like Infinity Nikki and, arguably, Monster Hunter Wilds use outfits as a primary motivator to progress gameplay, and people love it. Of course, people will want another costume change for Pauline other than “Aero.” But here’s the thing—Pauline’s Aero costume looks ridiculously cool! All these costumes are fantastic. They’re perfectly campy and delightfully dumb. Bowser’s “Biker” get-up involving jeans torn at the knee cap and greased-back hair, which screams “cool dad trying a little too hard”? Phenomenal. Wario can dress up as a bee. A bee! King Boo as a monocle-touting aristocrat? Please, yes!

    The thoughtfulness of all these costumes is precisely why the chasm between Mario’s 10 outfits and Pauline and DK’s two feels so pronounced. There’s not much rhyme or reason to it all, either: why does Koopa Troopa get six costumes, but Dry Bones—the skeleton version—get none? It’s fine if every character doesn’t have as many as Mario, but to underplay the mascot of the Switch 2’s first adventure game like that feels strange. Honestly, it might be a sign that Nintendo’s planning to add more.

    Give the Cow a costume, you cowards

    As likely as it seems for Nintendo to add costumes for the main cast as Mario Kart Tour rolls along, we inevitably turn back to the game’s biggest meme: Cow. For us Cow-lovers, the bigger question is whether they’ll ever bother to add some outfits for the “creatures”.

    It doesn’t have to be much, Nintendo. Just throw a scarf on that cow. Maybe some sunglasses and a floppy little hat. We’ll be so happy. It unfortunately feels doubtful: after all, the game has 50 playable characters. If each character had five outfits, we’re looking at 250 driver options. I’d be surprised if Nintendo had that in mind from the get-go. At the very least, the character select menu would need a major overhaul, but that’s necessary anyway. (How are costumes not a sub-menu for each character? How is it not at least organized by character? It’s mayhem!)

    Still, I hope against hope. Please, Nintendo, if you’re going to put the Cow and the Penguin in the game, let them play dress-up, too.


    The Escapist is supported by our audience. When you purchase through links on our site, we may earn a small affiliate commission. Learn more about our Affiliate Policy


    Source link

  • Ultimate Guide on How to Get Secret Brainrots in Steal a Brainrot

    Ultimate Guide on How to Get Secret Brainrots in Steal a Brainrot


    Steal a Brainrot is another unique Roblox experience inspired by the popular Italian Brainrot animals. If you want to rise to the top here, you want to collect only the best Brainrots in your base. However, obtaining the Secret Brainrots, such as Los Tralaleritos and La Vacca Saturno Saturnita, can be very challenging. To help you collect these extremely rare items, we prepared the following guide on how to get Secret Brainrots in Steal a Brainrot.

    How to Get Secret Brainrots in Steal a Brainrot

    There are two ways to get Secret Brainrots in Steal a Brainrot: by stealing or by buying them. Stealing a Secret Brainrot can be very challenging, as its owner will likely go to great lengths to protect it. However, you can always carefully plan out an attack and steal it while they are busy with something else.

    Secret Brainrots can very rarely spawn on the main track, from where you can buy them using cash. The only way to increase their spawn chance is to boost the Server Luck on the server you are currently on. Alternatively, you can try and server-hop until you find a server that is already Luck-boosted.

    List of Secret Brainrots in Steal a Brainrot

    Secret Brainrots have the highest money-making potential in the game. Therefore, you will want to obtain as many as possible and protect them to the best of your ability. Below is a list of all currently available Secret Brainrots in Steal a Brainrot, along with their purchase costs and the amount of cash they generate for you while they are in your base.

    Secret Brainrots Buy Cost Regular
    Income
    Gold
    Income
    Diamond
    Income
    Bloodrot
    Income
    Los Tralaleritos $100M $500K/s $625K/s $750K/s $1M/s
    La Vacca Saturno Saturnita $50M $250K/s $312.5K/s $375K/s $500K/s

    That concludes our guide on how to get Secret Brainrots in Steal a Brainrot. Feel free to share your experience with trying to get one of these rare items in the comments below. If you want to claim some freebies to help you assemble the ultimate squad of Brainrots, then make sure to check out our Steal a Brainrot codes.


    Secret Brainrots in Steal a Brainrot FAQs

    What are the chances of a Secret Brainrot spawning on the track naturally?

    Extremely low. On average, if the Server Luck bonus is at its maximum, you can expect to see a Secret Brainrot every 30-45 minutes.

    How can I protect a Secret Brainrot once I get it?

    The best way to protect your Secret Brainrot is to monitor your base as often as you can while replenishing your defensive weapons and traps at the same time. Additionally, you can purchase a private server and grind on it alone. This way, you avoid the risk of one of your Secret Brainrots being stolen.

    How do mutations influence the Secret Brainrots?

    Mutations on Secret Brainrots multiply the amount of cash those Brainrots generate every second (Gold=1.25x, Diamond=1.5x, Bloodrot=2x).


    The Escapist is supported by our audience. When you purchase through links on our site, we may earn a small affiliate commission. Learn more about our Affiliate Policy


    Source link

  • Full AOONI Nightmare Walkthrough Guide – All Classes

    Full AOONI Nightmare Walkthrough Guide – All Classes


    Roblox’s AOONI Nightmare takes you through four levels/classes of horror as you get chased by blue monsters. I’m here to guide you through all levels as well as give you some general tips and tricks. Here’s my full AOONI Nightmare Walkthrough Guide.

    AOONI Nightmare First and Third Class Guide

    aooni nightmare first and third class search guide
    Image by The Escapist

    The first and third classes/levels “Search” are similar since you have to find Dolls for the first one and Flasks for the third one while the monster chases you. Here are some tips and tricks for AOONI Nightmare first and third classes:

    • Hiding: You can hide in lockers (can spawn in classrooms) so that the monster can pass you by safely. You can hide as long as you want since there’s no time but your teammates can eject you from lockers if they attempt to hide in the same one.
    • Aggro Outplay: A good general tip that’s easy to do if you’re on voicechat is that someone should aggro the monster in front of the starting classroom/safe zone and then go into the safe zone as the monster reaches them. Once the monster loses aggro, aggro it again and rinse and repeat. This will keep your team safe as the monster is stuck in one place in a cycle of aggro and de-aggro.
    • Tunnels: The monster leaves tunnels behind when it breaks through walls, it can usually spawn from these tunnels so pay close attention when approaching one and keep your stamina high so you can spring away.
    • Hiding Warning: If the monsters sees you by spawning in a classroom you’re in or has line of sight when you hide, don’t hide. The monster will just approach the locker, knock you out of it, and eat you. Only hide when the monster has no line of sight on you by breaking line of sight via running into a classroom. You can outrun the monster in all stages as long as you have stamina.
    • Stamina Tip: Always save some of your stamina for sprinting away, never use it all when not in danger. A general rule is to use 25% to 35% to move faster between classrooms and then let it recharge as you’re looking for Dolls and later Flasks. This is so that you can quickly use the rest to sprint away if the monster spawns near you.
    • Locker Tip: Always have a locker in mind that you can retreat to. If you’re going from classroom to classroom note which ones have lockers and which ones do not so that you can go back to the ones that do if the monster spawns near you.
    • Collectables: Besides Dolls and Flasks which you can find in classrooms both left and right from the safe room and down the stairs, you can also pick up AoZeni. You also earn them passively by finding Dolls and Flasks. AoZeni currently do nothing but Omochi will add a shop in the future so that you can spend them on cosmetics and power-ups judging from how they did it with PETAPETA.
    • Third Class Red Lines: Avoid red lines when you see them in the third level since the monster charges down these red lines incredibly fast.
    aooni nightmare search guide

    AOONI Nightmare Second Class Guide

    The second class in AOONI Nightmare is the “Gym” platforming survival challenge. There are a few variations but it ultimately comes down to not falling down. Here are some tips depending on the challenge:

    • Spiketrap Variation: This variation starts with a rotating spike trap in the middle. Players will randomly get marked with a red light throughout the challenge and the rotating spike trap will rush towards them breaking the platforms you’re standing on along its path. In general stay away from the trap and the marked player by taking a wide berth around them while jumping when right at the edge of your current platform. A general rule is to always look for bigger platforms so that you have more room to maneuver. If you get marked, stand on the edge of your current platform, wait a bit before the spike approaches you and then move to the opposite side so that you can dodge it.
    aooni nightmare bomb gym class guide
    Image by The Escapist
    • Bomb Variation: In this variation players are randomly marked with bombs. If you get the bomb you can pass it to another player by touching them so it’s like a survival game of tag. Avoid players with bombs. To get the “Sacrifice with Bomb” achievement all you have to do is survive the first class with more than 6 people and clear the bomb version of class 2 ”Gym”. Go for the Blue power ups that speed you up and avoid red debuffs that slow you down. The question mark power ups are randomly either a speed buff or debuff.
    aooni nightmare bomb gym class guide
    Image by The Escapist

    AOONI Nightmare Fourth Class Guide

    aooni nightmare fourth class escape guide
    Image by The Escapist

    This is currently the final class/level in AOONI Nightmare called “Escape”. You’ll be put into auto-run mode where you can only move left or right and you can jump. Avoid vertical obstacles to the left or right and jump over horizontal obstacles. Make sure to only jump when you’re just near a horizontal obstacle. Note that the speed of the game will randomly change so be ready at all times to adjust your timing. Hitting an obstacle costs you health so you can make mistakes, just make sure to not make several. Eventually, you’ll reach a white light and escape which finishes the game.

    That’s it for my full AOONI Nightmare walkthrough guide. Check out our other Roblox guides for more walkthroughs. And if you want more horror like this then PETAPETA is for you.


    The Escapist is supported by our audience. When you purchase through links on our site, we may earn a small affiliate commission. Learn more about our Affiliate Policy


    Source link

  • All Infinite Mining Incremental Ores & Auras – Value, Health, Depth & More

    All Infinite Mining Incremental Ores & Auras – Value, Health, Depth & More


    Stone Value – 1
    Health – 3
    Depths – 0 to 500
    Rarity – 98
    Aura – N/A
    Chest Value – Contains Class Keys
    Health – 10
    Depths – 1 to 10,000,000
    Rarity – 1 in 3,000
    Aura – N/A
    Garnet Value – 30,000
    Health – 3
    Depths – 0 to 1
    Rarity – 1 in 10k
    Aura – N/A
    Copper Value – 3
    Health – 5
    Depths – 5 to 500
    Rarity – 1 in 200
    Aura – N/A
    Coal Value – 3
    Health – 10
    Depths – 5 to 500
    Rarity – 1 in 200
    Aura – N/A
    Diamond Value – 3
    Health – 30
    Depths – 5 to 500
    Rarity – 1 in 400
    Aura – N/A
    Abyssal Stone Value – 150
    Health – 50
    Depths – 5 to 500
    Rarity – 1 in 1,000
    Aura – N/A
    Ambrosia Value – 500
    Health – 50
    Depths – 5 to 500
    Rarity – 1 in 1,000
    Aura – N/A
    Ammolite Value – 2500
    Health – 50
    Depths – 5 to 500
    Rarity – 1 in 1,000
    Aura – N/A
    Datolite Value – 1500
    Health – 50
    Depths – 5 to 500
    Rarity – 1 in 2,000
    Aura – N/A
    Lithium Value – 250
    Health – 50
    Depths – 5 to 500
    Rarity – 1 in 10,000
    Aura – N/A
    Darkstone Value – 3
    Health – 10,000,000,000
    Depths – 500 to 10,000,000
    Rarity – 99
    Aura – N/A
    Iron Value – 100
    Health – 10,000,000,000
    Depths – 500 to 10,000,000,000
    Rarity – 1 in 200
    Aura – N/A
    Ruby Value – 100
    Health – 10,000,000,000
    Depths – 500 to 10,000,000
    Rarity – 1 in 200
    Aura – N/A
    Platinum Value – 250
    Health – 10,000,000,000
    Depths – 500 to 10,000,000
    Rarity – 1 in 1,000
    Aura – N/A
    Dragonglass Value – 1,000
    Health – 10,000,000,000
    Depths – 500 to 10,000,000
    Rarity – 1 in 1,000
    Aura – N/A
    Plutonium Value – 1,000
    Health – 10,000,000,000
    Depths – 500 to 10,000,000
    Rarity – 1 in 1,000
    Aura – N/A
    Firecrystal Value – 5,000
    Health – 10,000,000,000
    Depths – 500 to 10,000,000
    Rarity – 1 in 2,000
    Aura – N/A
    Darkmatter Value – 5,000
    Health – 10,000,000,000
    Depths – 500 to 10,000,000
    Rarity – 1 in 2,000
    Aura – N/A
    Rainbonite Value – 25,000
    Health – 10,000,000,000
    Depths – 500 to 10,000,000
    Rarity – 1 in 10,000
    Aura – N/A
    Stellarite Value – 25,000
    Health – 10,000,000,000
    Depths – 500 to 10,000,000
    Rarity – 1 in 10,000
    Aura – N/A
    Constellatium Value – 100,000
    Health – 100,000,000,000
    Depths – 500 to 10,000,000
    Rarity – 1 in 20,000
    Aura – N/A
    Unobtanium Value – 1,000,000
    Health – 100,000,000,000
    Depths – 500 to 10,000,000
    Rarity – 1 in 100,000
    Aura – N/A Crimsonstone Value – 50
    Health – 500,000,000,000,000,000,000
    Depths – 1,000 to 10,000,000
    Rarity – 1 in 1.01
    Aura – N/A Warped Coal Value – 500
    Health – 5,000,000,000,000,000,000,000
    Depths – 1,000 to 10,000,000
    Rarity – 1 in 200
    Aura – N/A Malachite Value – 500
    Health – 5,000,000,000,000,000,000,000
    Depths – 1,000 to 10,000,000
    Rarity – 1 in 200
    Aura – N/A Taaffeite Value – 1,250
    Health – 10,000,000,000,000,000,000,000
    Depths – 1,000 to 10,000,000
    Rarity – 1 in 1,000
    Aura – N/A Realgar Value – 1,250
    Health – 10,000,000,000,000,000,000,000
    Depths – 1,000 to 10,000,000
    Rarity – 1 in 1,000
    Aura – N/A Jasper Value – 15,000
    Health – 10,000,000,000,000,000,000,000
    Depths – 1,000 to 10,000,000
    Rarity – 1 in 2,000
    Aura – N/A Morganite Value – 15,000
    Health – 10,000,000,000,000,000,000,000
    Depths – 1,000 to 10,000,000
    Rarity – 1 in 2,000
    Aura – N/A Lightning Crystal Value – 100,000
    Health – 10,000,000,000,000,000,000,000
    Depths – 1,000 to 10,000,000
    Rarity – 1 in 10,000
    Aura – N/A Redlinite Value – 100,000
    Health – 10,000,000,000,000,000,000,000
    Depths – 1,000 to 10,000,000
    Rarity – 1 in 10,000
    Aura – N/A Devilline Value – 1,000,000
    Health – 10,000,000,000,000,000,000,000
    Depths – 1,000 to 10,000,000
    Rarity – 1 in 10,000
    Aura – N/A Void Crystals Value – 5,000,000
    Health – 10,000,000,000,000,000,000,000
    Depths – 1,000 to 10,000,000
    Rarity – 1 in 100,000
    Aura – N/A Masslock Value – 5,000,000
    Health – 10,000,000,000,000,000,000,000
    Depths – 1,000 to 10,000,000
    Rarity – 1 in 100,000
    Aura – N/A Ekanite
    (Kind of a Troll ore, not worth mining) Value – 1,250
    Health – 10,000,000,000,000,000,000,000
    Depths – 500 to 1,000
    Rarity – 1 in 100,000
    Aura – N/A Marble Value – 500
    Health – 1 octillion
    Depths – 2000 to 10,000,000
    Rarity – 1 in 1
    Aura – N/A Mineralite Value – 5,000
    Health – 1 octillion
    Depths – 2000 to 10,000,000
    Rarity – 1 in 200
    Aura – N/A Crookesite Value – 5,000
    Health – 1 octillion
    Depths – 2000 to 10,000,000
    Rarity – 1 in 200
    Aura – N/A Niedermayrite Value – 15,000
    Health – 1 octillion
    Depths – 2000 to 10,000,000
    Rarity – 1 in 1,000
    Aura – N/A Rozenite Value – 15,000
    Health – 1 octillion
    Depths – 2000 to 10,000,000
    Rarity – 1 in 1,000
    Aura – N/A Miroite Value – 50,000
    Health – 1 octillion
    Depths – 2000 to 10,000,000
    Rarity – 1 in 2,000
    Aura – N/A Rainbonium Value – 50,000
    Health – 1 octillion
    Depths – 2000 to 10,000,000
    Rarity – 1 in 2,000
    Aura – N/A Alagamite Value – 500,000
    Health – 1 octillion
    Depths – 2000 to 10,000,000
    Rarity – 1 in 10,000
    Aura – N/A Lavendulan Value – 500,000
    Health – 1 octillion
    Depths – 2000 to 10,000,000
    Rarity – 1 in 10,000
    Aura – N/A Wadsleyite Value – 2,500,000
    Health – 1 octillion
    Depths – 2000 to 10,000,000
    Rarity – 1 in 20,000
    Aura – N/A Celsian Value – 2,500,000
    Health – 1 octillion
    Depths – 2000 to 10,000,000
    Rarity – 1 in 20,000
    Aura – N/A Augelite Value – 2,500,000
    Health – 1 octillion
    Depths – 2000 to 10,000,000
    Rarity – 1 in 20,000
    Aura – N/A Cordierite Value – 2,500,000
    Health – 1 octillion
    Depths – 2000 to 10,000,000
    Rarity – 1 in 20,000
    Aura – N/A Decayium Value – 50,000,000
    Health – 1 octillion
    Depths – 2000 to 10,000,000
    Rarity – 1 in 100,000
    Aura – N/A Redrum Value – 50,000,000
    Health – 1 octillion
    Depths – 2000 to 10,000,000
    Rarity – 1 in 200,000
    Aura – N/A Fracturium Value – 50,000,000
    Health – 1 octillion
    Depths – 2000 to 10,000,000
    Rarity – 1 in 200,000
    Aura – N/A


    Source link

  • Everything We Know About Call of Duty: Black Ops 7 So Far

    Everything We Know About Call of Duty: Black Ops 7 So Far


    At the end of the Xbox Games Showcase, Microsoft surprised gamers with the debut teaser for the latest Call of Duty. While official information is still scarce, here’s everything we know about Black Ops 7.

    Setting and Story

    While the last several Call of Duty games have elected to stick to historical or modern settings, Black Ops 7 is heading back to the future. Despite being numbered to follow 2024’s Black Ops 6, the latest CoD actually has way more in common with the classic Black Ops 2.

    Like Black Ops 2, 7 will take players a decade ahead of the game’s release and predict a near future full of technology which revolutionizes the way wars are fought. Black Ops 7 takes place in 2035, with characters from Black Ops 2 returning in the form of David Mason, Menendez, and Harper. The announcement blog further teases the setting as a “world on the brink of chaos, ravaged by violent conflict and psychological warfare”.

    While story details are still being kept classified, the cryptic teaser does give fans a taste of what to expect. That trailer is filled with surreal, mind bending environments which confirm the spirit of Black Ops as a trippy espionage thriller is still alive and well. Several of these aforementioned locales allude back to classic characters and missions from early Black Ops campaigns. Most notably, David Mason confronts Raul Menendez in a recreation of the room has father was interrogated in over the course of the original Black Ops story.

    Multiplayer, Zombies, and More

    As exciting as a new Black Ops Campaign can be, Call of Duty’s suite of multiplayer modes is what keeps players hooked all year. That being said, the Campaign does actually fit in here, too. Perhaps whats most exciting about Black Ops 7’s story is that fans will be able to experience it with others. In a rare move for the franchise, this year’s campaign is confirmed to be playable co-op or solo, allowing fans to play the narrative out together for the first time in a decade.

    For fans of Call of Duty’s PvP offerings, Black Ops 7 is expected to have the classic Multiplayer modes, as well as some new ones. Black Ops 7 will continue the trend of a direct sequel to a previous Call of Duty entry in an odd numbered year; just as Modern Warfare III followed up II the year before it. However, unlike MWIII, Black Ops 7 is confirmed to have several brand-new Multiplayer maps at launch, rather than just a collection of remasters.

    The seasons of Warzone content to follow the Black Ops 7 launch seem to feature a new large-scale map called Avalon. Several prominent CoD content leakers have claimed Avalon was originally set to release with Black Ops 6, but was delayed too make room for the re-introduction of Verdansk. Several of the Black Ops 6 Multiplayer maps take place in or around Avalon, and the surrounding area matches up with some brief looks at gameplay in the first Black Ops 7 teaser.

    A brief look at this year’s Zombies offering was also shown. Black Ops 7 will once again feature the classic Round Based Zombies mode. Our first look at the horde mode this year shows a group of zombies being alerted by the turning on of headlights in a rural environment. Many fans believe this could be some sort of remake or reimagining of Tranzit, the launch map for Black Ops 2 Zombies, as the teaser images seem to include that map’s Farm locale and bus. Fans have long wanted a reinvention of the controversial map on new hardware, and with Black Ops 7 being a direct sequel to 2, the time may finally be right.

    A full reveal of Black Ops 7 is promised for this summer. In the meantime, you can play Black Ops 6 & Warzone on PC, PlayStation 4, PlayStation 5, Xbox One, and Xbox Series X|S. Black Ops 7 will be available on all those platforms as well. It is unknown if and when the game will come to the Nintendo Switch 2.


    The Escapist is supported by our audience. When you purchase through links on our site, we may earn a small affiliate commission. Learn more about our Affiliate Policy


    Source link

  • A Ghost Story Hidden in the City feature – Grandis Adventures

    A Ghost Story Hidden in the City feature – Grandis Adventures


    In Grandis Adventures, some side quests are quiet, subtle, and filled with mystery. This short article introduces one such moment — where a ghost vanishes into the night.

    Inside the train, a silence lingers. The world outside is shrouded in fog.

    Train

    In the world of Grandis Adventures, some side quests aren’t loud — they’re quiet, subtle, and mysterious.
    This clip shows one of them. A player walks through the neon-lit streets…

    Where the track ends… something else begins.

    Train

    And then, just at the end-
    He disappears.

    Yes. He was a ghost all along.

    We’re crafting each side quest with story, emotion, and mystery at heart.
    More to come soon.


    Source link

  • Updated Demo out now ! – Backpack Survivors news

    Updated Demo out now ! – Backpack Survivors news


    Backpack Survivors Updated Demo Announcement

    This new and updated version includes new systems such as Item Merging and a complete Talent Tree to unlock and discover. Also many Quality of Life and visual improvements have been added.

    Discover more than 40 weapons and over 180 items, equipment and relics.

    Check out the Backpack Survivors Demo and let us know what you think of it !

    We are very excited to have made the next step towards an Early Access Release and would love to hear your thoughts.

    Backpack Survivors Battle

    You can join our Discord to follow development, check out the Roadmap and share your awesome builds with others.

    Happy Gaming !

    Chris & Martijn
    CM Game Studio


    Source link

  • Ultimate Crystal of Atlan Class Tier List

    Ultimate Crystal of Atlan Class Tier List


    Crystal of Atlan is officially out, and as an MMORPG, it allows you to choose from a variety of different classes. There are five characters to choose from, but each one can specialize into at least two subclasses. We’ve been messing around with the game even before the official launch, and we’re proud to bring you our ultimate Crystal of Atlan Class Tier List.

    Crystal of Atlan Best Overall Class Tier List

    A Crystal of Atlan Class Tier List
    Image via TierMaker / Remix by The Escapist

    For this Crystal of Atlan tier list, we evaluated every character class, measuring their overall DPS, Survivability, Support, PvP capabilities, and usefulness while in a party.

    S-Tier

    Class Info

    Warlock
    The Warlock is one of the best classes in Crystal of Atlan as it’s excellent at PvP and PvE content with his spells, debuffs, and overall damage.
    However, once he transforms he suddenly skyrockets to the top of the DPS charts.
    Even with lousy armor, a transformed Warlock does insane damage.
    With so many tricks up his sleeve, we had no choice but to put him here.

    Scytheguard
    If you want a class that can do just about anything, this is the class for you.
    The Scytheguard is mainly a support unit, but she is great in the front lines, can do some great crowd control.
    She is also a great healer, which always comes in handy whether you are playing solo or in a party.
    She can’t dish out as much damage, but she makes up for it in almost all other areas.

    A-Tier

    Class Info

    Berserker
    If all you care about is dishing out melee damage and dominating the front lines, the Berserker is the class for you.
    Extremely powerful DPS, great mobility, and an absolute God at PvP.
    He’s somewhat lacking when it comes to his support abilities and can be outsmarted by a ranged unit.
    A great pick for a starter character.

    Cloudstrider
    Somewhat difficult to play, but a fantastic Class if you can master her playstyle.
    With the Cloudstrider, you can switch between all the different elements to take advantage of the enemy’s weakness.
    She is fast-paced, she can move around the battlefield a lot, and her moves just look amazing.
    She is great in PvP too, but she isn’t the tankiest character.

    Starbreaker
    Starbreaker does some devastating damage, and she is pretty tanky.
    If you get her in the frot lines, she can be an absolute beast with DPS.
    Her biggest problem is that she is slow. Her movement is slow, and her attacks need a second to charge.
    Because of this, she isn’t great at PvP, but in almost every other aspect, she is amazing.

    B-Tier

    Class Info

    Blademaiden
    If you position her correctly because of her puppet, the Blademaiden can do a lot of damage, maybe even more than other classes.
    Unfortunately, if she isn’t positioned correctly, she lacks a lot. She is not tanky at all, and she can be easily overwhelmed in PvP.
    If you’re playing in a group, she is a great pick for extra damage.

    Magician
    The ultimate support character. Unfortunately, there is definitely a learning curve when it comes to mastering the Magician.
    His abilities are super useful, and can save the entire party if done right. However, when it comes to dishing out damage, and surviving, he’s lacking a bit.
    Magicians are great at PvP and are overall a lot of fun to play, if you can handle their shortcomings.

    Bounty Hunter
    Bounty Hunters use their guns to attack from a relatively safe distance.
    If you like to play ranged units, this is the one for you. She excels in group combat but reveals her glass-cannon nature when surrounded by enemies.
    She is still a lot of fun to play with and is a great asset when in a group.

    Magiblade
    The Magiblade is a great class if you don’t want to be a melee but still leave a bit of room between you and the enemy.
    He is super easy to play, and a great pick for a first character. Unfortunately, once you get to the endgame, you realize that he isn’t amazing at anything.
    Decent damage, decent mobility, okay tankiness, but there are just better classes out there.
    Still, don’t sleep on the Magiblade if you like the combat style, because it can be a lot of fun.

    C-Tier

    Class Info

    Elementalist
    Under the right circumstances, the Elementalist is great. He can clear small groups of enemies and exploit their weaknesses.
    On the other hand, he isn’t very mobile, can get interrupted easily, and just isn’t great if there isn’t a group backing him up.
    If you don’t mind the squishy and stationary nature, the Elementalist is still a lot of fun.

    Gunner
    Gunner is great when she is in a party and casts her AoE abilities.
    Unfortunately, she lacks in almost any other aspect. She is too slow for PvP, her abilities aren’t varied, and she just can’t seem to catch a break with DPS.
    We’re confident the Gunner is going to get a major buff soon.

    That’s all there is to our Crystal of Atlan tier list. Have fun playing and don’t be afraid to try out other classes, even if we put them lower on our tier list. Check out our Crystal of Atlan codes for free rewards.


    The Escapist is supported by our audience. When you purchase through links on our site, we may earn a small affiliate commission. Learn more about our Affiliate Policy


    Source link

  • What to Buy in Crystal of Atlan – Best Purchases & Spending Guide

    What to Buy in Crystal of Atlan – Best Purchases & Spending Guide


    Crystal of Atlan town with a view of a few stalls and merchants

    Screenshot by The Escapist

    Crystal of Atlan is the new free-to-play MMORPG that just launched globally, and everyone’s already busy learning the ropes of each class and getting to the endgame. Of course, being free-to-play doesn’t mean the game doesn’t expect you to swipe your card every now and then. Since you are reading this, chances are you are considering buying something in the game but aren’t sure if it’s worth it. We know the feeling, and that’s exactly why we made this what to buy in Crystal of Atlan guide.

    What Can You Buy in Crystal of Atlan

    Opal store in Crystal of Atlan
    Screenshot by The Escapist

    Here’s everything you’re able to buy with real money in Crystal of Atlan:

    • Vouchers
    • Opals
    • Phantasium Passes

    Vouchers are used to buy different packs and can even be exchanged for the Phantasium Pass. With Vouchers, you’re usually aiming to buy more than one thing at once. Vouchers range from $0.99 all the way to $999

    Opal is something of a default premium currency in Crystal of Atlan, and it’s used for buying individual items and other currencies. A lot of the stuff you can buy with Opals, you can get from Voucher packs. This is also the main currency you’ll use to buy Gacha pulls. There is also a non-premium version of Opal called Prismadium (it’s the same as Opal, only earned by playing the game). Again, the amount of Opals you buy ranges from $0.99 all the way up to $999.

    Prismadium Pass is the game’s non-recurring monthly subscription. You can buy the 15 ($2.69) or the 30-day ($4.69) pass. You can also buy Vouchers and redeem them for either pass while in the game.

    What Not to Buy in Crystal of Atlan

    A Crystal of Atlan Gacha page
    Screenshot by The Escapist

    Here are the things we think aren’t worth buying in Crystal of Atlan using any of the currencies above:

    • Batteries – Batteries restore your character and account stamina. You get these from random item loot boxes but, honestly, even if you could buy them in bulks, they just wouldn’t be worth it.
    • Revival CapsulesThe game hands these out quite often, and it’s better to save them, than use them. Most of the time, it’s better to just die and restart a mission if you’re struggling. The game is easy enough, so you likely won’t start dying until you reach end-game, and even when you do, it’s better just not to spend Opals or Prismadiums on these items.
    • Maltz’s Special Injection – Like with Revive Capsules, the game will hand them out often. Save them for really tough end-game bosses and even then use them sparingly.
    • Rank A Outfits – In the Outfit section, you’ll have a few Rank A Outfits that don’t cost a lot of money. Avoid these, unless you really like the cosmetic look. Outfits do actually improve your stats, and since you’ll want the best one, there’s no need to buy A rank outfits when S rank are available too.
    • Buying Opals for Gacha pulls – Crystal of Atlan gives you plenty of ways to earn Gacha pulls and Prismadium. Because of this, there isn’t a real need to spend money for extra pulls, when you can just use what you earn by playing to get them. So, just play the game a bit more, and you should earn more than enough non-premium currency for the Gachas.

    Things Worth Buying in Crystal of Atlan

    Crystal of Atlan Phantasium Pass
    Screenshot by The Escapist
    • Prismadium Pass – This non-recurring subscription is absolutely worth it if you’re planning to play the game for a good while. Firstly, it immediately gives you 150 or 300 Opal, depending on how many days you bought. Secondly, it gives you so many daily benefits such as: daily chests and daily Prismadium, an increases your daily energy cap, free Double Potions, free Abyss Runs, the ability to acquire skills faster, faster EXP gain, lower fees when using the Trading House, extra Gold gain, and additional Trading House listing Slots. The value is amazing, but only if you’re planning to play Crystal of Atlan daily.
    • Resource Packs – The Resource packs usually give you more value than the individual items are worth. The only problem is, you are usually limited to buying one of each packs. These aren’t super valuable like the Prismadium Pass, but are great if you were planning to spend a bit more money anyway.
    • Premium Adventurer’s Manual – This is Crystal of Atlan’s Battle Pass. As you complete daily, weekly, and seasonal quests you’ll unlock both free and premium rewards. This is worth getting if you are planning to play the game on a daily basis. We definitely recommend the regular Adventurer’s Manual. The Collector’s one is only worth it if you REALLY want the extra cosmetics.

    The rest is up to you. We hope our recommendation gives you a better idea on what you should and shouldn’t buy if you’re planning to play Crystal of Atlan. Have fun and if you haven’t decided on your class yet, check out our Ultimate Crystal of Atlan Class Tier List.


    The Escapist is supported by our audience. When you purchase through links on our site, we may earn a small affiliate commission. Learn more about our Affiliate Policy


    Source link

  • Ultimate Universal Piece Sword Tier List [SLAYERUPD]

    Ultimate Universal Piece Sword Tier List [SLAYERUPD]


    A Universal Piece character is holding a metal pipe

    Screenshot by The Escapist

    Gotta have the right blade to slash some enemies.

    One thing we love about Universal Piece is how the game allows you to progress in a multitude of different ways. Depending on what Fruit you use, you can make the game easier or harder for yourself. The same goes for weapons. If you aren’t big on powerful Fruits, you can always grab a trusty blade and destroy your enemies the old-fashioned way, especially with a good Sword. To help you pick the best blade, we made this Ultimate Universal Piece Sword Tier List.

    Roblox Universal Piece Sword Tier List

    A Tier list of all the swords in Universal Piece
    Image via TierMaker / Remix by The Escapist

    Down below, we’ll cover each sword currently in the game and list how to get them, and tell you a little bit about what we think of them.

    SS-Tier

    Sword Obtainment Info

    Monarch Daggers
    Can drop from System Breaker Boss (Solo Island; 0,85%)
    Can drop from Red Knight Boss (3%)
    You can also buy it for 2,250 Robux
    The best set of swords in the game.
    Abilities cover a massive area, so it’s great for PvP and PvE farming.
    Amazing DPS.

    S-Tier

    Sword Obtainment Info

    Hybrid Blade
    Do the new raid and buy it from Prototype-01
    You can also buy it for 2,050 Robux
    A well-rounded end-game blade.
    It’s not as good as the Monarch Daggers,
    and it will probably get a buff.

    Dual Sword
    Drops from Dual Sword Master Boss (Solo Island; 4%)
    You can also buy it for 326 Robux
    Great DPS, Good range,
    you can almost spam all the abilities
    Great for PvE

    Flash Katana
    When you have 10,000,000 Bounty you can
    buy it from the Flash Master on Solo Island
    Does more damage than Dual Swords, but does more DPS
    Fun abilities
    Great for PvE

    A-Tier

    Sword Obtainment Info

    Inverted Spear of Heaven
    Defeat a player with a Skull
    You can sometimes buy it for 1,326 Robux
    Great for bosses
    Has a low range, but the DPS is decent
    Not great for PvP

    Smoke Pole
    Buy from Retired Admiral (Burger Island) for 75x Burgers, 150 Gems, 450,000 Yen A fantastic early game weapon.
    Pretty easy to get, too.
    You can use this until you get a higher tier
    weapons, and it won’t disappoint.

    B-Tier

    Sword Obtainment Info

    Bisento
    Buy from Bisent Seller (Solo Island) for 15x Joystick, 20,000 Gems, 3,000,000 Yen A good weapon, but you get it much later in the game.
    Does more damage than the Smoke Pole, but the cooldowns aren’t great.

    Dark Blade
    Buy it for 326 Robux Extremely mediocre, considering you can only get it by swiping.
    Only worth getting if you are just starting out and don’t want to grind.

    Soulcane
    Buy from Good Zombie (Zombie Island) for 10x Bone, Skeleton Head, 400x Gems It’s not a good weapon, but it can freeze enemies, which is amazing.
    Great if you are in a party.

    C-Tier

    Sword Obtainment Info

    Pipe
    Buy from Pipe Seller (Burger Island) for 30x Burgers, 150 Gems, 450,000 Yen Low damage, but ok abilities
    A bit better than the starter Katana

    Katana
    Buy from Katana Master (Starter Island) for 20x Ice Cream, 5,000 Yen Pretty much your starter weapon
    Decent when you consider how early and
    easily you can get it.
    You should still switch to a better weapon ASAP.

    D-Tier

    Sword Obtainment Info

    Dual Katana
    Buy from Bone Collector (Zombie Island) for 15x Bone, 200 Gems, 750,000 Yen Just bad in every way
    Low damage, bad abilities
    Don’t bother with this one
    (at least until it gets a buff)

    There you have it. All swords currently in Universal Piece, ranked accordingly. Have fun swinging those blades, and if you haven’t already, check out our Universal Piece codes for some cool in-game freebies.


    The Escapist is supported by our audience. When you purchase through links on our site, we may earn a small affiliate commission. Learn more about our Affiliate Policy


    Source link