After an emergency call from the leaders of the world, the team discuss the adorable area control game Bunny Kingdom, give some tips on teaching games to the uninitiated, and guest game guru Jenny Garner brings in Patchwork.

After an emergency call from the leaders of the world, the team discuss the adorable area control game Bunny Kingdom, give some tips on teaching games to the uninitiated, and guest game guru Jenny Garner brings in Patchwork.

Illusions of Glory: The Great War on the Eastern Front (“IoG”) is a card-driven game simulating the First World War in eastern Europe. Its first edition was published by GMT Games in 2017 after the award-winning Paths of Glory, which simulated the entire war in Europe and the Near East in army/corps scale. IoG also came after the popular Pursuit of Glory, which focused on the war in the Near East and the Eastern Balkans in corps/division scale. IoG’s corps/division focus displays the relative strengths and weaknesses of the opposing armies in greater detail than an army/corps treatment does.
For those of you planning to attend this year’s ConsimWorld Expo in Tempe this July, you can attend a “Learn the Rules/Play the Game” Session and experience the upcoming Second Edition of IoG.

In IoG, the Allied Powers (“AP”) player brings massive forces to bear against Germany, Austria-Hungary, and their allies in the east while trying to avoid a game changing revolution in Russia. The Central Powers (“CP”) player must defeat Russia, hold off Italy, and win the upper hand in the Balkans or face demoralization and rebellion at home.

Battlefield losses detrimentally affect the Troop Quality of major AP and CP combatants. Excessive troop losses and reinforcement call-ups will degrade their manpower pools and impair military capabilities. Territory losses may drain their National Will and cause domestic uprisings— which includes revolution in Russia’s case.
Strategy Cards give a player the choice of several actions—move units, make attacks, strategically redeploy, or rebuild damaged units. Each card also gives the player a choice between these actions and an historical event that provides a powerful and specific action (or combat advantage).

Cards give the player Operations (OPS) Points to use in activating spaces containing his units for movement or attack. OPS Points can also be used to strategically redeploy units. OPS Points appear in the upper left-hand corner of the card. If they appear in a yellow square, the Event is played also. If they appear in a red square, the card is a Combat Card whose capability can be used in attack or defense.

Separate sets of cards are provided to the AP and CP players. Each player increases his deck by elevating his War Status from Mobilization to Limited War, and then from Limited War to Total War. Since quite a few cards are discarded once their events are played, the momentum towards Total War builds as the game proceeds.

There are Summer, Fall, Winter, and Spring Turns representing 3 months apiece. However, this is where the similarity to Paths of Glory and Pursuit of Glory ends.

IoG can be played by more than two players. With team play, the dynamics of player decision-making and interaction add an enjoyable social element to the game. While this might lengthen the game, the fun of negotiations between players is worth it!
IoG simulates the drain casualties have on available manpower and a nation’s officer corps. As Russian (“RU”), German (“GE”), Austro-Hungarian (“AH”), and Italian (“IT”) casualties mount, the drain on their national manpower reserves and officer corps is reflected by a Troop Quality Index.

Each of these Nations have a Troop Quality Marker that starts at a maximum value. When a GE, AH, RU, or IT corps is destroyed, the Troop Quality marker of that Nation moves –1 on the General Records Track (but the destroyed LCU can be rebuilt). When a GE, AH, RU, or IT corps is permanently eliminated, the Troop Quality marker of that Nation moves –1 on the General Records Track (and the eliminated LCU cannot be rebuilt). If a Strategy Card is played to bring GE, AH, RU, or IT reinforcements onto the mapboard, the Troop Quality marker of that Nation moves –2 on the General Records Track. These reductions will soon vex the affected player.
When the RU, IT, GE, or AH Troop Quality marker reaches “Poor Troop Quality”, reinforcements of that Nation are placed on the mapboard with a step reduction for each unit. Things do not get better—they can only get worse!
IoG simulates political upheaval in Germany and Austria-Hungary, in addition to Russia. The loss of home Victory Point spaces and Events may cause Rebellion to break out in Russia, Germany, or Austria-Hungary. These are represented by a National Will Index.

Each of these Nations has a National Will Marker that starts at a set value, moves -1 on the General Records Track for each home Victory Point space that it loses, and moves +1 for every home Victory Point space recaptured from enemy control. The National Will Level for each of those Nations is also affected by Events.
If downward movement of a National Will Marker reaches the “National Demoralization Level”, rebellion may break out in the that Nation. Rebellion is represented by placing two Uprising Units in that Nation during the Rebellion/Revolution Phase. Uprising Units can cut off supply to combat units, cause CP governments to collapse, and trigger the Russian Revolution.

If all VP spaces in Austria-Hungary are occupied by Uprising Units in the War Status Phase, Austria-Hungary collapses and is out of the war. (Germany does not collapse.) If there is an Uprising Unit in Russia after the RUSSIAN FOOD RIOTS card is played, then comes the Russian Revolution . . . or does it? The RUSSIAN REVOLUTION card must still be played.

IoG does not make success of the Russian Revolution inevitable. The game represents the revolution with a Russian Revolution Track having four Stages. During each of the following Rebellion/Revolution Phases, the Revolution Marker moves ahead one Stage on the Russian Revolution Track.

However, the Russian Revolution cannot advance Stages if all Uprising Units on the mapboard have been destroyed. This places Russia in a dilemma—either divert decreasingly effective combat units from facing the Central Powers or leave revolution back home unchecked.
As the Russian Revolution enters each Stage, the following occurs:
The AP player can suppress the Russian Revolution entirely by playing a LONG LIVE THE TSAR! card when all Uprising Units are destroyed. After it is played, Russian reinforcement cards can again be played, and Russian combat units can again receive Replacement Points.

The revolution remains suppressed until the CP plays a FALL OF THE TSAR card when Uprising Units are again placed in Russia. The Russian Revolution restarts, but still cannot advance Stages if the AP player destroys all the RU Uprising Units on the mapboard before the next Rebellion/Revolution Phase.
The Central Powers must still fight Italian, British, French, and Serbian units capable of capturing Victory Point spaces. If the CP player presses his advantage against Russia too far by triggering a revolution, the AP can play the TREATY OF BREST-LITOVSK card to end the Russian Campaign, send German units to the Western Front, and weaken the Central Powers’ ability to fight other AP armies in the East. The decision to play TREATY OF BREST-LITOVSK as an Event is momentous because the AP player loses the use a card worth 5 OPS Points or, alternatively, 10 Replacement Points!

Although TREATY OF BREST-LITOVSK takes Russia out of the war, it has another role to play against a CP victory. When the CP plays RUSSIAN WAR WEARINESS, the game comes closer to Armistice—and perhaps a CP victory-point win—at the end of each Turn. This effect is canceled by playing TREATY OF BREST-LITOVSK.
(1) The mapboard has been revised to show terrain effects on combat and place names more accurately. There are also more Victory Point spaces.
(2) Casualty and reinforcement card effects on Troop Quality have been moderated so that reinforcement step reductions do not occur until 1916, as is historically accurate.
(3) The player taking fire must apply as much of it as possible to his units using adaptable guidelines instead of clunky scripted procedures.
(4) A unit that is Out-Of-Supply can still move or attack, but its movement and attack strength are minimized.
(5) A unit that can only trace a supply line to Supply Sources of other friendly nations can still activate for movement or attack, but at a cost of one additional OPS Point.
(6) Only German, Austro-Hungarian, Italian, and Serbian units may attempt to build a Trench in a Mountain space, only one trench building attempt may be made per space in an Action Round, and entrenching is attempted by rolling a die. A unit can move or entrench in the same Action Round, but not both.
(7) A defending unit forced to end its retreat in an overstacked friendly space is not destroyed, but is reduced by one step and continues retreating to the nearest friendly-controlled space or region where it will not overstack.
(8) Defending units in Forest, Mountain, or Swamp spaces can reduce a two-space retreat by one space by taking a step loss from any of those units, but a one-space retreat from those spaces cannot be stopped except by Combat Card.
(9) Defending units in Trenches do not have to retreat, and a retreating unit taking a two-space retreat can stop if its first retreat space is a Trench.
(10) Reduced-strength units that take another step loss are destroyed and go into the Replaceable Units Box. Units destroyed by combat when Out-Of-Supply are permanently eliminated. Reduced-strength units that are Out-Of-Supply during the Attrition Phase are permanently eliminated. Reduced-strength units that are forced to retreat into or through a space that contains enemy units, an unbesieged enemy Fort, or an Uprising Unit are permanently eliminated.
(11) A unit can move or assemble/disassemble in the same Action Round, but not both.
(12) Division-sized units in the Replaceable Units Box that are rebuilt go immediately into the Reserve Box. They can use Strategic Redeployment to go from the Reserve Box onto the mapboard or they can use Strategic Redeployment to go from the mapboard into the Reserve Box.
(13) Units that move or retreat into neutral nations are immediately interned to the Replaceable Units Box, but Serbian and Montenegran units entering neutral Albania are not interned until the end of the Action Phase and may use Strategic Redeployment to leave neutral Albanian ports.
(14) If a nation’s National Will reaches the National Demoralization Level before the Rebellion/Revolution Phase, the opposing player can immediately place two Uprising Units in separate spaces and/or regions of that Nation.
(15) If a Strategy Card cannot be played for its Event, it can still be played for its War Status Points.
These features create a play-balanced game that is relevant, fun, exciting, challenging, and tense. You will enjoy playing the Second Edition of Illusions of Glory: The Great War on the Eastern Front.
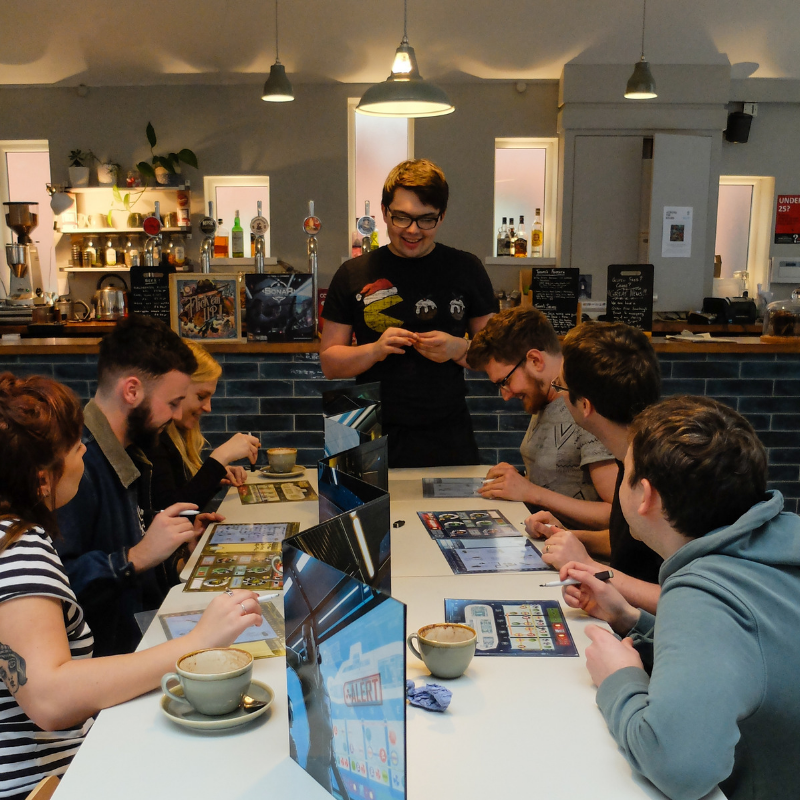
My job is fun. I don’t mean that I have fun doing my job (although I do), but rather that I am in the business of fun. After a year of working at the Treehouse, I’ve helped hundreds of customers find the games they need at any given moment. It really is the best part of my job, but it’s far from easy.
Thing is, and I’m sure this won’t be a surprise, there are so many games to choose from. Our library is edging its way towards 500 titles, a drop in the ocean compared with the astonishing number in existence (Board Game Geek recently passed the 100,000th game in its database), but more than enough to make deciding what to play a substantial challenge. When you’re so spoilt for choice, who is there to help you navigate the treacherous waters of indecision? Enter the courageous and handsome staff members of The Treehouse! One of our main jobs is recommending games for groups, and we’ve gotten really good at working out what kind of group is going to enjoy what kind of game. It’s part interrogation, part psychological puzzle, and part test of games knowledge.
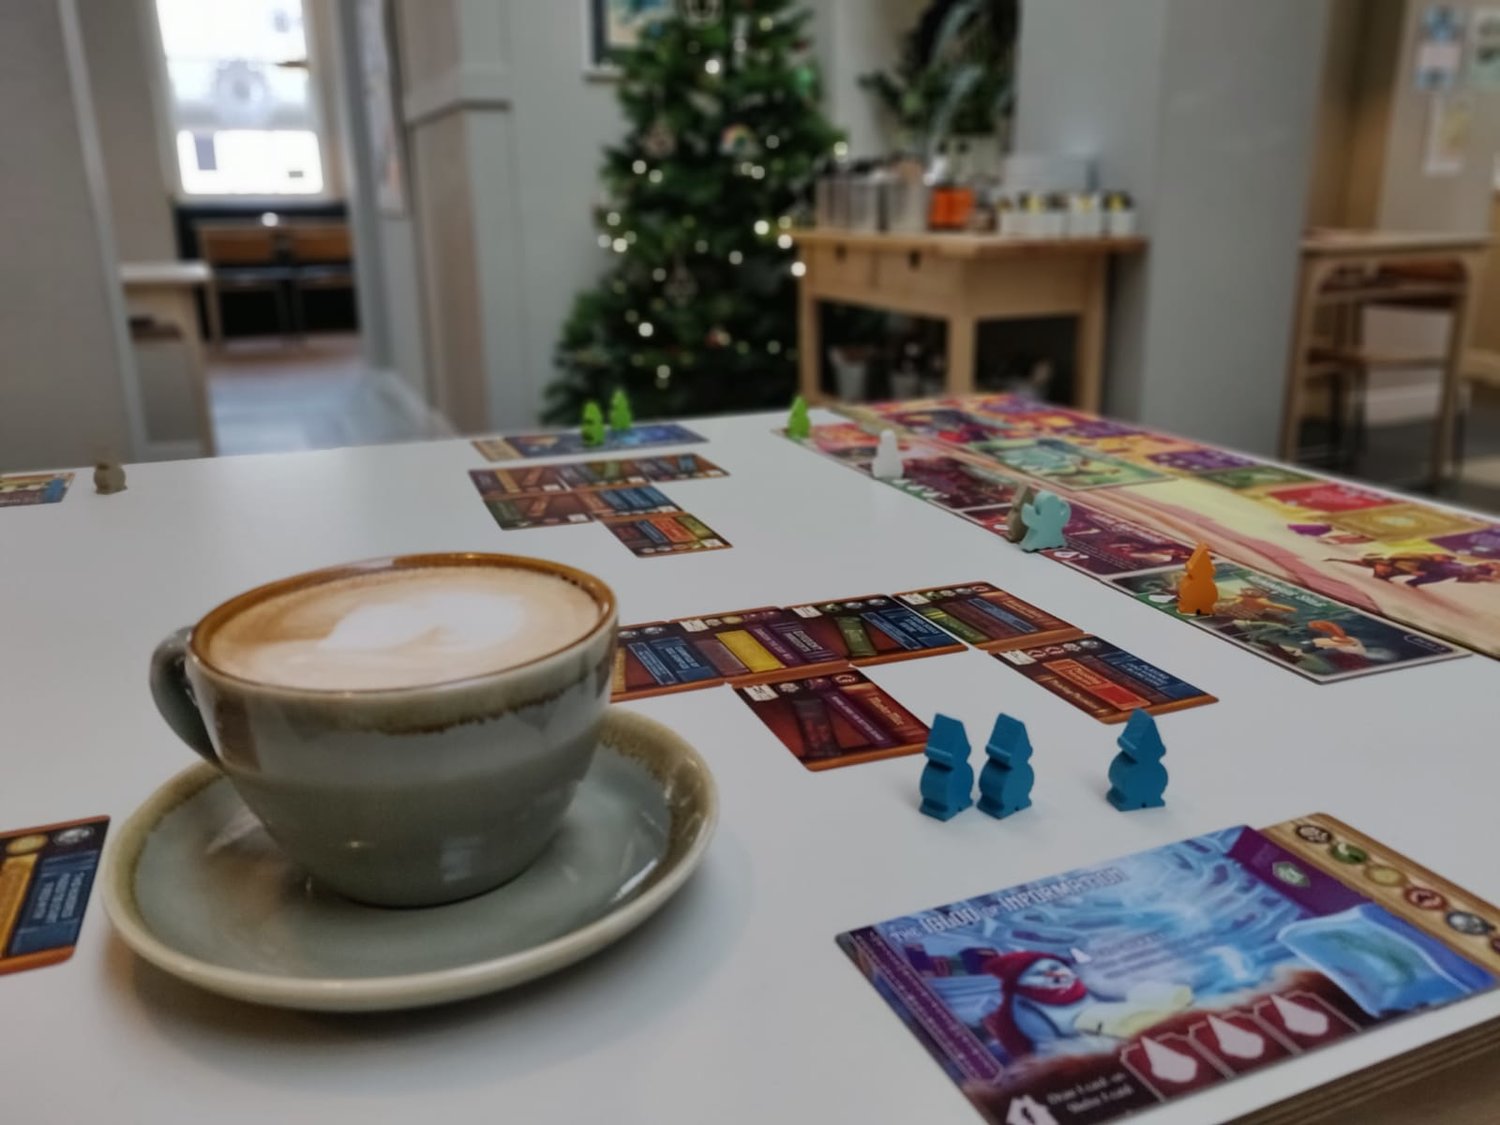
The Treehouse library
To begin with, we have a lot of old standbys. These are games that we feel confident recommending to a majority of groups, for a variety of purposes. We often recommend a quick game to start people off – Ghost Blitz, a real-time deduction game of grabbing, is a reliably silly time for most sizes of groups, and is both easy to understand and loosens people up. Most of our customers are from outside the gaming community and are understandably a little intimidated by the towering wall of cardboard and rule books that is our library, so games which offer a simple concept that people can’t help but get invested in are invaluable. Tsuro and Timeline fit similar niches, so we find ourselves recommending those a lot.
Things get harder when it comes to the “main course” – the game that customers will spend the majority of their time playing. This depends a lot on the group – it’s not uncommon for customers to come to us sceptical about this whole board gaming thing (I’m with them, it’ll never catch on) so we try to gauge their mood and choose appropriately. A five-player group in the mood for something lightly strategic? Perhaps Colt Express, Escape From The Aliens In Outer Space, or Forbidden Desert. Two customers who look like they might be on a first date? Either something co-operative (Pandemic is always reliable) or hilariously aggressive (Azul), nothing in between. Established couples get either Sherlock Holmes: Consulting Detective or Fog of Love, if they have enough time. That’s another big factor – do they want to spend two hours on a single game on a night out? More often than not, the answer is no, so we usually shy away from the heaviest games.
By far the easiest group to recommend for is big parties. Seven or eight is the magic number, because games like Deception: Murder in Hong Kong, Codenames, Spyfall, and (if they’re a little tipsy) Dead Last are guaranteed to draw players in . If anything I wish there were more party games at the lower player counts – something like Secrets is close, and works well at four players, but is often too complex. That’s not to say the group who are playing it couldn’t understand it, but that their interest might wane faster than understanding dawns. I always worry a little bit about patronising customers, but we’ve found that a lot of them genuinely want to be reassured, and if they’ve had a good time by the end then I think I’ve done my job okay.
“Somebody’s lying here, and it might be me…” Deception: Murder in Hong Kong
Of course, people do actually have to accept our advice for this to work out. Because this is the UK, it’s more common that we approach befuddled-looking customers at the shelves rather than them coming to us, and sometimes they’ll defer our offer, saying that they’re fine. That’s okay, of course, and it saves us a job, this scenario often ends with the group picking up Monopoly or Scrabble, and then not returning to the cafe because they haven’t gotten anything out of it they couldn’t get at home. That always makes me a little sad, but not as sad as when I’ve recommended and taught a game to see it returned to the shelves five minutes later in favour of Guess Who. Again, that’ll always happen sometimes, and we’re not always going to find the perfect game to engage everyone first time, but it always feels like a missed opportunity.
Heavy gamers rest assured, the big games get their dues too. Last year we had a lot of groups come in specifically to play Scythe – they had read about it online and wanted to give it a try . I always try to recommend TIME Stories to groups of three or four, as it’s perfect for an environment where you can feel good about only playing it once. As the Shut Up & Sit Down review said, that’s a hard game to justify buying at full price, but with a board games cafe you don’t need to! I’m always trying to foist Alchemists onto groups who say they want something weighty, and they always start off looking intimidated by all the actions and are super intensely into it by the end.
But those groups are few and far between, and we’re cautious to recommend complex games unless people specifically ask for them. The reason why goes back to the experience level of customers – if they’re going to be bored they aren’t going to come back. Yes, sometimes a group comes in knowing exactly what they want to play – we memorably had a stag party last week who spent nine hours playing Twilight Imperium – but this is a small minority of our customers. A larger number have had a go at Catan or Ticket to Ride, and they want to know what’s next. Others are being dragged along by a single enthusiastic colleague/family member, and they don’t know or care to know the first thing about board games. Many of you will have been that enthusiastic hobbyist trying to bring people into the cardboard fold, so a lot of these reactions will be familiar to you. I think that impulse to get people excited about board games is so common because it’s an inherently social activity – you need people to play with you, and the more the better – so it makes sense that evangelism is such a big part of the hobby.
Me in evangelical mode, teaching Two Rooms and a Boom
At work, I try to do it every day – take at least one person who walked into the cafe expecting chess and Monopoly, and send them away enthusing about Sagrada, Flick ‘em Up, or Sheriff of Nottingham. It doesn’t always happen, but when it does it’s like a switch has been flicked . First impressions are so important, and that’s why we spend so much time thinking about how to ease out customers into the hobby. The earlier comparison to libraries is appropriate, because the thing that make libraries great (especially in the modern age) is the staff. People who know their shelves like the back of their hands, and are always willing to help find what you want, even if you don’t know what you want. Yes, machines can do that too, but only to a certain extent. When I was younger I wanted to be a librarian (because of Matilda, obviously), and I seem to have stumbled toward that direction quite by accident. Which really begs the question, where’s my board-game-based telekinesis? Eh Dahl? Eh??
Patrick Lickman
After a touching father-son moment, the team sing the praises of Century: Eastern Wonders, interview megagame designer Jon Gracey, and guest game guru (and local astronaut) Joe Bernard brings in the surprisingly sleek Small World.
Links:


Even if I did have magical telekinetic board gaming powers, I wouldn’t know how to use them. Sure, I could cheat at games, cause havoc with components, and shuffle every deck of Dominion at the same time, but I wouldn’t make any friends doing it. And without friends, board gaming isn’t much fun.
Board games are intensely social, almost by definition. Solo games do exist, but they’re still fairly niche, and as standard, games require communication between multiple people in the same room. That isn’t true of all hobbies – some can be done solo (fitness, art) and others can be done online (video games, arguing). And while online adaptations of games and applications like Tabletopia are gaining ground, the vast majority of board gaming is still done in person.
This is, by and large, a good thing. This isn’t about to become a society-is-dying-because-internet post, but it’s undeniably pleasant to treat board gaming as a means of bringing people together face-to-face. This is something that as a hobby it does perhaps uniquely well, and a feeling that it’s tough to replicate online. The big downside to this aspect is that it introduces a prerequisite for participation: having a group to play with.
Maybe you just moved to a new city and you don’t know anyone. Maybe your friends are not the board-gaming type (much as I want to convert everyone I know, I’ve come to accept that some people just… don’t like games). Or perhaps the problem is even worse – you do have gaming friends, but you’re all so busy with other things that it’s impossible to get together to play. This is normally Kevin’s fault. Damn it, Kevin.
At The Treehouse, we’ve thought about this quite a bit. People come in semi-regularly to ask if we have a way to find them some players, and over the last year we’ve tried a few different methods of helping them out.
Before The Treehouse opened, owners Ruth & Andy hosted a monthly board games evening called Across the Board at the Showroom Cinema, for exactly this purpose. Each month would have a theme, from “Go Team!” (cooperative games) to “Art & Design” or my personal favourite, “Crime!”.
After a tour through victory, the team discuss strategy and lasers in Khet, recall their experiences with escape rooms, and guests Ruth and Andy Haigh bring us deep underground in Sub Terra.
Links:

Except when it isn’t. Because Reddit as a whole incorporates some less-than-inclusive viewpoints, it’s generally rare that I like what I see on the site. /r/boardgames suffers less from this than other areas, since board gaming isn’t the most politically charged subject, but it’s still an unfortunate feature of the website. On top of that, while Reddit’s news is comprehensive, it’s also ephemeral – it doesn’t serve as a really source of information much older than a couple of days. The threads are all archived, of course, but Reddit doesn’t make it easy to find them.
There are a ton of different board game review websites out there, so I thought I’d call out a few of the most popular and my personal favourites. The best reviewers in board gaming tend to follow the same rules as in other media – they clearly state their own view with the benefits of experience and authority, transparently admit their own blind spots (because everyone has them), and above all entertain their audiences.
Shut Up & Sit Down are the kings, no question. Their videos are sheer delights of whimsy, mixed in with loveable personalities, maddeningly dumb running gags, and startling good insights into board gaming. Not everyone agrees with their reviews (they more often appeal to the newer gamer than the hardcore, particularly in their choice of game) but nobody can deny that the craft they put into their work is without equal.
The Dice Tower, on the other hand, are certainly the reviewers closest to global recognition in gaming. Since 2005 Tom Vasel and co. have been a respected voice in the community, with their seals of approval and excellence gracing the cover of many modern games. In fact, publishers Arcane Wonders have released a line of games partnered with The Dice Tower called Dice Tower Essentials, games considered necessary for any collection. Their ideas are generally well-reasoned, and the sheer quantity of content they have produced makes for an enticing catalogue.
No Pun Included follow more in the vein of Shut Up & Sit Down, with witty and likeable hosts at the fore of reviews and sketches. They’re also very willing to play with the form, meaning you never quite know what you’re going to get from an NPI review.
Meeple Like Us do primarily written reviews, of mostly older games, but have a special focus on accessibility. Every week, as well as a typical review, they publish an “accessibility teardown”, detailing the various ways in which the game helps or hinders players with disabilities such as vision impairment, communication barriers, cognitive difficulties, and so on. The teardowns are remarkably detailed, and make for fascinating reading. When thinking of board gaming as a cohesive community, Meeple Like Us ought to be a pillar – or at least get more recognition than they currently do.
This list could keep going, of course. There are no shortage of great content creators out there, as well as organisations and services dedicated to teaching people about gaming. But if I did this article would be a million words long. There’s a whole world out there to explore, but hopefully this gives you a place to start. And as always, the friendly staff of The Treehouse are always around to answer your questions. After all, it’s just our job!
by Patrick Lickman
After a PR disaster, the team fall in love with KeyForge, give some tips on the best family games for Christmas, and gamble their docks away in Port Royal.
After a mixup with head office, the team get cozy with Ex Libris, get frugal with a cheap-to-free board game collection, and get positively warlike with 7 Wonders.
After a trip through time, the team carefully balance their views of Tokyo Highway, fail to solve the problem of hype, and discuss the perfectly imperfect Dominion.