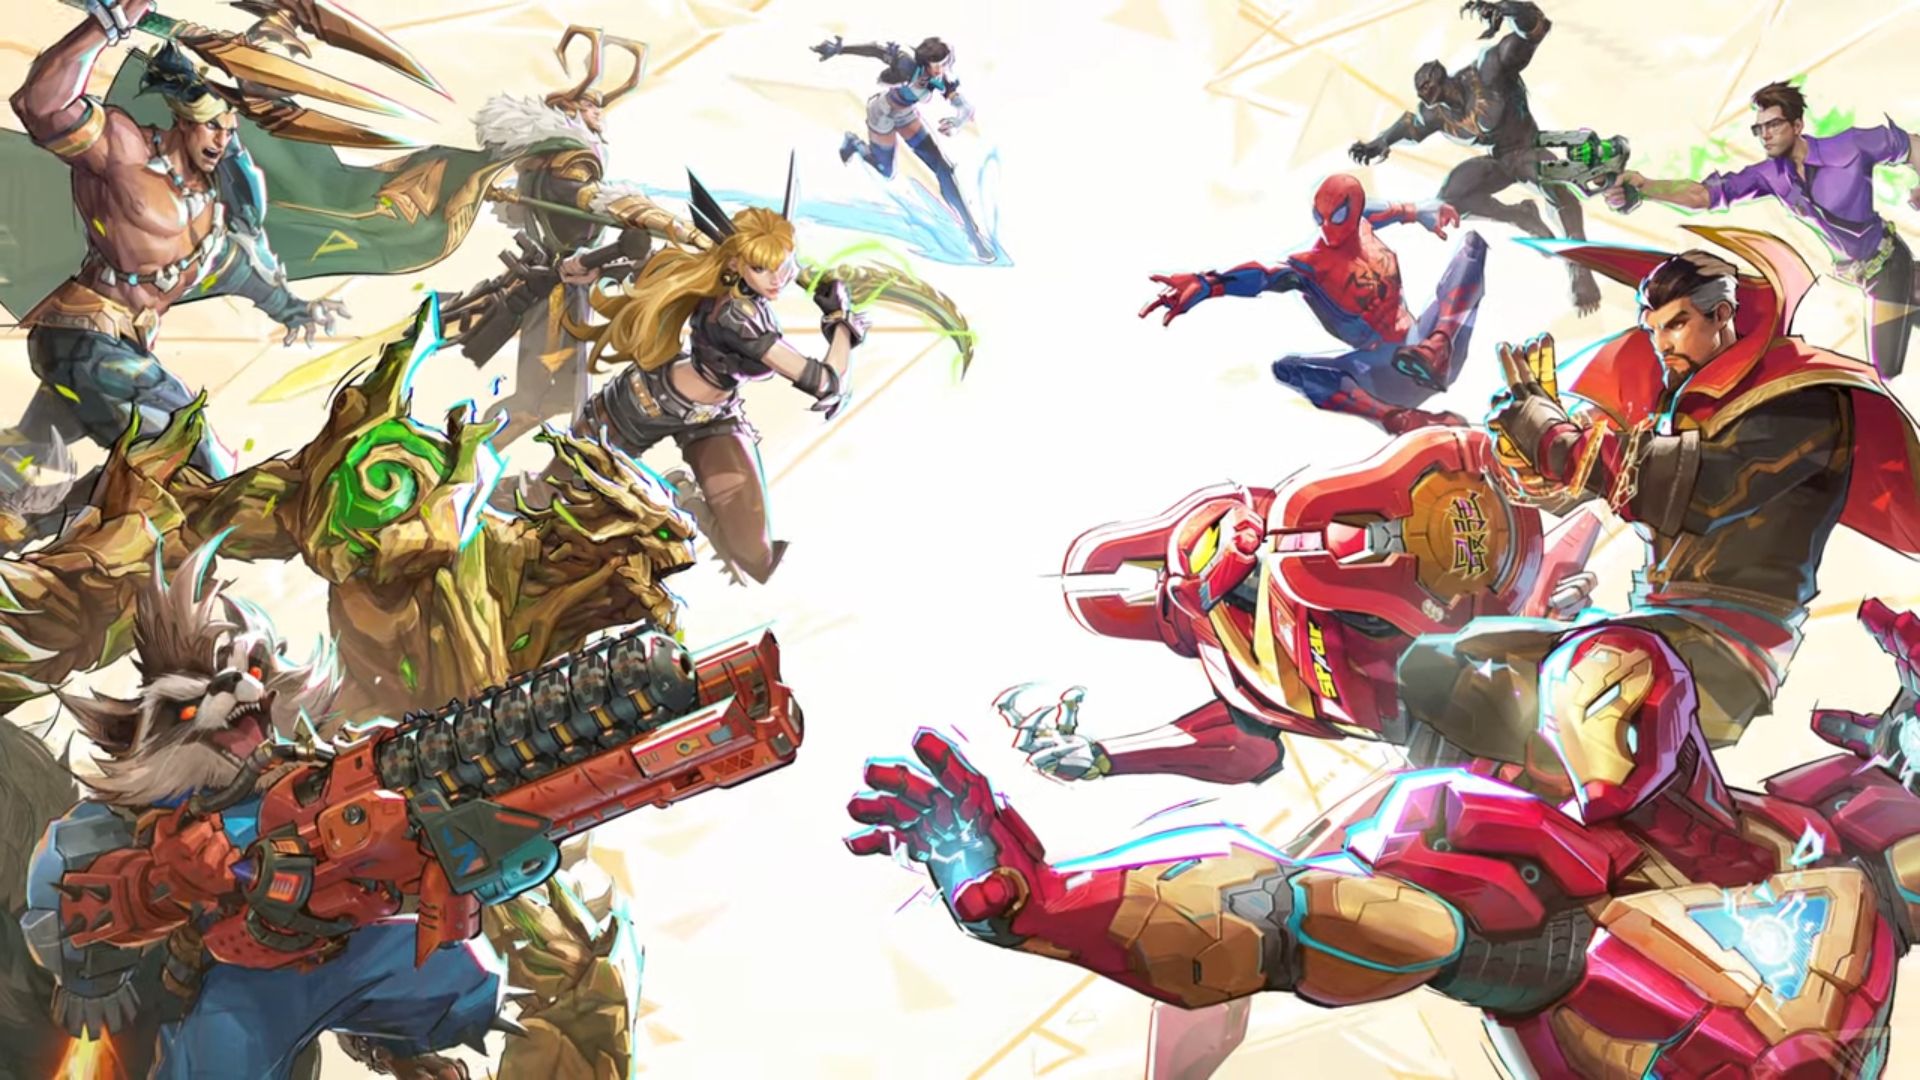
Who are the Marvel Rivals characters? With any new Marvel game comes playable Marvel characters, and in Netease and Marvel Games’ new 6-vs-6 shooter, there are plenty to choose from. Spanning across some of the biggest and best comic book series, you can pick from a growing list of legendary heroes and villains.
There are 37 Marvel Rivals characters as of mid-Season 1, each bringing their unique flair to the multiplayer game. Check out all the upcoming characters at the bottom of this list to see who’s joining the cast in Season 2 and beyond, as well as the latest leaks. Who will you decide to play as in Marvel Rivals in your bid to be the best around? This primer aside, our Marvel Rivals tier list can also help you make that decision.
The Marvel Rivals characters are:

Adam Warlock
If you thought Adam Warlock was OP in the canon, wait until you see him in-game. Using his protective light, Warlock can heal allies, dish out damage, and shield himself from harm within his quantum cocoon. What’s going to make him busted, though, is his team-wide resurrection, a mechanic who made Overwatch’s Mercy a must-use support until it eventually got canned from her kit.

Black Panther
Black Panther, also known as T’Challa, brings agility to the field, able to use his powered suit to rapidly scour the battlefield and address threats. He attacks with claws, meaning close-up combat will be where he excels.

Black Widow
Master assassin, super spy, and a world-class marksman, Black Widow makes her mark on the battlefield with her range of equipment and what looks like a rather large sniper rifle. A ranged character, Black Widow can direct the flow of a fight from the backline, picking opponents off with ease.

Captain America
Joining best-friend-turned-enemy-turned-friend-again, the Winter Soldier, Captain America joins the cast, complete with his trusty shield. He storms onto the battlefield, charging shield first as he blocks incoming attacks and projectiles. The shield can also be used as a projectile, capable of interrupting abilities when timed correctly.

Cloak and Dagger
You get two characters for the price of one with Cloak and Dagger – the pair were forever connected after an illegal drug test gone wrong, Cloak and Dagger have had many forms over the years – sometimes vigilante, sometimes on the side of good, sometimes at odds with one another. They act as one, and even though Cloak sometimes falls foul of the inherent darkness that surrounds them, Dagger is always there to lend a helping hand.

Doctor Strange
Doctor Strange seems able to throw spells and use his cape to traverse aerially. The former neurosurgeon has mastered the mystic arts and will use that to his advantage in combat.

Emma Frost
The White Queen has arrived, and to nobody’s surprise, Emma Frost is debuting as a Vanguard. Similarly to Cloak & Dagger, Emma Frost has two forms: human and diamond, which have differing movesets.
While in human form, Emma Frost can channel an Iron Man-style beam as her primary fire, and set up a diamond totem that appears to act similarly to Moon Knight’s Ankh. She can also send out a barrier to support allies similarly to Invisible Woman, though this doesn’t appear to be targeted.
While in diamond form, Emma Frost becomes more of a traditional brawler, foregoing her psychic beam for crystalline fists of fury. She can also grab enemies before kicking them away. Emma Frost’s ultimate is an AoE mind control ability that forces enemies to walk towards her while taking damage over time.

Groot
Groot’s trailing, twisted roots can lock enemies in place before his spiked thorns deal AoE damage. He can also put up a wall to protect allies. If you can find a balance between offense and defense, Groot can be an invaluable addition to any team.

Hawkeye
Clint Barton makes his debut in Marvel Rivals, featuring a considerably cooler design than his MCU counterpart (no offense, Jeremy Renner). Overwatch players will be familiar with Hawkeye’s playstyle, sporting a deadly bow and arrow capable of dealing massive damage if you can land critical headshots. He also wields a sword to repel incoming projectiles, and it can be used to push enemies off platforms. Hawkeye’s ultimate gives him access to an instantly charged bow, allowing you to fire off arrows at lightning speed.

Hela
As the Goddess of Death, Hela wields supreme control over the fallen souls residing in Hel. With a haunting whisper and a murder of crows, the queen of the underworld gracefully reaps the souls of her enemies without an ounce of mercy.

Hulk
The Hulk serves as a D.Va-like hybrid character in Marvel Rivals, being able to return to his Bruce Banner appearance or Hulk out to smash through enemies with giant, overpowered fists.

Human Torch
Aerial DPS threat Human Torch is getting his flame on in-game. Not only can he rain down fire on enemies, but he can also connect fireballs to form a fiery containment field, before crashing down into it full-force. The big one is his team-up ability with Storm, which turns her ultimate into a fearsome firestorm.

Invisible Woman
Having been exposed to unhealthily high levels of cosmic radiation alongside the rest of the Fantastic Four, Susan Storm gained the ability to create forcefields and, as per her moniker, turn invisible. The tricksy Strategist is one of the tougher Marvel Rivals characters to master, but if you can weave protective shielding for your allies between stints of invisibility, you’ll be an absolute nightmare to catch for the opponent.

Iron Fist
After Lin Lie has the power of the Iron Fist bestowed upon him, his task of protecting K’un Lun from the Timestream Entanglement begins. It’s okay if you don’t know what any of that means – we’re a little fuzzy on the details, too – what you do need to know is that Iron Fist is a master duelist, and can use his mastery of the martial arts to take down any opponent in a one-on-one fight.

Iron Man
Iron Man can use his repulsor blasts to reach vantage points most others on the roster can’t, leaving him able to attack with an advantage. Flanking and offering a different angle of attack is key to making this agile DPS character work.

Jeff the Land Shark
Who is Jeff the Land Shark, you ask? Well, this adorable little shark has had a wild ride, from being adopted by Gwenpool to spending time with Deadpool and later Kate Bishop too. Though he’s not the most well-known hero on the Marvel Rivals roster, he’s by far the cutest.

Loki
Loki can use deception and trickery to his advantage, morphing into his opponents to mimic their abilities – he is the Norse god of mischief, after all. Similarly to the Invisible Woman, Loki can use invisibility to his advantage, leaving decoys to take the heat as he repositions either to where he can best support his team with healing, or where he can backstab his enemies.

Luna Snow
Luna Snow can use her ice abilities to freeze enemies and skating agility to evade tricky situations. She can alternate between a healing and a damage-botting aura – think Lucio from Overwatch.

Magik
Magik’s sword looks to be a formidable foe, and she can metamorphize into a stronger form to increase her damage output. As a powerful sorceress, Illyana Rasputin finds her place by casting spells to disrupt her opponents.

Magneto
Magneto, as the leader of the Mutant Brotherhood, will use magnetism to his advantage on the battlefield. A tanky character, Magneto can absorb incoming damage and use it to hurt your enemies.

Mantis
Mantis joins as another support superhero from the Guardians of the Galaxy universe. She uses the power of emotion to both deal damage and protect her allies, combined with the deadly martial arts she has mastered.

Mister Fantastic
Reed Richards might not get the kudos he deserves due to the prominence of Banner and Stark in the MCU, but Mister Fantastic completes the genius trio and then some in the comics. In Marvel Rivals, it’s not just his ever-expanding cranium you’ll have to watch out for, but his stretchy body can clobber enemies from afar, CC them, and even block projectiles before sending them right back where they came from. That’s plenty of utility for a Duelist.

Moon Knight
Marc Spector, the avatar of the Egyptian Moon God, Khonshu joins the battle using ancient weaponry to take down anyone in his path. Sporting crescent darts, Moon Knight can hurl sharp objects toward opponents with ease, and he’s equipped with the moon blade to handle anyone who gets within melee range. Moon Knight’s ultimate opens a portal to space, allowing him to rain down Khonshu’s wrath onto anyone directly underneath the portal.

Namor
Namor’s deadly trident allows him to wield water itself, using it to force enemies into vulnerable positions ready for allies to take advantage of the situation with their damage and abilities.

Peni Parker
Peni Parker joins the roster from the Spiderverse. Originally designed by none other than My Chemical Romance’s Gerard Way, she has a psychically powered mech suit called SP//dr to leap into and attack foes, as well as allowing her to take increased incoming damage.

Phoenix
Shift over, Human Torch, because the new hottest property on the Marvel Rivals roster has arrived. That’s right, Jean Grey has come to an accord with the Phoenix in this timeline, and this has only bolstered her immense psychic powers and capacity to utilize Phoenix Force.

Psylocke
Sporting a range of weaponry, Psylocke comes to the battlefield equipped with killer tools to combat enemies at any distance. She can immediately close the game in the middle of a fight with her dash, a strong tool when it comes to ambushing opponents. Speaking of ambushing players, Psylocke can temporarily turn invisible to make her way through enemy lines.

The Punisher
Frank Castle, better known as The Punisher, is a violent vigilante who lives up to his name in Marvel Rivals as a deadly damage dealer. Easy to get to grips with, The Punisher is very much intended as Marvel Rivals’ version of Soldier 76 from Overwatch, capable of switching between two weapons, throwing smoke, and spawning a turret.

The Thing
It’s clobberin’ time, baby! A rock-solid Vanguard, The Thing matches raw tankiness with big, brawlers fists, turning him into a one-Thing army. Ben has a standard and charged punch, a rush that knocks up foes and grants shielding, a big leap, and a ground smash ultimate that spits up rocks and enemies. Like Hulk, The Thing can throw Logan, which makes for a pretty entertaining game of Wolverineball should both Vanguards feature on the same team.

Rocket Raccoon
Rocket Raccoon’s fire weapons will cause blasts and burns to opposing teams, no matter their size. Rocket can alternate between damaging abilities, and abilities that both heal and boost ally damage.

Scarlet Witch
A powerhouse in the comics, Scarlet Witch, also known as Wanda Maximoff, has no problem keeping up with the game’s heavy hitters. If we’re comparing things to Overwatch, she’s a damage dealer version of Moira. Able to wield chaos magic to siphon energy from nearby enemies and charge more powerful attacks, as well as hover around the map, Scarlet Witch makes for a terrifying opponent.

Squirrel Girl
A lot of the characters in Marvel Rivals possess destructive, flashy powers that strike fear in the hearts of their opponents. Well, Doreen Green possesses the power of the common squirrel – but that doesn’t mean she shouldn’t be feared. The unbeatable Squirrel Girl wields a slingshot and commands a small army of squirrels to take down anyone who dares stand in her way.

Spider-Man
Spider-Man is one of the more instantly recognizable superheroes on offer in Marvel Rivals. His notorious agility wenables him to swing across the battlefield and get into the most advantageous positions quickly and efficiently. His webs can also be used to limit opponents’ movement.

Star-Lord
Peter Quill lives to dazzle his foes on the battlefield with his signature swagger. As his element guns pain arcs of devastation, his acrobatic moves sail through the sky with unrivaled style. With performances this spectacular, it’s no wonder that Star-Lord is so legendary!

Storm
Storm can control storms to deal damage and support her team with damage or speed buffs. This member of the X-Men stands out from the rest of the Duelists as a great support-DPS hybrid.

Thor
Ah, the God of Thunder himself. It came as know surprise when Thor was announced for the launch roster, though his trickster brother beat him to the punch. With trusty Mjolnir and the power to channel lightning, Thor can cook up a storm on the battlefield.

Ultron
The Age of Ultron arrived in Season 2.5, and the wayward child of Stark and Banner (at least, in the movies) really puts the AI in ‘villain.’ Even though he operates as a Strategist, Ultron is a veritable harmacist, utilizing his army of drones to harass enemies while keeping his allies safe.

Venom
Everyone’s favorite malefic symbiote is here, and Venom is the perfect Vanguard if you’re looking to blend mobility with crowd control. Not only can he grab multiple enemies at once, but he can also swing high above rival combatants before initiating a Diving Strike, knocking up those he hits.

Winter Soldier
Equipped with his special vibranium arm, the Winter Soldier looks like an aggressive character, able to grab enemies from across the battlefield like a grapple hook. As you might expect from an arm made of metal, it also packs a punch, giving the Winter Soldier a way to launch any enemies with an uppercut to the face. That’s not all, his arm looks like it has been infected by an alien symbiote, revealing tentacles that can whip enemies. Finally, he also has a powerful pistol, ready to blast away anyone who gets too close.

Wolverine
Everyone’s favorite bad-tempered amnesiac is making Marvel Rivals his home. Wolverine uses his razor-sharp claws and unfettered aggression to defeat his enemies, with regeneration his key to staying alive no matter the opposition. Wolverine has had a team-up ability in the comics for quite some time – the fastball special – and we’re treated to that in Marvel Rivals, with the Hulk able to throw Wolverine into battle.
Upcoming Marvel Rivals characters
The heroes coming to Marvel Rivals in the future are:
Blade
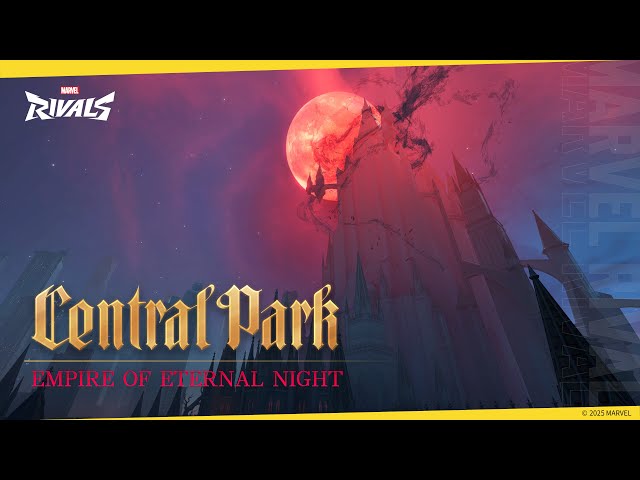
Blade was briefly shown in the ‘Empire of Eternal Night: Central Park’ map reveal trailer embedded above, lending credence to leaks at the time that claimed he was coming to the game. With the arrival of the Season 3 trailer, it was confirmed that the duelist would join the roster, though you’ll have to wait until mid-season to unleash the coolest vampire hunter in the game.

All leaked Marvel Rivals characters
All characters originally mined from the Marvels Rival alpha by X user, Miller Ross, have either come to Rivals in a playable capacity or have been showcased in-game at some point.
Since then, plenty more characters have been spotted lurking in the files, though it’s currently unclear if they’re going to become playable in the future. Some have even been marked as potential red herrings thrown in by the devs to throw dataminers off the scent. Nonetheless, we’ll note them here.
The leaked Marvel Rivals characters are:
- Amaranth
- Angela
- Beast
- Captain Marvel
- Colossus
- Cyclops
- Daredevil
- Deadpool
- Forge
- Gambit
- Hit-Monkey
- Jubilee
- MODOK
- Nightcrawler
- Quicksilver
- Rogue
- The Hood
- Valkyrie
- White Fox
Those are all the confirmed characters in Marvel Rivals. You can also check out the Marvel Rivals system requirements to see if you can run it on your PC. If you’re eager for more team-based shooting, why not check out our Apex Legends tier list or Overwatch 2 tier list to see who you should be jumping into combat. We also keep a regularly updated list of Marvel Rivals codes for free rewards.


Published: Jul 12, 2025 06:31 am