Ready to dominate the Planet? In Project Viltrumites, a fun new game inspired by Invincible, you can play as all the famous comic book Characters. Each one brings their own style that is reminiscent of their counterparts in the comic books and the cartoon, making the game feel different every time you turn it on. The Characters are easy to start, but hard to master, so follow along with our Project Viltrumites Character tier list and guide to start destroying your opponents.
Project Viltrumites Character Tier List
Image via Tiermaker
There are not too many Characters introduced in Project Viltrumites yet, but from the ones that were added, they are quite good. Each of them have a unique use and playstyle, and are fun in their unique way. I recommend starting off with Mark, as he is easy and does a lot of damage. The game will be fully released soon, so you should bookmark this page to stay up to date with the latest releases and Character rankings.
Project Viltrumites Characters List
A Character that is drastically stronger than the rest, but comes at a price of having to buy the Early Access. Has powerful ranged and melee options, along with some very high damage.
Not a strict upgrade on Mark, but still comes out on top because of the ranged abilities. Electricity Guy has very good damage, but most importantly, he has stun chains that can lock a player down until death.
Mark is the definition of ‘Die, die, die.’ All his abilities are continual and brutal physical attacks that beat the opponent into the ground with increasing force. Best for new players.
This is the default Character that everyone starts with. He has abilities similar to Mark, but he does not possess the same damage, and his attack chains are a lot shorter. I recommend switching to any of the other free characters immediately upon starting.
+Damage +Range – Stuns
+Range +Stuns – Damage
+Damage +Stuns – Range
+Versatility – Everything else
If you are just starting Project Viltrumites, I would recommend going for Mark, as he is easy and does a lot of damage. When you are ready to take off your training shoes, try playing Electricity Guy. He is fun and can attack multiple people at once with his ranged abilities. Big Brain is a pay-to-winCharacter that is very strong. But he costs money for now, so I do not recommend that you buy him, as he will probably become free when the game releases.
How to change Characters in Project Viltrumites
It’s that easy!
To change your Character in Project Viltrumites, all you have to do is navigate to the top left side of your screen. You will find the Characters button right next to the Options and Chat buttons. It is pretty big, so once you know it’s there, you can’t miss it. Once you’re ready, select the Character you would like to play and enjoy!
That is all for my Project Viltrumites Characters tier list. Check out our Ghoul://RE Kagune Tier List if you are a fan of this type of brawling-fighting game.
The Escapist is supported by our audience. When you purchase through links on our site, we may earn a small affiliate commission. Learn more about our Affiliate Policy
Attention roleplayers, experienced and aspiring! If you’re currently craving adventure but are unable to get together with a group, expert Treehouse Dungeon Master Henry is here to help, with some advice on how to get started with online roleplaying platform Roll20…
Are you currently at an exciting moment in a tabletop roleplaying game, but unable to meet up with your group anytime in the near future? Or maybe you’ve suddenly found yourself with a lot of spare time and have always been intrigued by the idea of doing some pen and paper roleplaying with friends? Well, luckily for you, a while back some nerds decided to go and invent the internet, which has been further built upon (presumably lots more nerds were involved) until we’re at the point where roleplaying is now something that you can do from the comfort of your own home, without the need to meet people IRL!
In my roundabout way, I’m coming to the point that I’ve been exploring Roll20, an online resource for hosting or joining roleplaying sessions. If your newsfeed is anything like mine then recently you’ll been inundated with suggestions and lists of ways to take your roleplaying game online. There seem to be many options, and while I do advise doing some research to find which one best suits your needs, I am here to relate what Roll20 was like for a first-time user, and give some advice on things that may not seem obvious from the outset.
In Wagarashi, there are several Skill trees into which you can invest your hard-earned Skill points. All of them are viable, and that’s why choosing which one to focus on can be challenging. To help you make the right choice and answer all other questions related to Skill trees and Elements, we prepared the following Wagarashi Element and Skill tree guide.
Wagarashi Skill Trees Explained
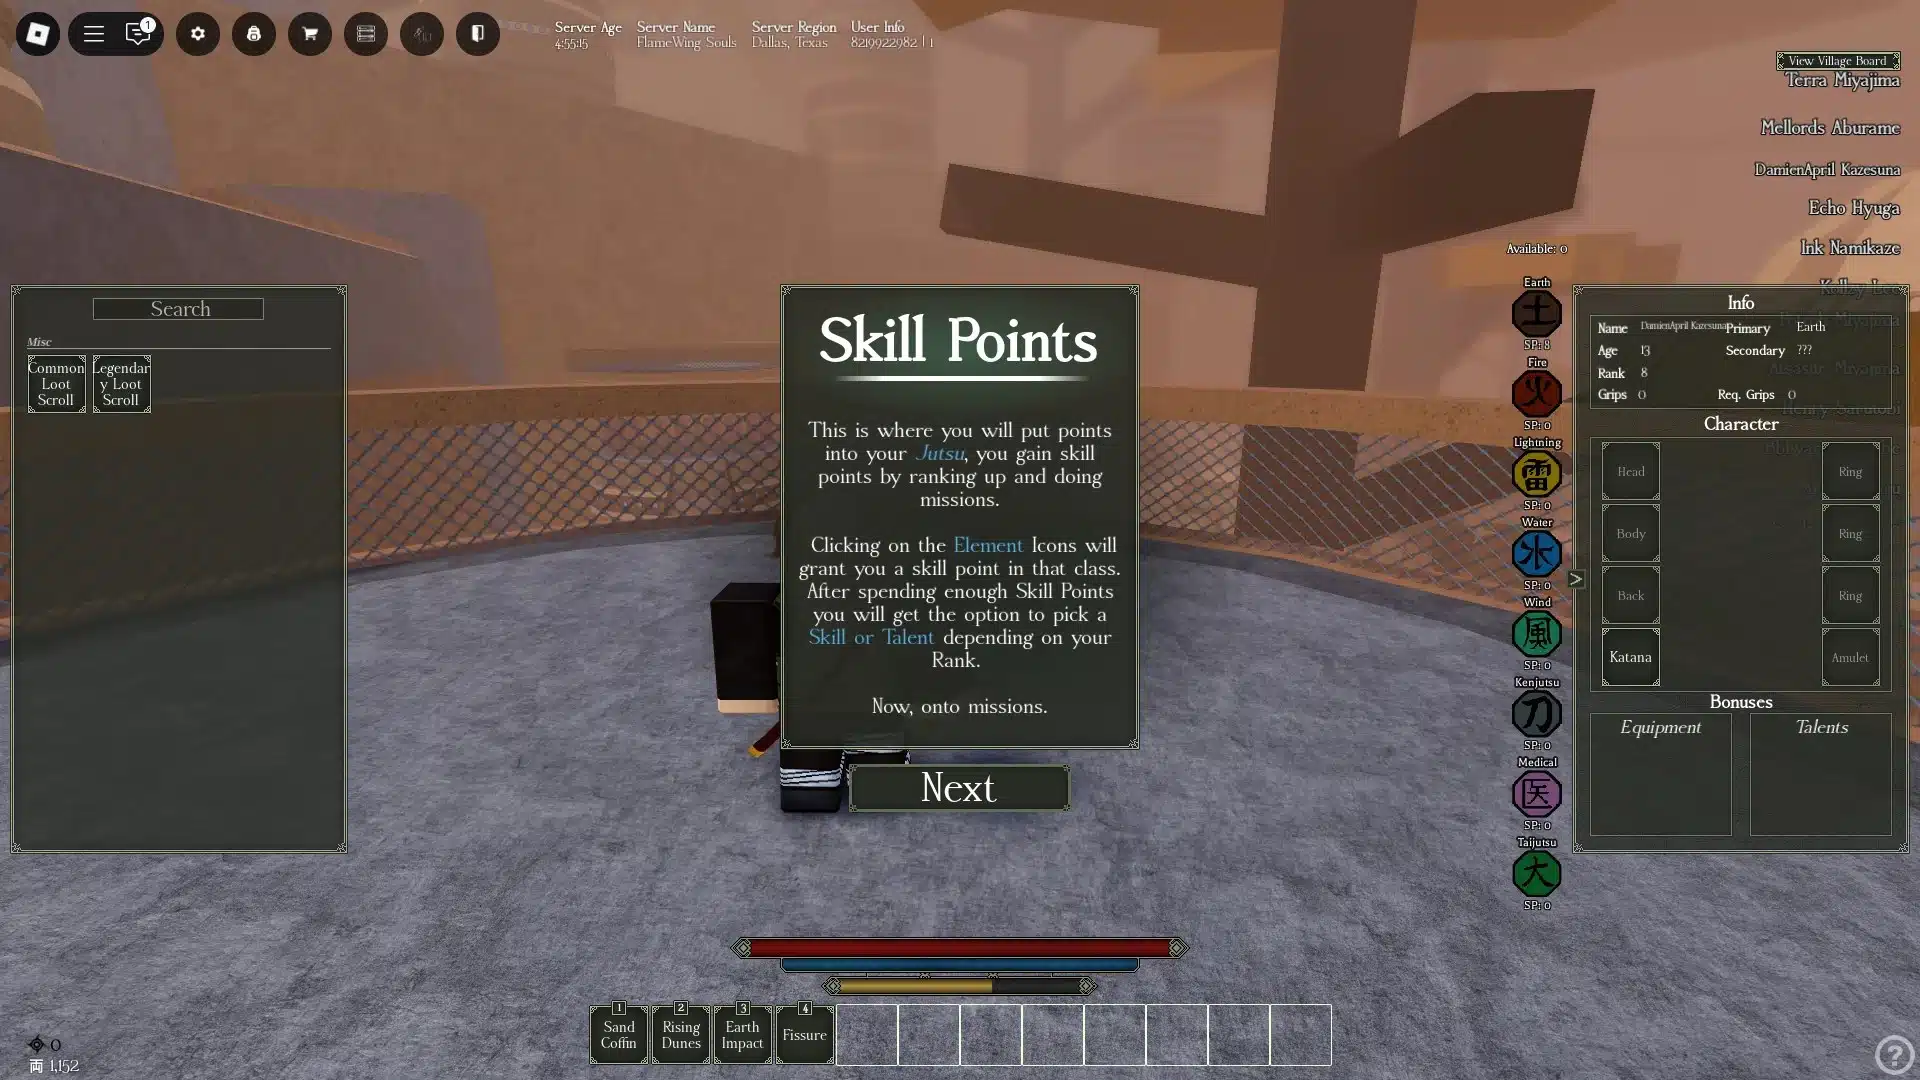
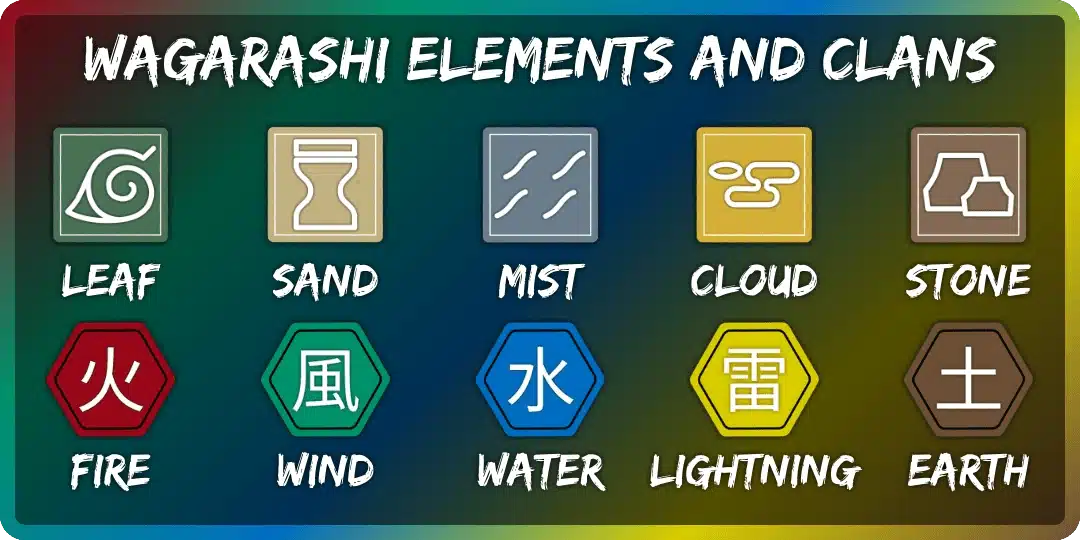
In total, there are eight Skill trees in Wagarashi: Earth, Fire, Lightning, Water, Wind, Kenjutsu, Medical, and Tai. By investing Skill points (SP) into these trees, you can unlock special Skills (Jutsus) available through them. Also, every SP increases the effectiveness and the damage of related Skills. With every two Skill points you spend in any tree, you get to choose one new Skill to unlock. And, every five points, you get to pick a new Talent, which grants passive bonuses.
How to Get, Spend, and Reset Skill Points
In the tutorial, you can learn the basics of spending Skill Points in Wagarashi.You can learn a new Skill with every two points spent on any of the Skill trees.
In Wagarashi, you get one Skill point every time you rank up, which you can do by simply gaining XP. To spend your Skill points, use the inventory key and expand the menu on the right using the little arrow on it.
There are multiple ways to reset the Skill points you spent in Wagarashi. Firstly, you can use one of the Wagarashi codes to reset your Skill Points instantly. However, doing this will clear out the items in your quickbar. So, make sure to move items and materials to your inventory before resetting your SP. Next, you can reset your Skill points in the Shop by spending $349 Robux. Lastly, you get a free Skill point reset whenever you change your Clan, either when using codes or Robux to do that.
How to Find Out Your Elemental Affinity
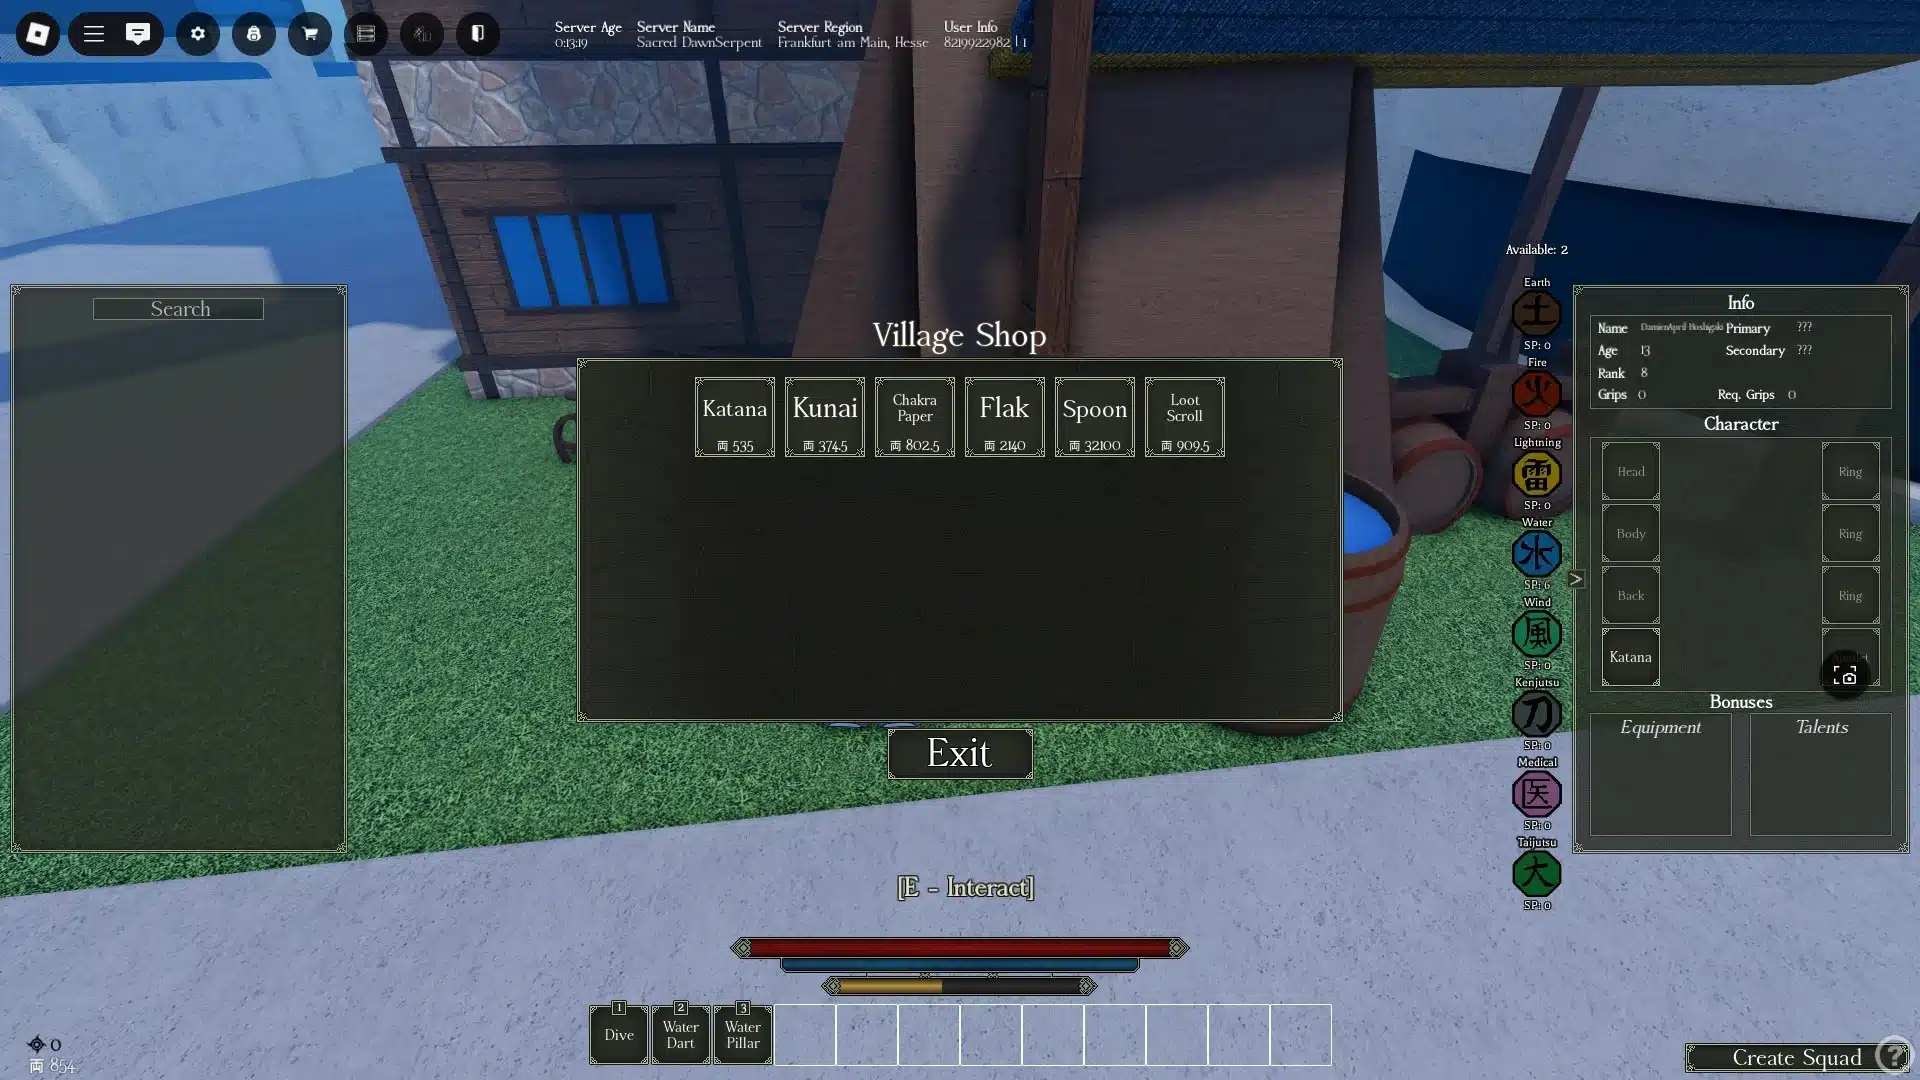
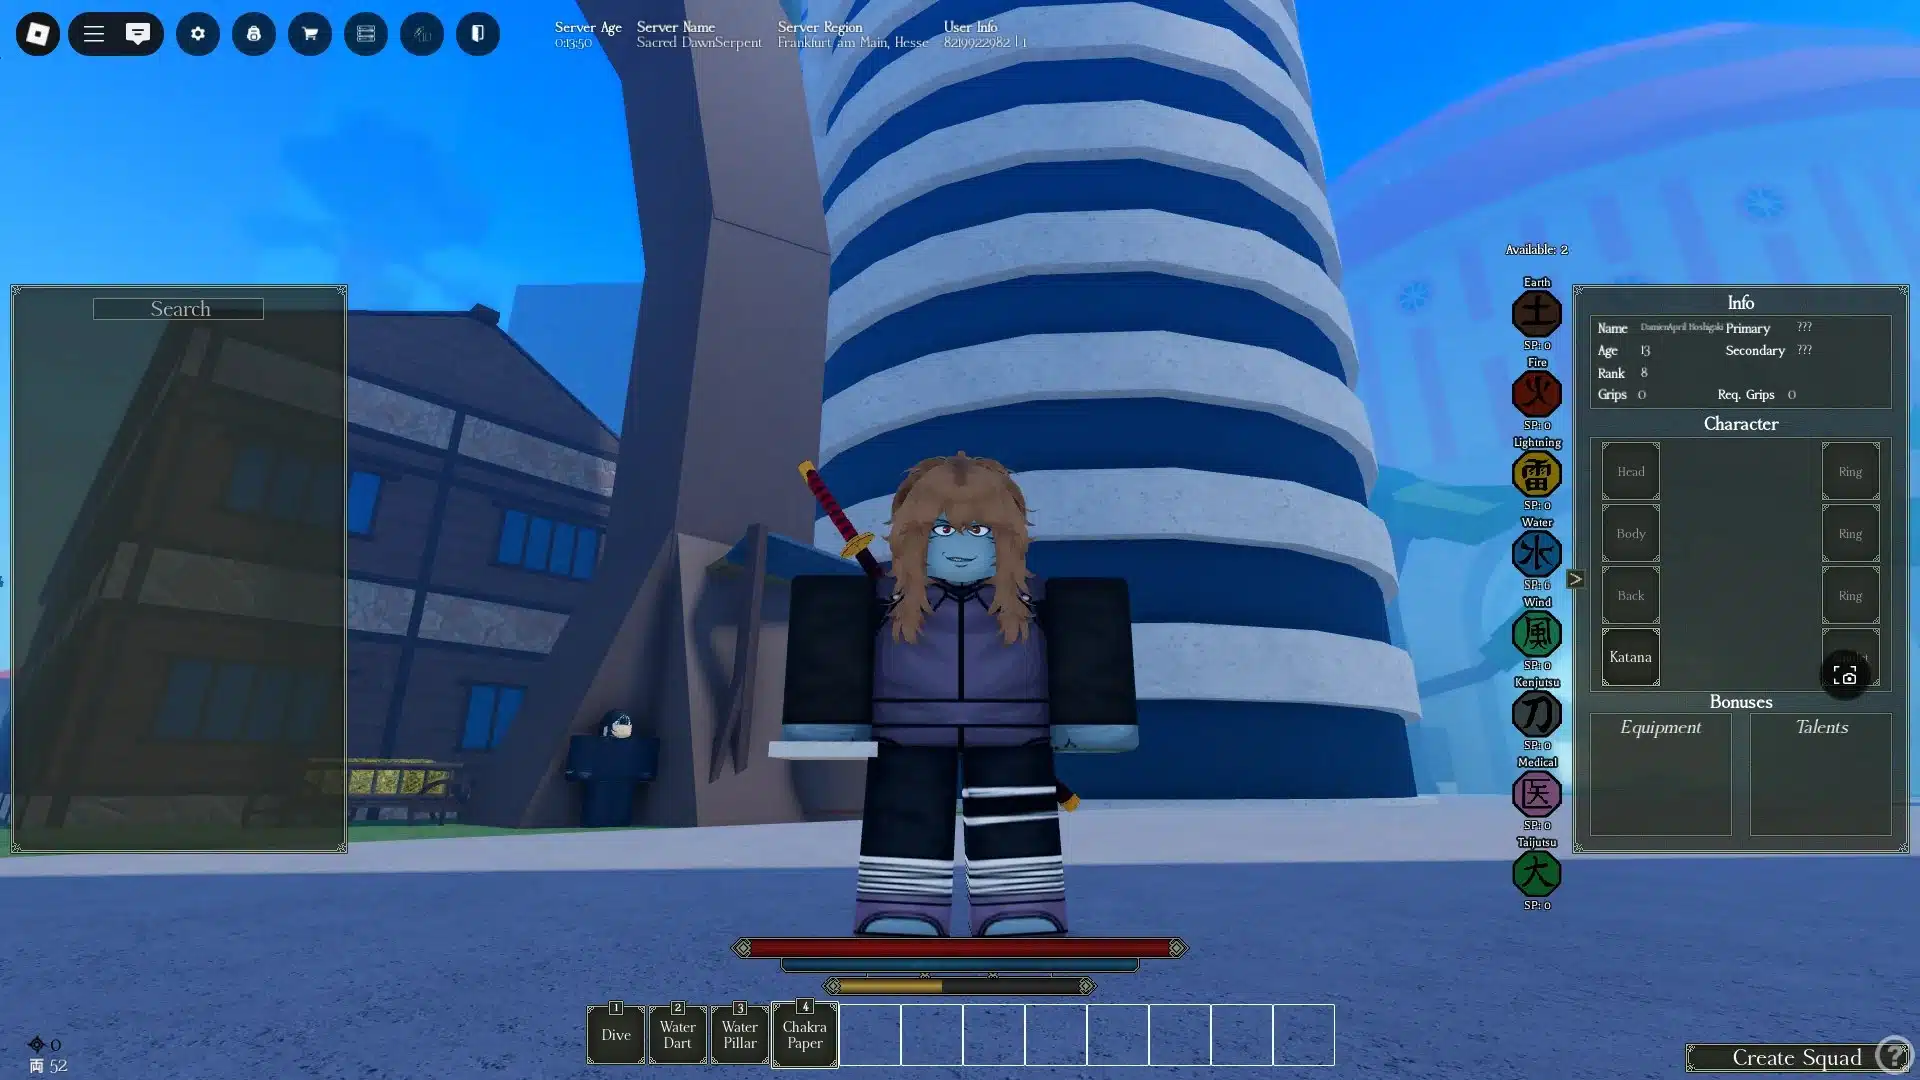
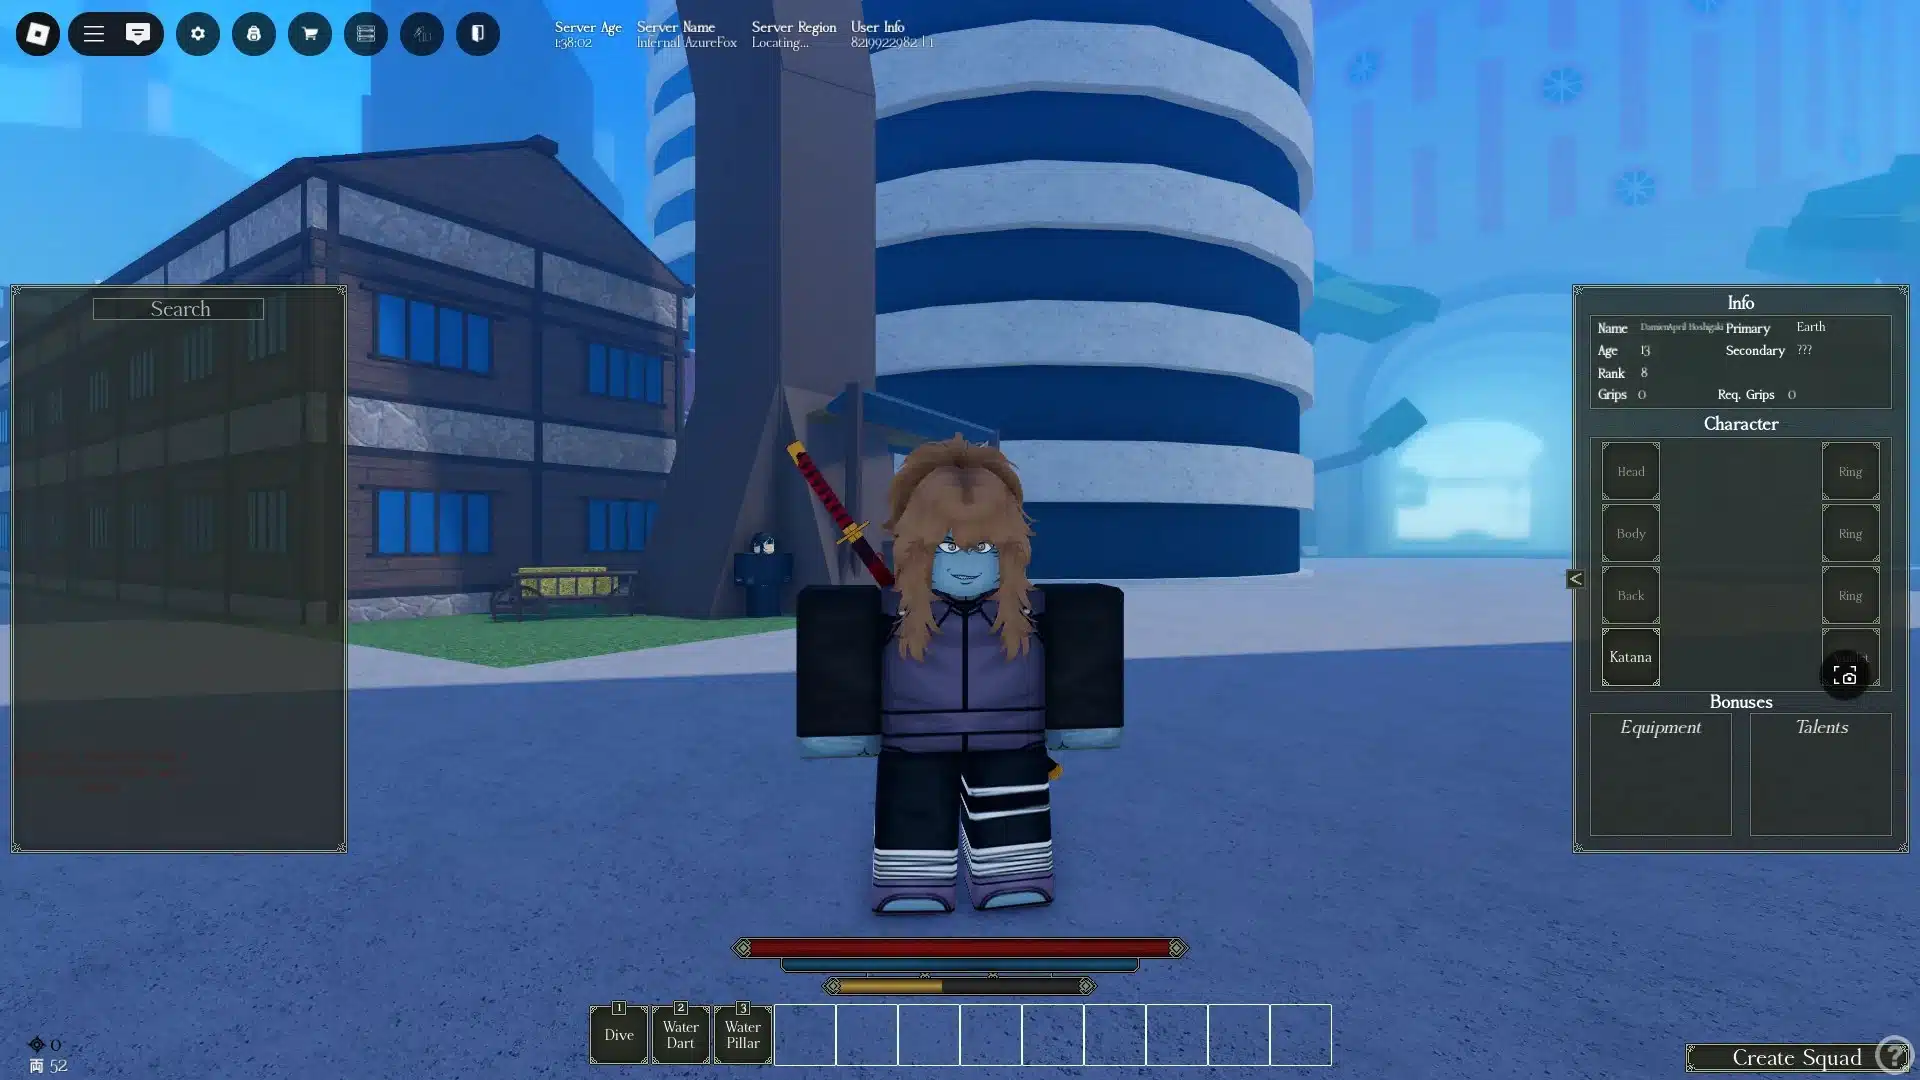
You can buy the Chakra Paper at the Shop NPC in each of the villages.Hold out the Chakra Paper and use it to learn your Elemental affinity.You can see your primary and secondary Elemental affinity in the upper-right corner of the Info panel.
Each character in Wagarashi has an affinity for two random Elements. So, when you use those Elemental Skills, they deal more damage. By using Chakra Paper, you can check your primary and secondary Elemental affinity. Chakra Paper is available at the Shop NPCs in each major Village. Now, unfortunately, the only way to change your Elemental affinity is to reroll it using Robux.
Deciding Which Element Skill Tree to Invest Skill Points In
When deciding which Element Skill tree to invest your Skill points in, there are two things to consider: your Elemental affinities and your Clan. In general, you should first spend your SP on leveling up the Skill tree of your primary Element. Then, invest SP into the Skill tree of your secondary Element, or any other Skill tree you like.
Each of the five basic Elements is associated with a specific Village, just like in the Naruto manga/anime series.
Now, most Clan Skills in Wagarashi are also Elemental-based. So, you can invest points into the Element that matches your Clan. Alternatively, you can save up Skill points until you verify your Elemental affinity. Then, based on what it is, reroll your Clan using codes or Robux until you get a Clan that matches your primary Elemental affinity.
However, ultimately, you will get enough SP to invest in multiple Skill trees. So, it is fine to experiment on your own. As a reference, here is a list of Elemental Skill trees in Wagarashi, their pros and cons, and the SP requirement of the last Skill in each of them.
Because you unlock a new Jutsu only once with every two rank-ups, it will be hard to unlock all of the Skills in Elemental trees like the Earth one. So, it is a good idea to level up a tree until you can unlock the last Skill in it. Then, invest SP into another tree, and the high SP requirement Jutsus from the previous one will appear when choosing which Skill to unlock.
Wagarashi Elemental Skill Trees
There are five Elemental Skill trees in Wagarashi, and each of them contains a variety of Skills. You can find a list of all Elemental Skills and their Skill point requirements right below.
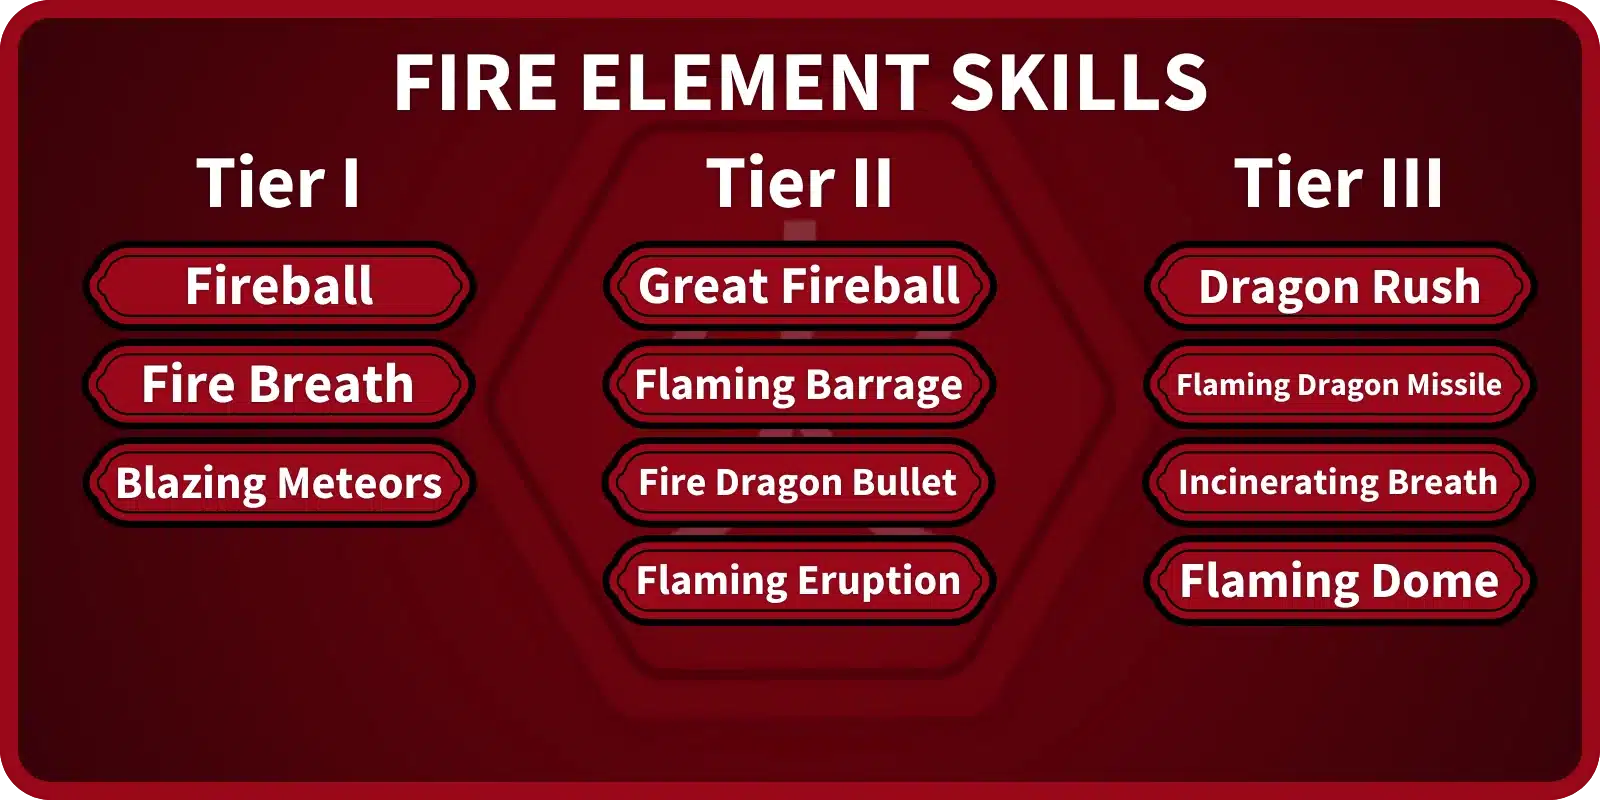
Fire Element Skill Tree
List of Fire Element Skills you can learn.
Skill (Jutsu)
Effect
Skill Point Requirement
Fireball
You shoot a long-range fireball forward.
1
Fire Breath
You breathe fire for a few seconds and continuously damage enemies in front of you.
1
Blazing Meteors
You shoot out several smaller long-range fireballs forward.
6
Great Fireball
Improved version of the regular Fireball Skill.
8
Flaming Barrage
Improved version of the Blazing Meteors Skill.
8
Fire Dragon Bullet
Similar to the Great Fireball but with a longer cast time and higher damage.
10
Flaming Eruption
You slam your hands on the ground and produce an erupting flame that deals high damage over time.
12
Dragon Rush
You dash forward and slam into the first enemy you hit, and send them flying backwards.
14
Flaming Dragon Missile
Improved version of the Fire Dragon Bullet Skill.
14
Incinerating Breath
Improved version of the Fire Breath Skill.
15
Flaming Dome
You cover a large area around you with fire, and imprison enemies inside it.
19
List of Fire Element Skills
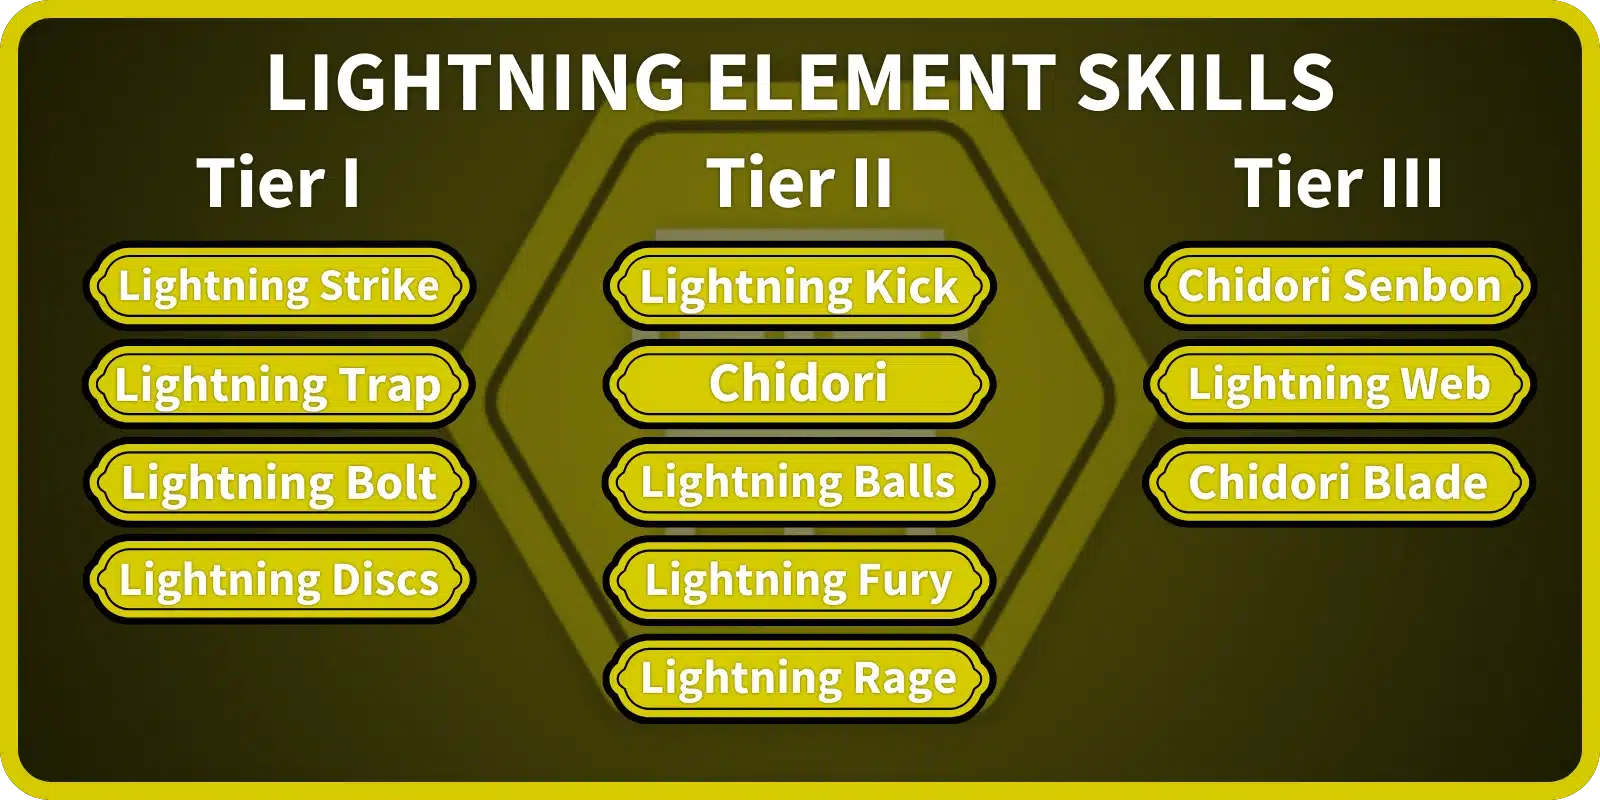
Lightning Element Skill Tree
List of Lightning Element Skills you can learn.
Skill (Jutsu)
Effect
Skill Point Requirement
Lightning Strike
You summon a lightning strike that hits right in front of you.
1
Lightning Trap
You place a lightning trap on the ground that deals high damage if an enemy steps into it.
1
Lightning Bolt
You shoot out a long-range lightning bolt.
1
Lightning Discs
You shoot out two small lightning discs forward.
4
Lightning Kick
A large number of lightning strikes shoot out from below you in all directions.
8
Chidori
You form a Chidori in your hand and hit a nearby enemy with it.
8
Lightning Balls
Improved version of the Lightning Discs Skill.
10
Lightning Fury
Short-range grab attack that temporarily stuns the enemy.
12
Lightning Rage
You slam the ground and deal high damage in a medium-sized area.
12
Chidori Senbon
You form a Chidori in your hand and shoot it forward.
12
Lightning Web
A large number of lightning strikes shoot out from below you in all directions.
12
Chidori Blade
You coat your weapon in Chidori, increasing the damage you deal with it.
16
List of Lightning Element Skills
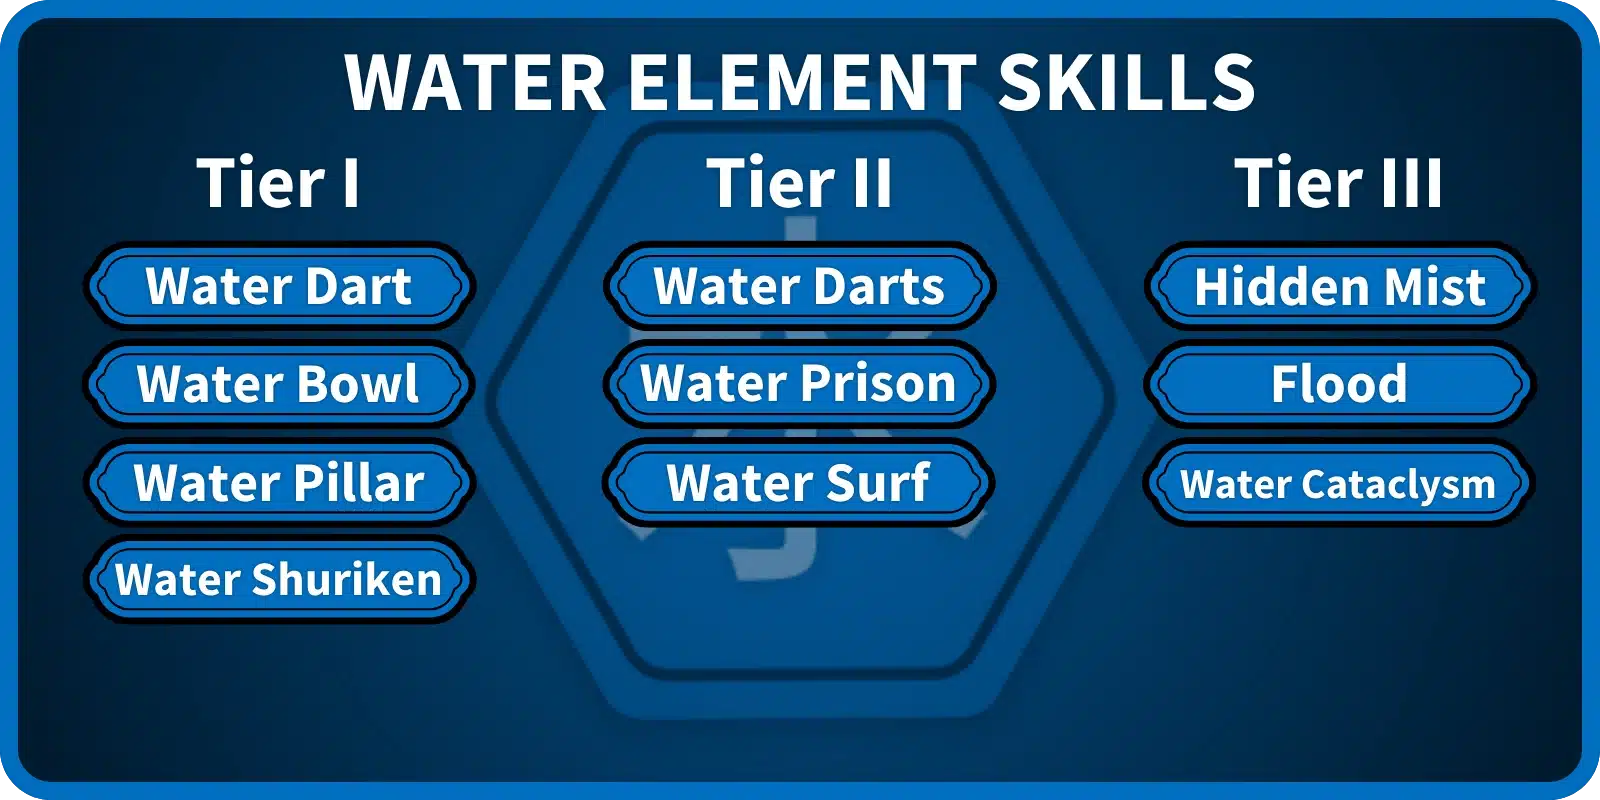
Water Element Skill Tree
List of Water Element Skills you can learn.
Skill (Jutsu)
Effect
Skill Point Requirement
Water Dart
You shoot out a tiny dart made of water.
1
Water Bowl
You do a water breath attack in a cone in front of you.
1
Water Pillar
You make the water erupt from the ground, which sends enemies hit by it flying.
4
Water Shuriken
You fire a barrage of water shurikens.
6
Water Darts
Improved version of the Water Dart Skill.
8
Water Prison
You imprison an enemy in a water bubble that breaks when you hit it.
12
Water Surf
You start surfing on water at a very high speed.
16
Hidden Mist
You create a thick mist in a large area around you.
18
Flood
You make a pool of water in a large area around you.
18
Water Cataclysm
You shoot out a bubble that traps the enemy you hit, and then summon water spikes that impale them, dealing very high damage.
15
List of Water Element Skills
Earth Element Skill Tree
List of Earth Element skills you can learn.
Skill (Jutsu)
Effect
Skill Point Requirement
Earth Impact
You create a medium-sized spike from the ground, which sends enemies flying.
1
Earth Spikes
You summon several spikes from the ground that deal low damage.
4
Earth Pillar
You summon a tiny pillar from the ground, dealing decent damage.
4
Earth Rampart
You summon a long earth pillar from the ground and elevate yourself up.
6
Mud Wall
A large number of lightning strikes shoot out from below you in all directions.
6
Fissure
You summon a huge pile of rocks that drops from the sky.
7
Rumble
You make the ground erupt in a long line in front of you.
7
Floating Rocks
You summon several levitating rocks that auto-target the enemies close by.
8
Rock Gun
You shoot out a rock.
8
Great Earth Rampart
Improved version of the Earth Rampart Skill.
9
Earth Gloves
You cover your fists with earth, increasing your melee damage.
12
Great Earth Seal
You create a very high wall in a large circular area, trapping everyone inside it.
13
Earth Clap
You summon two earth blocks on each side and then slam them together.
13
Seismic Slam
A technique that combines Earth Impact and Earth Rampart to send the enemy flying even further.
15
Swamp of the Underworld
You create a swamp that reduces mobility in a massive area around you.
18
List of Earth Element Skills
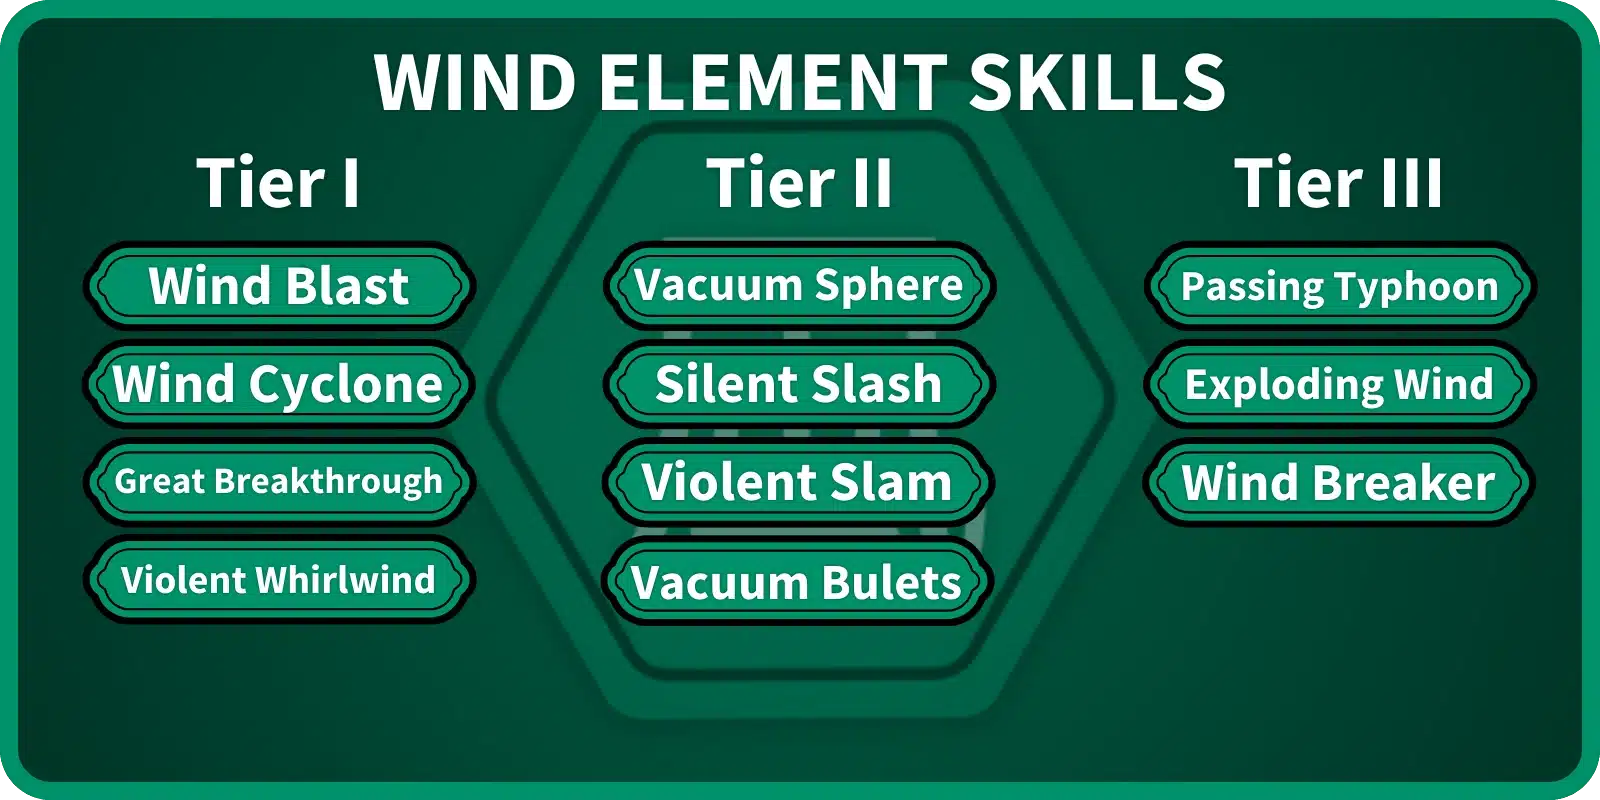
Wind Element Skill Tree
List of Wind Element Skills you can learn.
Skill (Jutsu)
Effect
Skill Point Requirement
Wind Blast
You conjure wind and release it in a cone in front of you, which sends enemies flying.
1
Wind Cyclone
You create a wind around you that deals damage and pushes enemies away from you.
1
Great Breakthrough
You summon a large number of wind bullets that push enemies forward.
4
Violent Whirlwind
You conjure a large tornado and send it forward.
4
Vacuum Sphere
You throw a small sphere on the ground that sends enemies flying if they step into it.
7
Silent Slash
You make a wind slash around you, disappear, and then reappear to hit a nearby enemy.
13
Violent Slam
You slam the ground and push a nearby enemy down, briefly stunning them.
12
Vacuum Bullets
You shoot out a large number of wind bullets forward.
14
Passing Typhoon
You conjure a large wind force that deals continuous damage and pushes enemies away from you.
16
Exploding Wind
You shoot out a small wind orb that detonates and produces large wind shockwaves from it on impact.
16
Wind Breaker
You throw a nearby enemy up in the air and then slam them down.
16
List of Wind Element Skills
Wagarashi Hybrid Element Variations (Releases)
By leveling up specific Elements, you can unlock special Hybrid Element Jutsus.
When you invest enough SP into specific Skill trees, you can unlock some powerful Hybrid Element Jutsus. Currently, there is only one Hybrid Element Skill in Wagarashi. However, we expect the developers to add more of them with future updates.
Hybrid Element
Skill (Jutsu)
Effect
Requirements
Storm Release
Stormy Weather
You summon a large storm cloud that creates lightning strikes, which deal high damage on impact.
Lightning: 14 Water: 18
Wagarashi Technique Skill Trees
Besides the Elemental Skill trees, there are three more trees in Wagarashi through which you learn various medical, weapon, and fighting techniques. One important thing to note is that Kenjutsuand Tai Skill trees are mutually exclusive. So, if you invest SP into one of them, you won’t be able to level up the other one. Thus, think carefully before deciding which of these two to spec into. You can find a list of the technique Skill trees, the Skills available through them, and their SP requirements right below.
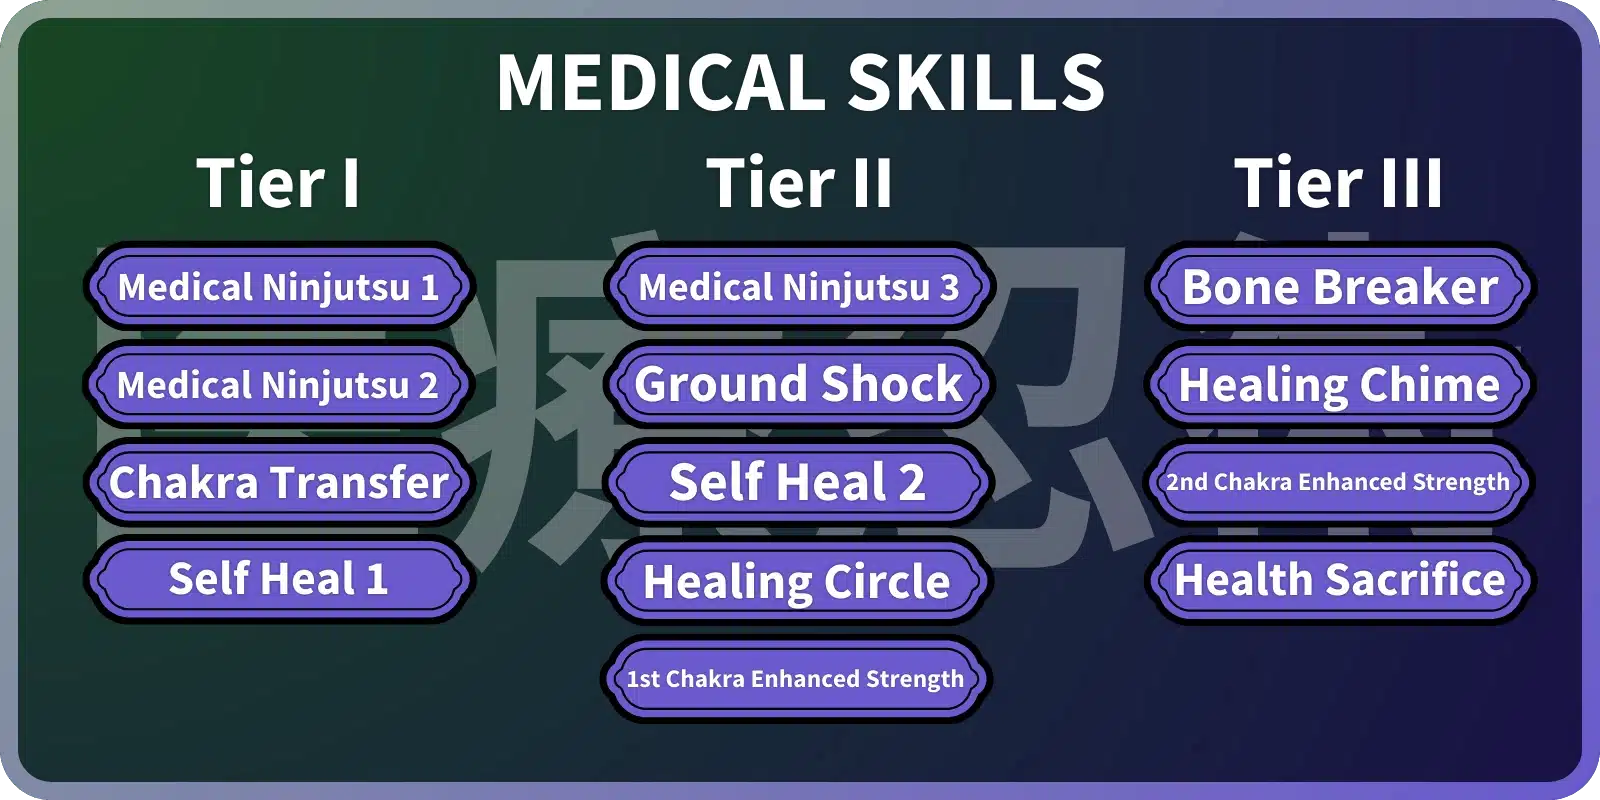
Medical Skill Tree
List of Medical Skills you can learn.
Skill (Jutsu)
Effect
Skill Point Requirement
Medical Ninjutsu 1
You heal a player close to you.
1
Medical Ninjutsu 2
Improved version of the Medical Ninjutsu 1 Skill.
3
Chakra Transfer
You transfer some of your chakra to a nearby player.
1
Self Heal 1
You heal yourself for a small amount of HP.
6
Medical Ninjutsu 3
Greatly improved version of the Medical Ninjutsu 1 Skill.
6
Ground Shock
You slam the ground and send nearby enemies flying.
8
Self Heal 2
Improved version of the Self Heal 1 Skill.
12
Healing Circle
You summon a healing circle on the ground that heals all players within it.
12
1st Chakra Enhanced Strength
You cover your fists in chakra, improving your melee damage.
13
Bone Breaker
You grab a nearby enemy and slam them into the ground.
12
Healing Chime
After a long channel, you summon a large healing orb that instantly heals everyone around you.
16
2nd Chakra Enhanced Strength
Improved version of the 1st Chakra Enhanced Strength Skill.
15
Health Sacrifice
You sacrifice some of your HP to shoot out a healing orb that heals another player.
16
List of Medical Skills
Tai Skill Tree
List of Tai Skills you can learn.
Skill (Jutsu)
Effect
Skill Point Requirement
Leaf Whirlwind
You kick the player in front of you.
1
Powerful Impact
You slam the ground and create a small shockwave.
2
Dynamic Entry
You jump up and then do a charge-kick towards an enemy.
4
Ascending Leaf
You kick an enemy up, and then punch them a few times.
6
Primary Lotus
You kick an enemy up, and then grab them and slam them to the ground.
8
Dual Kick
You do a dual kick on a nearby enemy.
8
Dragon Fist
You do a fiery uppercut on the nearby enemy.
12
Diablo Kicks
You unleash a whirlwind of attacks around you.
14
Wolf Fang Fist
You do a barrage of punches on a nearby enemy, and kick them back at the end of the combo.
16
Eight Gates
You open one of the six chakra gates, increasing your speed and damage. Reusing the ability opens the next gate.
20
Reverse Lotus
You do a flurry of attacks on a nearby enemy, each dealing high damage. It works only while the Eight Gates Skill is active.
20
List of Tai Skills
Kenjutsu Skill Tree
List of Kenjutsu Skills you can learn.
Skill (Jutsu)
Effect
Skill Point Requirement
Air Cutter
You do a double slash using your weapon toward a nearby enemy.
2
Flash Cut
You dash forward and slash enemies you pass through.
2
Flashing Strikes
You do a flurry of slashes using your weapon.
6
Thrust
You thrust your weapon and trigger a flurry of slices on a nearby enemy.
5
Tornado Dance
You do a double slash in front of you that sends out a medium-sized tornado forward.
8
Winter’s Fury
You cover your weapon with snow and then do a flurry of forward slashes.
8
Nine-Head Strike
You lock onto a nearby enemy and then strike them from all directions using your weapon.
15
Soaring Dragon Flash
You pass through an enemy and then trigger a barrage of slices on them.
20
List of Kenjutsu Skills
That concludes our Wagarashi Element and Skill tree guide. Now, you have an idea of where to put your Skill points. If you want to check out more of our Roblox content, visit the Roblox section here on The Escapist.
Wagarashi Element & Skill Tree Guide FAQs
What is the Elemental affinity in Wagarashi?
Elemental affinity increases the damage you do with the Skills of a specific Element. You can check your Elemental affinity by using the Chakra Paper available at Shop NPCs in each Village.
How do you unlock new Skills (Jutsus) in Wagarashi?
With every two Skill points spent in any of the Skill trees, you get to choose one Skill to unlock out of the several ones you get offered. The Skills you are offered are randomly selected from the pool of Clan, Elemental, and other Skills for which you meet the requirements.
What are the best Elements in Wagarashi?
Essentially, all Elements are pretty equal in Wagarashi. So, to choose the best one for you, take into consideration your Elemental affinities and the Element of the Village your Clan is associated with.
The Escapist is supported by our audience. When you purchase through links on our site, we may earn a small affiliate commission. Learn more about our Affiliate Policy
How does being an Oblivion Remastered vampire work? We get it, sometimes you need to add a little sparkle sparkle to your life in Cyrodiil. And what better way is there to do that than to inherit the skin (and powers) of a supernatural killer?
Whether you’re looking to become a vampire in Oblivion Remastered or need to cure vampirism before you have to cancel that sunny holiday to Hammerfell in the RPG, we’ve got everything you need to know about the affliction. To help you make that big decision, we’ve even broken down what makes becoming a vampire in Oblivion worth it, as well as the pesky drawbacks (silver) bolted on.
How to become a Vampire in Oblivion
You become a Vampire in Oblivion through the Porphyric Hemophilia disease.
This is contracted by taking damage from an afflicted person or creature, such as vampires in dungeons like Memorial Cave southeast of the Imperial City, Crowhaven northwest of Anvil, or one of the many named forts you’ll find infested on your travels.
One easy location is in the Imperial City itself. Head down into the Imperial City sewers through the town’s many floor grates, follow the tunnels until you arrive under the arena’s Bloodworks, and you should find two vampires there.
You’re also given the open opportunity to become a vampire by Vicente Valtiera at the end of the Dark Brotherhood questline.
The effects only kick in once you rest in a bed 72 hours after the event. This makes dealing with it early much simpler than leaving the wound to fester.
How to cure Vampirism in Oblivion Remastered
To cure Vampirism in Oblivion Remastered, you have two options depending on the state of the disease. You can either consume an item with Cure Disease (or visit a shrine) within 72 hours of the bite or, if you’ve already succumbed to it, by speaking with Raminus Polus at the Arcane University in Skingard and completing the lengthy Vampire Cure questline.
The Cure Vampire questline is a long fetch quest involving five empty Grand Soul Gems, Bloodgrass, Garlic, Nightshade, the Blood of an Argonian, and the Ashes of Hindaril. Here’s how to get each item:
Item
Location
Grand Soul Gems (x5)
Sometimes found in dungeon loot (when above level 11) or stolen from display cases.
Bloodgrass (x2)
Tall red grass is commonly stocked at Alchemy stores or found growing by Oblivion gates.
Garlic (x6)
A common sight in houses or sold at shops and inns
Nightshade (x5)
Found around the West Weald or bought at the Alchemy shop in the Imperial City.
Argonian Blood
Stab an Argonian with the Enchanted Dagger.
Ashes of Hindaril
Kill Hindaril in Redwater Slough.
After turning in the ingredients to complete the quest, Melisande will provide you with the Cure for Vampirism potion. Use it from your Potions tab to be cured, becoming immune to Vampirism in the process.
While you can contract the Porphyric Hemophilia disease after being cured this way, it acts like a standard debilitating debuff and can be removed through normal means. Sleeping while afflicted won’t turn you back into a Vampire.
Is it worth becoming a vampire in Oblivion?
Becoming a Vampire in Oblivion has various benefits and drawbacks, like resistance to damage, bonuses to Strength, Willpower, Speed, Acrobatics, Athletics, Destruction, Hand to Hand, Illusion, Mysticism, Sneak, access to unique skills, and a chronic aversion to sunlight.
These pros and cons can fluctuate, with the benefits growing stronger the longer you go without feeding, though amplifying the cons of being a servant of the night as well. Here’s a breakdown of the pros and cons:
Oblivion Remastered Vampire pros
Time between feeding
Skills/Attributes
Normal weapon resistance
Ability
Ability effect
1 day (25%)
+5
5%
Hunter’s Sight
Applies Night Eye (30 seconds) and Detect Life (100ft for 30 seconds)
2 days (50%)
+10
10%
Vampire’s Seduction
Applies Charm for 50 points for 20 seconds once per day.
3 days (75%)
+15
15%
Reign of Terror
Applies Silence for 60 seconds and Demoralize (on level <7 target) for 60 seconds once per day.
4+ days (100%)
+20
20%
Embrace of Shadows
Night Eye for 90 seconds and Invisibility for 180 seconds.
Oblivion Remastered Vampire cons
Time between feeding
Fire weakness
Damage from the sun
1 day (25%)
20%
0 HP per second
2 days (50%)
30%
1 HP per second
3 days (75%)
40%
4 HP per second
4+ days (100%)
50%
8 HP per second
Given you only take damage from the sun at Stage 2 of hunger, you can maintain some of the benefits of being a Vampire in Oblivion while maintaining the ability to sit in the sun by feeding every day.
Feeding once will return you to Stage 1 (25%) no matter which stage you’re currently on.
Becoming a vampire doesn’t unlock any unique quests outside of the one needed to cure you.
You won’t attract unwanted attention from anyone for being a vampire, but you will need to limit your exposure to the sun at higher levels. This can make exploring Cyrodiil (and taking on quests) uniquely difficult.
Where are the best places to feed as a Vampire in Oblivion?
If you’re looking to avoid making a spectacle of your need to consume the blood of other humanoids, it’s best to target places where hosts frequently sleep.
Camps and inns make feeding easy for this reason. The unlucky victims are unlikely to notice, witnesses are scarce, and you won’t have to worry about the sunlight.
If you can’t handle the thought of completing a lengthy sidequest to right the wrong of becoming a vampire, take a break with the best RPGs on PC right now.
In Ghoul://RE, Kagune serve as the defining trait of every ghoul, making a perfect mix of power and mobility. These deadly biological weapons allow players to unleash explosive attacks, adapt to different combat styles, and dominate the battlefield with unique abilities. To gain mastery over your Kagune, make sure to follow along with our Ghoul://RE Kagune tier list and guide.
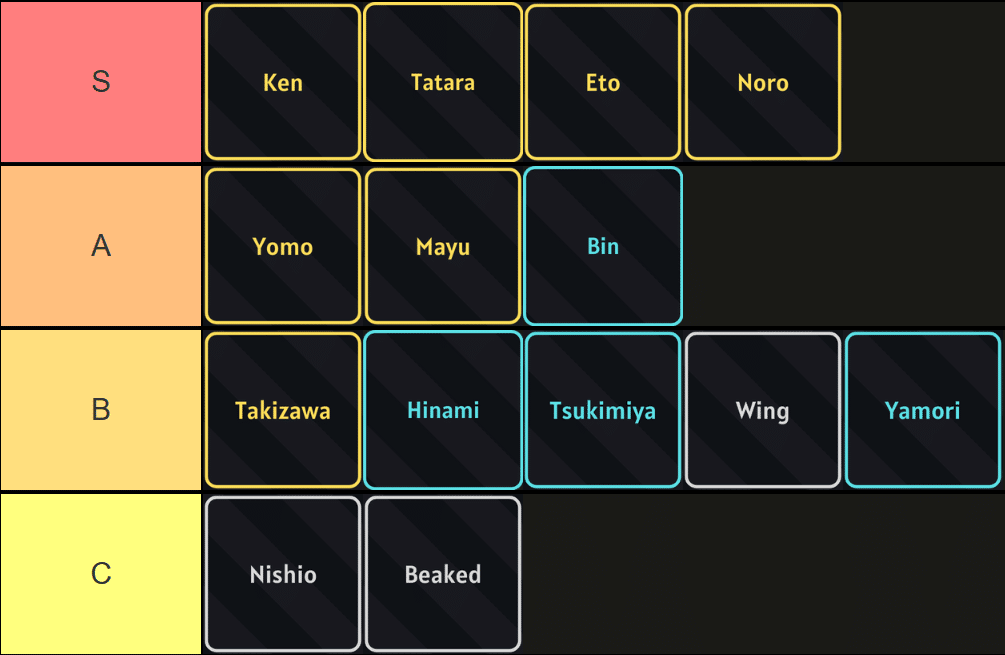
Ghoul://RE Kagune Tier List
Image via Tiermaker.
There are a lot of good Kagune in Ghoul://RE, so the top tiers are quite packed. Any of these choices will be good enough to carry you for the entirety of the game. Ken, specifically, has multiple stages of evolution that get stronger as you level up, making it the best Kagune in the game. A good starting Kagune would be Yamori or Beaked, for their simplicity and decent damage output. Check out our ranking reasons for each one below.
Ghoul://RE Kagune List
Below is a complete and detailed overview of Kagune in Ghoul://RE, sorted by rarity and usefulness:
How to Unlock Kagune in Ghoul://RE
To unlock your Kagune, you’ll need to collect 5000 RC first. You can earn RC by eating Humans or Ghouls using Ctrl + B. Eating Ghouls gives you slightly more RC, so keep that in mind while farming.
To check how much RC you’ve gathered, head to the Hospital and speak to the NPC inside.
Instead of roaming the map and attacking anything you see, it’s much more efficient to farm RC while completing quests. Quests reward you with additional loot and EXP, and some of the loot can even be used to gain more RC.
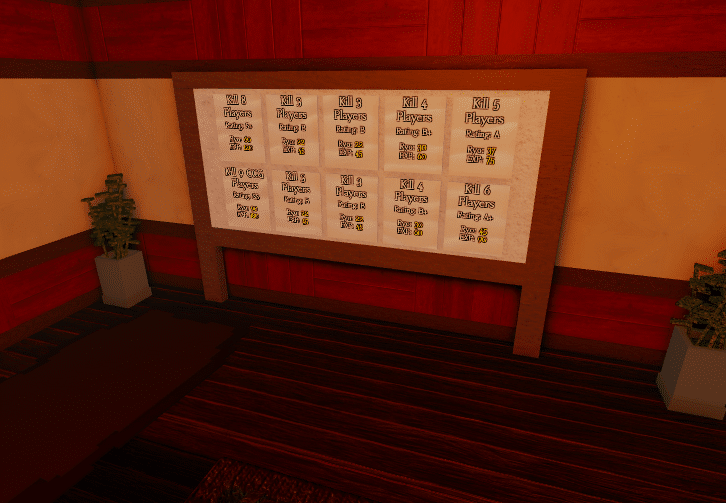
The Mission board In Anteiku.
If you’re playing as a Ghoul, you can find Quest Boards at the following locations:
In front of Anteiku
First floor of Helter Skelter
Can’t find them? Just press P to open the map—it’ll show all important locations, including the Quest Board.
How to Reroll Kagune in Ghoul://RE
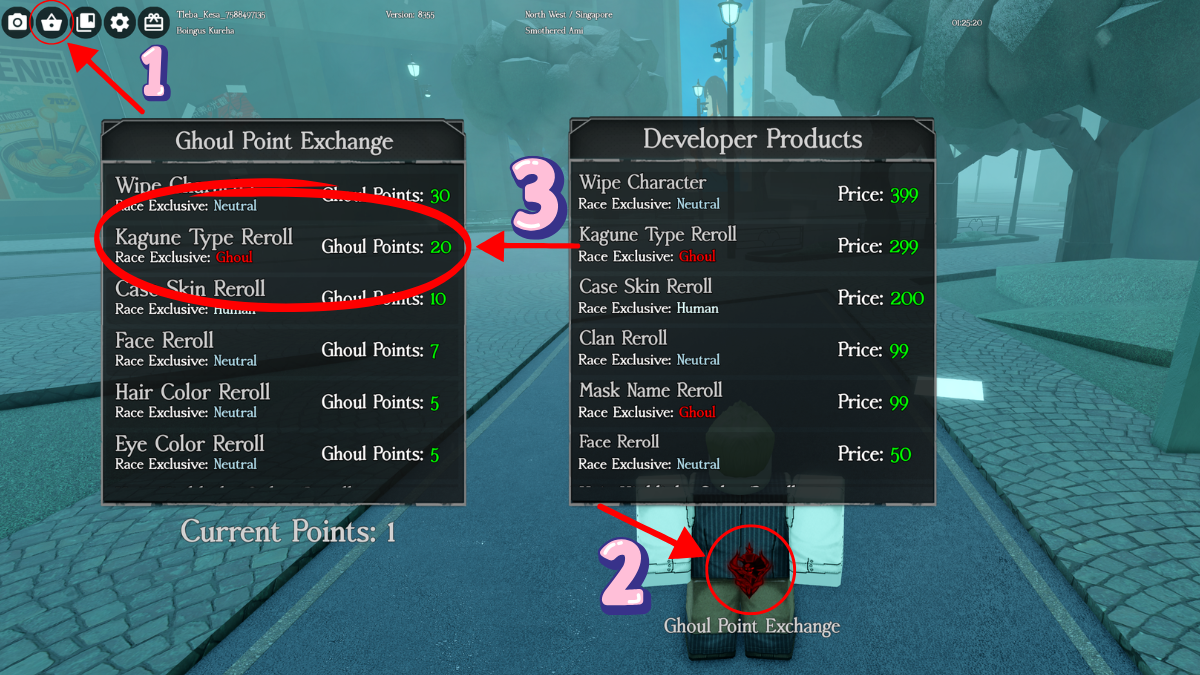
Steps to Reroll kagune in Ghoul://RE
To Reroll Kagune in Ghoul://RE, you first need to collect Ghoul Points. You get Ghoul Points by completing missions, doing quests for your faction, and defeating marked players. But luckily, everyone gets 500 Ghoul Points to start out with, so you can make a few Rerolls before going out to collect more points. To Reroll, click on the Shop icon on the top left of the screen, followed by clicking on the Ghoul Point Exchange, and finally, Kagune Type Reroll.
And that is all for our Ghoul://RE Kagune tier list and guide. Visit our Ghoul://RE Boss Guide to learn how to progress your Kagune even faster.
The Escapist is supported by our audience. When you purchase through links on our site, we may earn a small affiliate commission. Learn more about our Affiliate Policy
Abilities in Volleyball Ascended add a unique layer of strategy and excitement to every match. They allow players to pull off unexpected moves, shift momentum, and outsmart opponents in creative ways. From teleporting sets to directional spikes, each Ability offers a distinct tactical edge. Mastering these powers can be the difference between a good play and a game-changing moment. So follow along with our Volleyball Ascended Abilities tier list and guide to learn how.
Valleyball Ascended Tier List
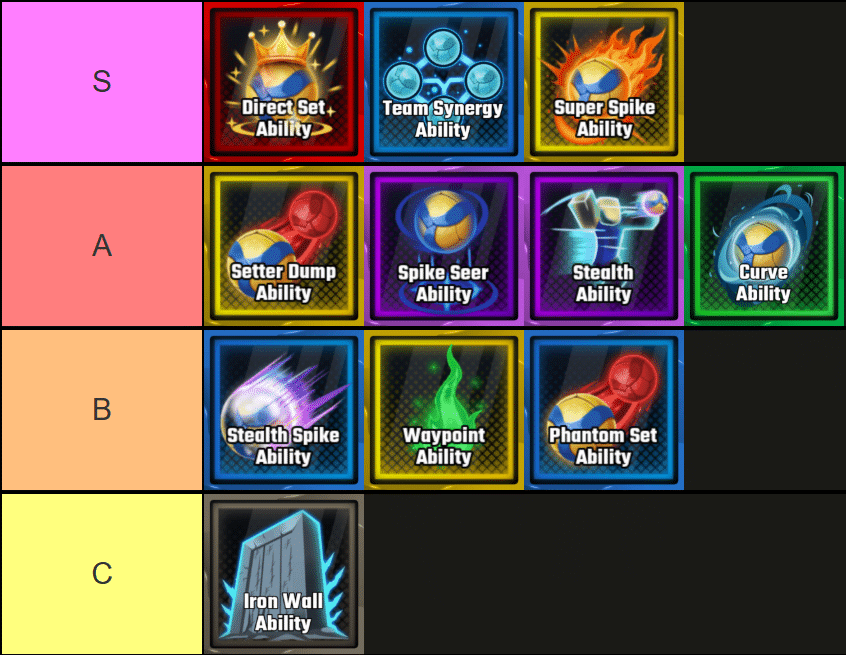
All Abilities in Volleyball Ascended ranked from best to worst — Image via TierMaker.
In the tier list above, we ranked all Abilities in Volleyball Ascendedbased on how good they are in the current meta. In general, rarer Abilities are stronger. However, as surprising as it may be, a Rare Ability is one of the strongest Abilities in Volleyball Ascended, and a Rival Ability is one of the weaker ones. After extensive testing, I found out that teleporting back with Waypoint is virtually useless compared to the increased team movement speed given by Team Synergy.
Volleyball Ascended Abilities List
Below is a complete and detailed list of all Abilities in Volleyball Ascended, sorted by their position on the tier list:
Ability
Rarity
Description
Tier
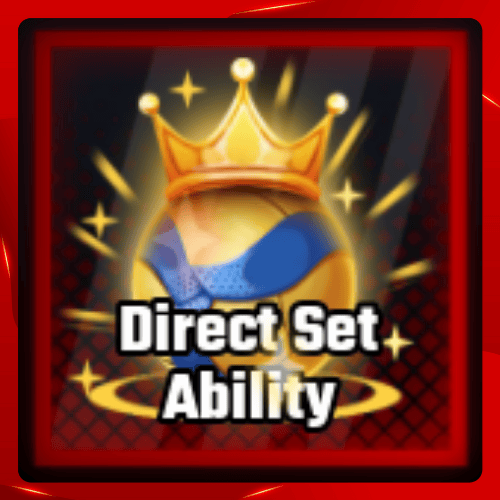
Legend
• When activated, your next set within 8 seconds will automatically teleport to the nearest teammate within 35 studs. If no teammate is within range, the set will instead go directly above you. + Amazing for any playstyle. + Easy points when coordinating with your team.
S
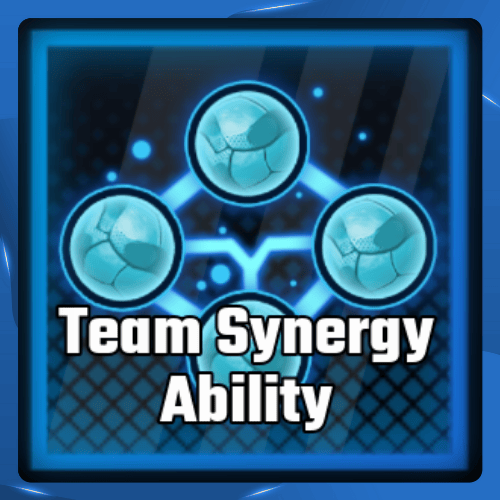
Rare
• When activated, your whole team gains a burst of movement speed for 5 seconds. + A Universal Ability that is amazing for any situation. + Best defensive Ability in the game. +It might as well be of Rival rarity or even higher.
S
Rival
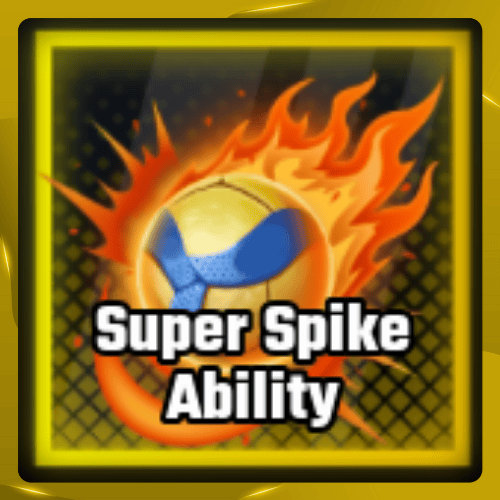
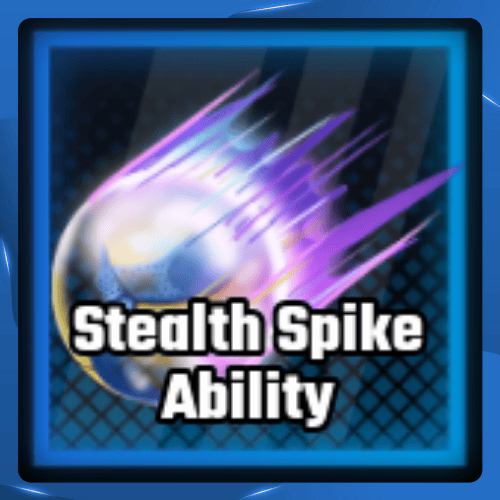
• When activated, your next Spike within 8 seconds has significantly increased power. + Amazing for an offensive playstyle.
S
Rival
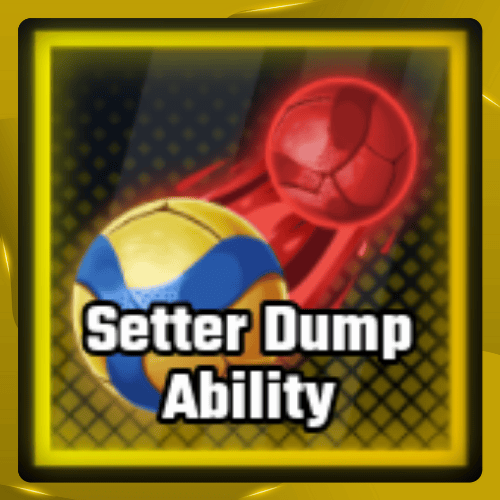
• When activated, your next set within 8 seconds will be dumped in the direction you are tilting, allowing for quick and unexpected plays. + Great for surprising the opponents.
A
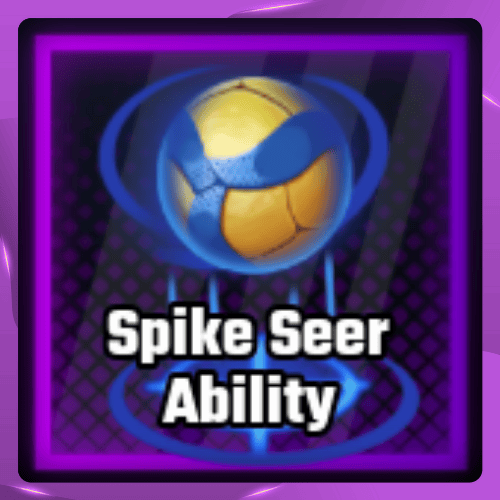
Epic
• Passively see all landing spots of spikes for both teams. + Great for controlling gameplay and learning.
A
Epic
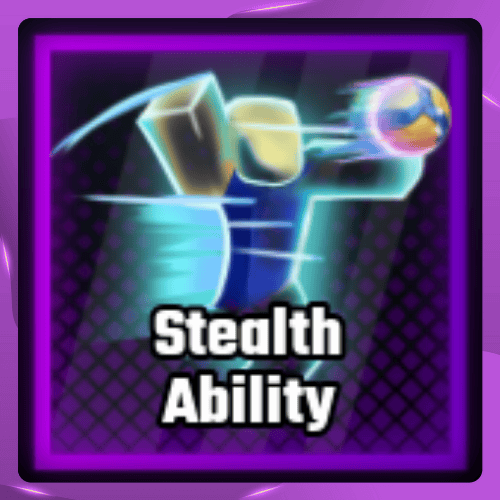
• When activated, you become invisible to all enemies for 0.6 Seconds. + Great for surprise Spikes.
A
Uncommon
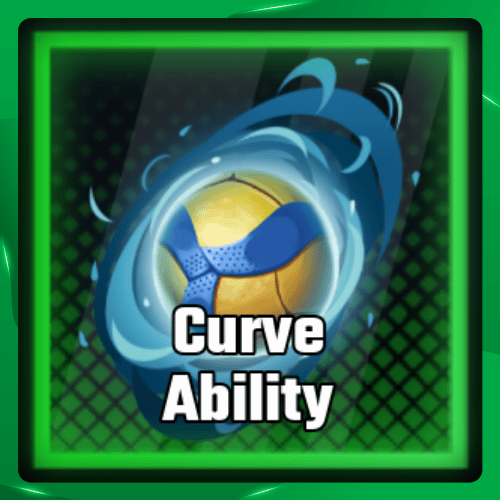
• When activated, your next Spike within 8 seconds will curve to the side. + Useful in all playstyles.
A
Rare
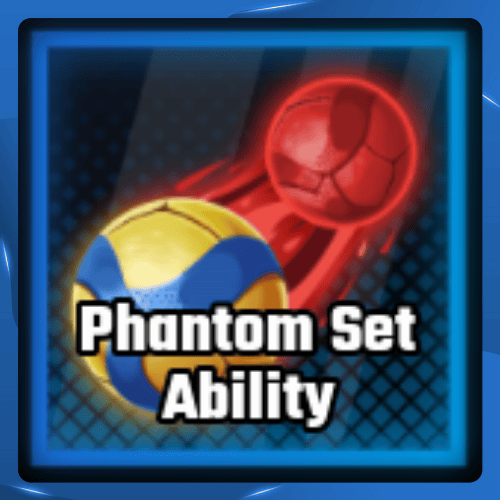
• When activated, your next Spike within 8 seconds will become invisible for a split second. + Great against experienced players.
B
Rival
• When activated, mark your current location. After 10 seconds, teleport back to it. − Man, this Ability is just sad. − Very rarely useful and only in niche situations. − It is a Rival rarity Ability, but it might as well be a Rare or Uncommon.
B
Rare
• When activated, your next set within 8 seconds will create a mirage ball. + Good when trying to confuse enemies.
B
Common
• When activated, increase your Block radius by 30% for 0.75 Seconds. − A very basic Ability with extremely limited use.
C
A good starting Ability in Volleyball Ascended would be Super Spike, if you can get it, or Spike Seer, as it allows you to see where Spikes will land. Seeing where they land means you can quickly learn how people play and develop a sense of where opponents usually aim.
How to get Abilities in Volleyball Ascended
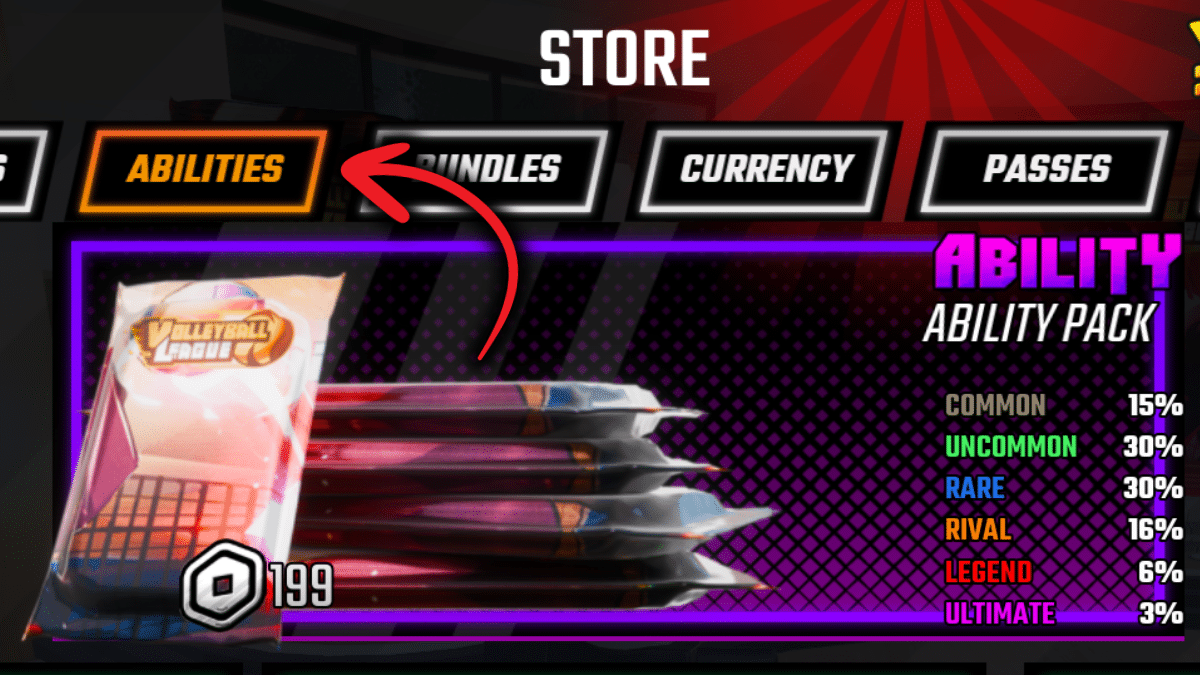
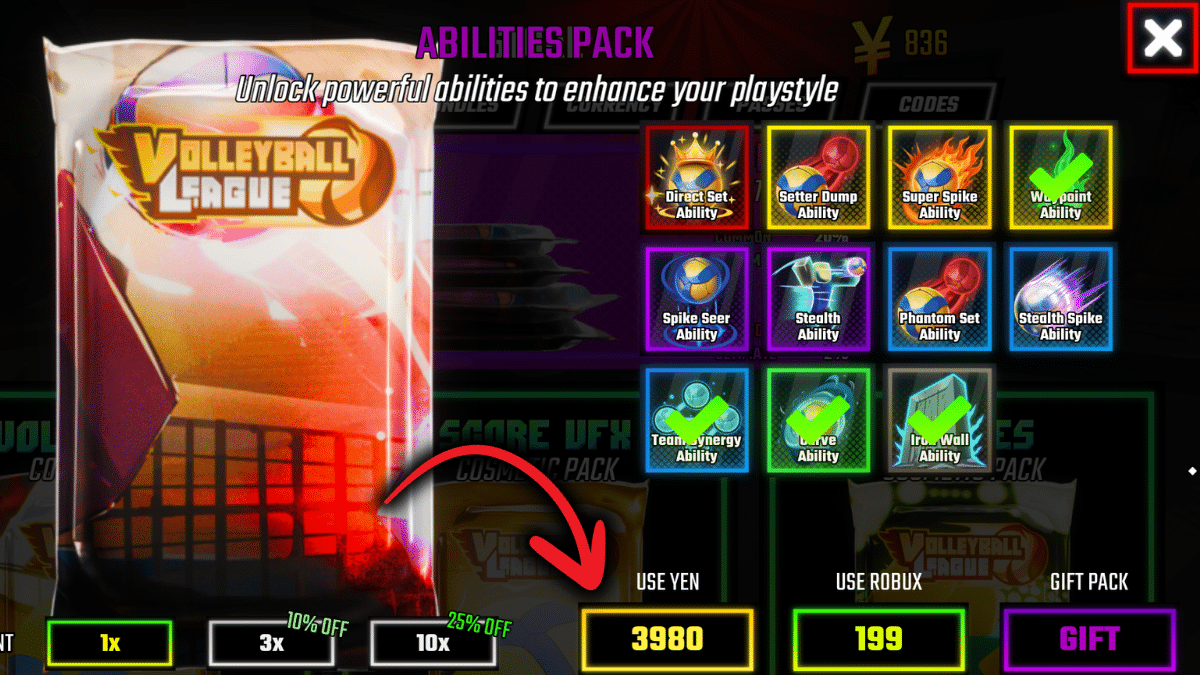
Click on the Shop icon.Go to the Abilities section.Open an Abilities pack.
If you want to get one of the Abilities from our tier list in Volleyball Ascended, you first need to collect enough Yen. You can collect them by playing or using codes from our Volleyball Ascended Codes page. Once you have 3980 Yen, you will be able to buy an Abilities Pack from the store. When you open it, you will get a random Ability from the list above. Some of the better Abilities have a lower chance of dropping, so make sure you have enough Yen to Reroll a few times until you get the one you’re looking for.
And that is all for my Volleyball Ascended Abilities tier list and guide. Check out more Roblox-related stuff on our Roblox Page.
The Escapist is supported by our audience. When you purchase through links on our site, we may earn a small affiliate commission. Learn more about our Affiliate Policy
This week we assembled the whole editorial team for our 2021 Christmas Gift Guide – with everyone picking a small handful of games that are excellent gifts AND currently actually available to buy!*
Below you’ll find links and a brief description of each game, but for more detailed explanations and recommendations, be sure to listen to the podcast episode that’s paired with this post – in which the whole team go through these individual choices. Thanks for reading and listening along, and do share the article or podcast if you think it’s a valuable resource for others this year. Much love from all of us – LET’S GO!
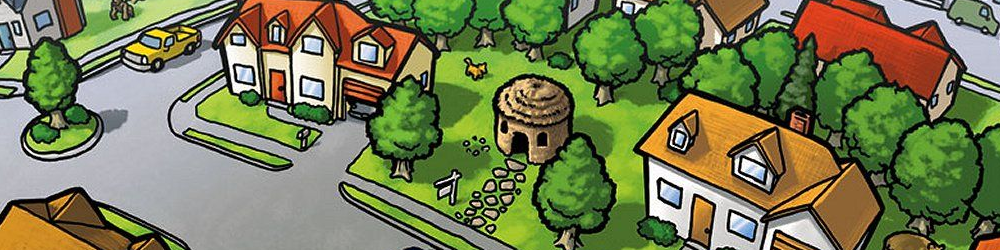
Super Skill Pinball: Ramp It Up
Players roll one set of dice that everyone then uses, choosing the next nearby location with a matching die-face to send their pinball pinging off towards. Push your luck and achieve killer combos, or take the safer option? This pinball-inspired Roll & Write that plays up to 4, but our very own Tom Brewster swears that it shines brightest when played alone for high-scores. A small box of shiny, ridiculous delights. Perfect for pinball enthusiasts or solitary thinkers – just maybe don’t mention which of the two you’ve got them pegged as. Check out our review.
The Fuzzies
Alternate-reality Jenga designed by aliens, The Fuzzies is a surprisingly compelling exercise in denying physics their right to exist – players take it in turns to remove a fuzzy ball from anywhere on the tower, placing it in a higher location than it previously sat. A tiny handful of rules later, and you’re good to go – with the real joy slowly settling in as you realise that these strange grippy things behave in a way that almost feels like magic. This small, lightweight crowd-pleaser requires dexterity and deftness that not everyone has, but it’s joyful to behold – even if you aren’t playing. See it in action here, in our full review.
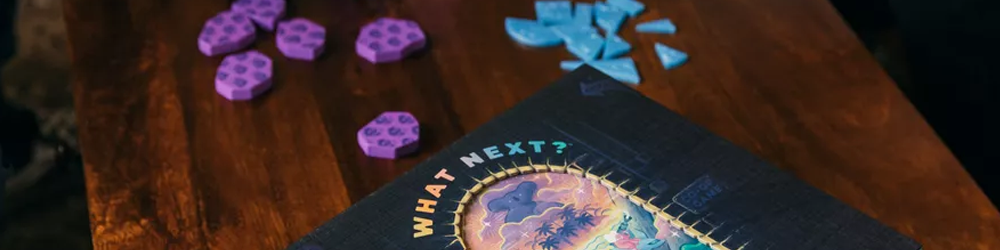
A multiplayer re-imagining of the Choose Your Own Adventure genre – three small stories of choices and challenges, muddled together with truly gorgeous components. Replaying through scenarios to find the optimal solutions, you’ll be tasked with small physical mini-games to pass challenges. Sky-scraper capers and exploring Koala Cove, this is a colourful, modern take on a classic style of game that older folks will be well-familiar with.
The small-box code-cracker that continues to delight. Two teams must work to communicate safely with one another, while not giving away so much information that the other team are able to intercept their codes. Tougher to teach and play than the mega-hit Codenames, but vastly more rewarding. A SU&SD classic we just can’t get rid of – this cerebral party game might be your next family favourite. Watch our review!
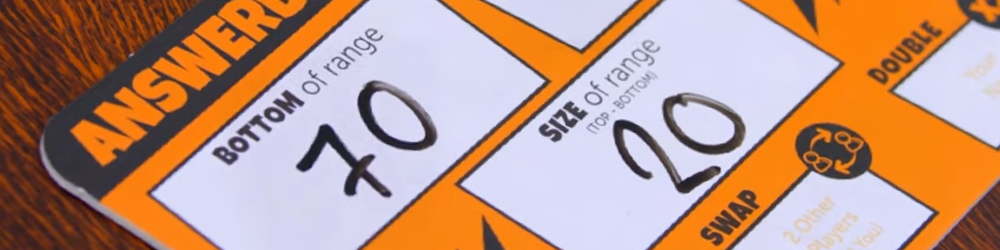
Another dramatically simple set of rules that achieves more than you’d expect – this orange box of questions each has a numerical answer that players need to estimate by offering a range of numbers that they think will contain the answer. Really though, this one requires no quiz-skills to master: party game silliness means that much of the game is less about getting things right yourself, and more about correctly estimating who you’ll think around the table is most likely to have nailed it. Discussed in Episode 101 of the podcast! Oh, and if you’re unfamiliar with the beautiful language – check out this video for the Welsh version of the game.
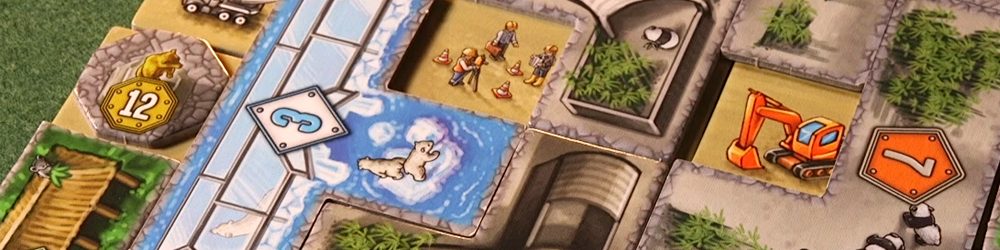
Tile-laying puzzler with adorable bears. Collect strangely-shaped enclosures and then strategically place them on your empty plots of land, turning the chaos of bad shapes into something neat and tidy. Gently making shapes and filling gaps in your playerboards doesn’t get smoother and nicer than this – the ideal gift for those who prefer quieter games, with minimal confrontation. Although you’ll still get stressed about where to put the toilets. Watch our full review here, including the monorail expansion.
The tightly-packed version of a classic. Players must choose whether to persist with progress in expeditions they’ve already embarked on, or play it risky and start new adventures in tandem. Tricky choices and rapid hubris make this an easy crowd-pleaser. If you’re a fan of rolling dice and then writing things down, for Ava’s money this is the best gift available. Discussed in Episode 154 of the podcast!
A huge hit in the party game scene, and for good reason: there aren’t many games this clever that only require a handful of brain cells to comfortably play. A single player must guess the correct word – everyone else must guide them towards it by writing down a single-word clue, with the caveat that all duplicate clues will be erased before the guessing player sees them. A collaborative gem that takes moments to teach, and rapidly becomes raucous. Discussed in Episode 90 of the podcast!
A two-phased auction game that is light, immediate, and deeply silly – while also dripping with simple thematic charm. Will you end up stinking rich and owning a castle, or spending 15k on a cardboard box? Tactical & smart and yet lucky & light, this is a beloved classic for good reason. Discussed in Episode 99 of the podcast!
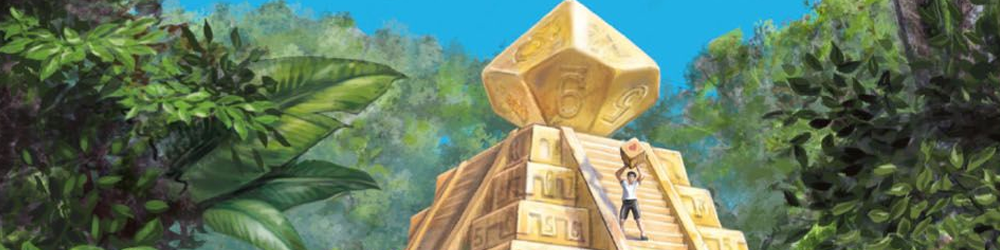
A family board game of bold exploration – build up a personal deck of cycling cards that you’ll successfully use to snag the treasures of El Dorado. Players race across an expanded board of large hexagonal tiles, in this – the most board-game-looking game of this year’s recommendations. A beloved classic by Reiner Knizia – who is widely regarded as being “The Best”, and we probably shouldn’t have spent years representing him as a deranged man in a grey wig failing to pilot a spaceship. Check out our full review of the base game, and the expansion.
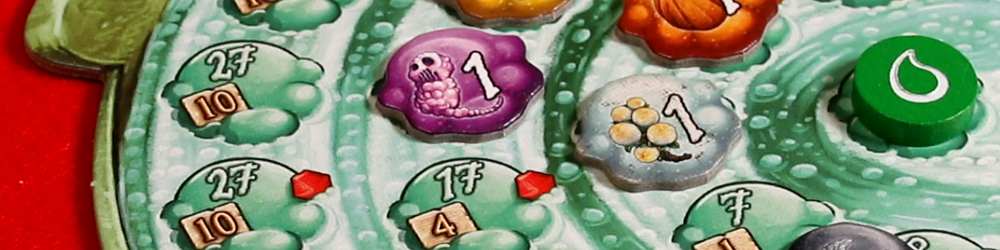
The family game that Matt simply won’t stop recommending, this push-your-luck game of brewing risky potions is a joyful experience from start to finish. Earn gold to buy ingredients that you’ll then randomly pull out of your own personal bag, hoping that you won’t go too far and explode your cauldron in the process. Raucous, loud and comedically unfair, you only need look at how grubby that white token in the photograph above is to get a sense of how many times this gem has hit our table. Check out our full review, which features a frankly misguided use of paint cannons.
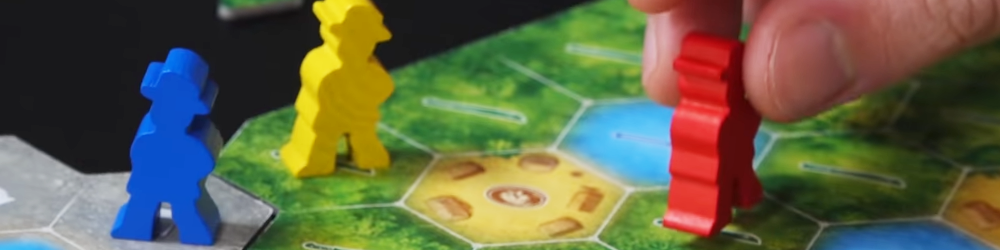
Hubris and silliness finally tie the knot: in SPACE. This modern classic has finally seen a reprint, and you’ve every reason to be excited – players assemble ships from a communal collection of face-down tiles, peeking and placing whilst working against the clock. The fabulous/terrible ships you’ve each constructed will then be put through their paces in the field, as you attempt to lug cargo from A to B whilst keeping your rapidly-assembled ship in one piece. If drastically unfortunate strokes of poor luck sound like the ideal recipe for a great night, this is the one you want. Watch the digital version of the game in action here, in which Matt went head-to-head against Tom.
Finally – after an extended length of time in which this game was sold out – we hope you’ll allow us to be VERY CHEEKY here and give a brief plug for a game that we made. The Serious Nonsense Box is a stand-alone expansion to the game Monikers – a beautifully produced party game in which you’ll play through several rounds, trying to get your team to guess the title of as many cards as possible – whilst against the clock.
In the first round you can say almost anything, or even just read out the card’s descriptions – but by the final round you’ll only be able to act out the titles using silent charades. What initially sounds impossible becomes a magic trick in familiarity, and we took this formula and honed it further to specifically amplify the capacity of players to be naturally funny, writing hundreds of new cards and keeping the cream of the crop.
If you want a comedy party game that doesn’t feel the need to get grim or punch-down, we’re pretty proud and confident of what we’ve crafted here. But don’t just take our word for it, obviously! Check out someone else’s review!
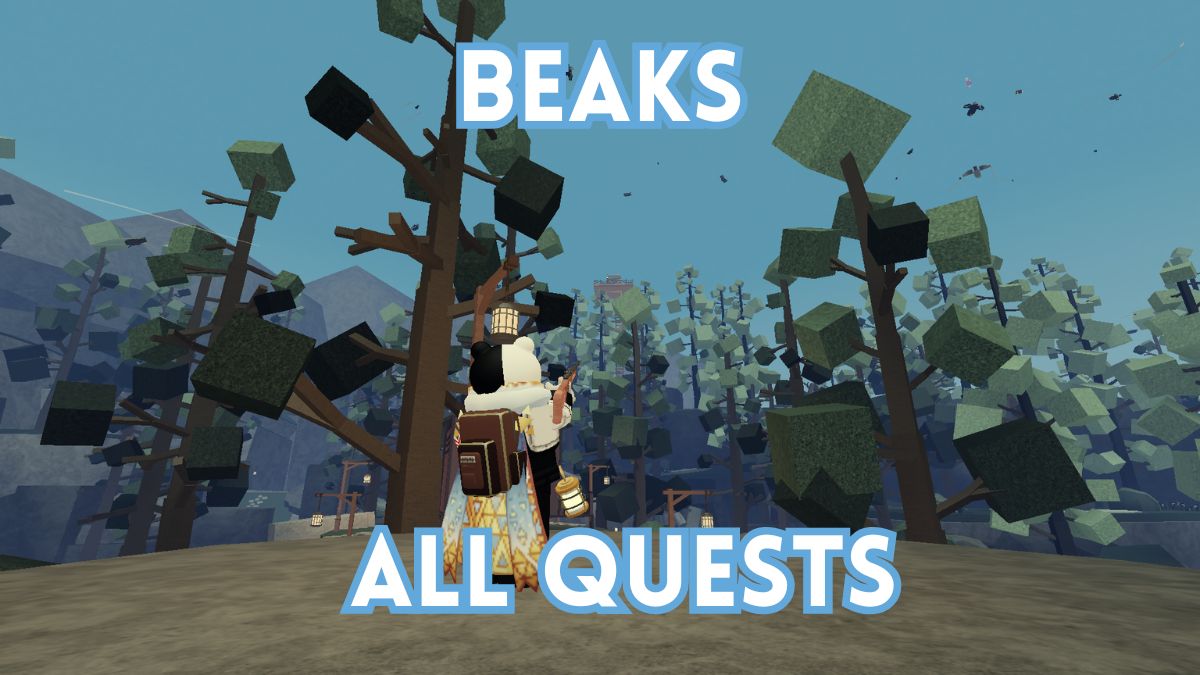
Beaks just had its first major update, and with it came Quests. These are completely optional, but still a great way to earn some extra XP, currency, and even darts. We’re going to tell you how to start and complete every single one in this All Roblox Beaks Quests Guide.
All Benny Beaks Quests in Roblox Beaks
Screenshot by The Escapist
When you first start playing the game, you’ll be at Beakwoods Camp. On the Right of the sign, you should see Benny Beaks, who has a few tutorial quests for you. Even if you already have a high-level character in Beaks, you should still do these because they take less than a few minutes, and they give you a bunch of darts. You have to finish these in order.
Capture 10 birds Quest
Screenshot by The Escapist
Just like it sounds. Equip your gun and capture 10 birds. Any will do, so feel free to capture 10 Pidgeons or 10 Parrots, which are all over the place. Go back and talk to Benny when you’ve captured 10.
Reward: 50 Coins, 20 XP
The Bird Collector
Screenshot by The Escapist
After catching your 10 birds, Benny tells you to sell them to the Bird Collector. Walk up to the Bird Bazaar NPC (it’s just next to you), and ask to sell all your birds (or if you want to keep a few, just sell 10). Return to Benny for your reward.
Reward: 50 Coins, 20 XP
The Dartsmith
Screenshot by The Escapist
This is actually a great way to see how the Beaks developers reworked the Dartsmith. Before the update, you had to pay 200 Coins to get around 4-5 random darts. Now, you can pick the darts you need, and buy them in sets from just one to up to 10.
Visit the Dartsmith who is next to the notice board and craft any dart. We recommend you get 10 Iron Darts, but you only really need one for the quest. Return to Benny for your reward.
Reward: 15 Steel Darts, 100 Coins, 25 XP
The Gunsmith
Screenshot by The Escapist
This one can take a few minutes. You need to have 1,500 Coins to buy the Hunter Rifle from the Gunsmith at Beakwoods. So, go into the field and start gunning down birds and then selling them to the Bird Collector. This is a great way to learn the loop of the game. Once you have 1,500 Coins, buy the gun from the Gunsmith. Return to Benny for your reward.
Now, if you already bought the Hunter Rifle before the quest was added, simply talk to the Gunsmith, then unequip and equip the Hunter Rifle again. You won’t get the progress, but with your Hunter Rifle equipped, talk to Benny, and that should finish the quest.
Jimmy is the innocent-looking NPC just outside Beakwoods camp (on your way to Quill Lake). He has a few quests that further teach you about different kinds of birds.
Jimmy’s First Quest!
Screenshot by The Escapist
Jimmy wants you to collect 5 common and 2 uncommon birds. You’ve probably already figured out that birds like Parrots and Pigeons are really common, while Bulbuls, Sparrows, and Goldflinches are somewhat uncommon (but you really shouldn’t have a problem finding two of them). Once you capture the birds, talk to Jimmy for your reward and next quest.
Reward: 50 Coins, 25 XP
Beakwood’s Rare Birds!
Screenshot by The Escapist
Jimmy wants you to catch 3 rare birds. Rare birds (in Beakwoods) include: Crossbills, Woodpeckers, and Hummingbirds. Out of all of these, Crossbills and Hummingbirds are the easiest to notice. Just look for anything blue flying around or anything red flying somewhat high. If you can’t see them right away, try to shoot some common birds until these rare ones eventually spawn. It shouldn’t take you too long. Return to Jimmy for your reward and one more quest.
Reward: 75 Coins, 50 XP
Beakwood’s Mutated Birds!
Screenshot by The Escapist
Jimmy wants you to capture 3 mutated birds in Beakwoods. These can be of any rarity, so even 3 mutated Pidgeons are good. For this one, just look for any bird with weird colors or glowing eyes and gun it down. It shouldn’t take you much longer than the Rare Birds quest. Once you gun down the 3 mutated birds, report to Jimmy for your reward.
Reward: 30 Smoke Darts, 75 Coins, 50 XP
All Moon Quests in Roblox Beaks
Screenshot by The Escapist
Just before you arrive at the Quill Lake sign, you should spot Moon the Beakwoods Guardian.
Moon’s Quest
Screenshot by The Escapist
Moon wants you to complete the Beakwoods bestiary. Honestly, out of all bestiaries, the Beakwoods one is likely the easiest. Simply shoot birds until you fill it out (don’t forget about the birds that fly high above the trees) and return to Moon.
Reward: 25 Smoke Darts, 20 Golden Darts, 250 Coins, 100 XP
All Star Quests in Roblox Beaks
Screenshot by The Escapist
When you reach Quill Lake, you can find Star (Quill Guardian) standing on one of the elevated piers. She actually gives you a choice between two quests, and you can even repeat one (but you probably shouldn’t).
Lake Birds
Screenshot by The Escapist
Getting into some tougher quests. What you need to do is complete the Quill Lake Bestiary. Refer to our Roblox Beaks All Birds Guide for a list of all birds in the game. When you have the full bestiary, return to Star, and you can then accept the other quest. We recommend you pair this quest with other ones (such as Garden of Eden) because it can take a while.
Reward: 25 Golden Darts, 20 Smoke Darts, 20 Steel Darts, 25 Iron Darts, 1,000 Coins, 500 XP
The Wishing Well
Screenshot by The Escapist
This one is entirely luck-dependent. You need to use a regular bird on a Wishing Well and (hopefully) get the Bio-Luminous mutation on this same bird. Refer to our Ultimate Roblox Beaks Beginner’s Guide to learn where the Wishing Well is. Essentially, grab any common bird (a Swan worked for us) and dunk them until you get the Bio-Luminous Mutation. Needless to say, this can take a while, so just be patient and if you get bored, just go and do something else. It’s RNG after all.
Note: this quest is repeatable (for some reason)
Reward: No reward (because reasons)
All Laken Quests in Roblox Beaks
Screenshot by The Escapist
Find Laken in Quill Lake, who is just under the Camp NPC.
Garden of Eden
You need to capture 10 vibrant birds that reflect the beauty of nature. What the game actually means is that it wants 10 birds with nature-like mutations. These are the Cherry and the Mossy Mutation. This can take a while, so we recommend you pair it with the
All Vito Quests in Roblox Beaks
Screenshot by The Escapist
Vito the Quill Lake Veteran is stationed in Silverstone Camp (the place where you can get the Night and Thermal Vision Goggles).
Big Birds of Quill
Vito’s first quest is for you to capture bigger birds. Pretty much, anything bigger than a Swan is considered a big bird on Quill Lake. So go and hunt down Flamingos, Storks, Sandhill Cranes, Pelicans, and Great Egrets. This shouldn’t take you too long.
Reward: 750 Coins, 500 XP
The Wishing Well (Vito)
Screenshot by The Escapist
After you finish the quest above, Vito wants you to “sacrifice” a bird to the Wishing Well, so go and do just that. Simply put ANY bird into the wishing well, and once it comes back, you’ll get the progress. Simple as that.
Reward: 100 Coins, 75 XP
Double Trouble
Screenshot by The Escapist
Vito wants you to capture 5 different species of birds, each with two different mutations. Honestly, just do this one as you do any other quest because you should get it naturally. We recommend you just shoot everything at Quill Lake, and eventually you should have all of them. You can also just go for the common birds like Swans, Black Swans, Ducks, Parrots, and Pidgeons and just focus on them until you capture two versions of each.
Alex the Wanderer is an NPC on the cliff above the Mount Beaks campsite.
Eye on the Skies
Screenshot by The Escapist
Alex wants you to buy your first set of binoculars. You can buy Binoculars from the Glider merchant. Night Vision Goggles or the Thermal Vision Goggles do not count as Binoculars (we thought we could get away with them). A regular pair of Binoculars costs 1,500 Coins, and an Advanced pair of Binoculars goes for 2,500. You only need the basic ones. Buy it and take it back to Alex for your reward.
Reward: 100 Coins, 50 XP
A Small Ask!
Screenshot by The Escapist
Alex wants you to capture 10 small birds at Mt Beaks. Believe it or not, this actually isn’t that straightforward. Most Mountain Beaks birds are huge and fly really high. Only occasionally can you see the really tiny birds, and they tend to stick low. So simply aim around the trees until you spot them. These include birds like the Chickadee, the Mountain Bluebird, the Brown Creeper, and the Snowfinch. Once you capture 10 small birds, report to Alex for your reward.
So, here’s a ridiculous one. You need to capture 10 (or 5) high-flying birds with a Golden or Gold-spotted mutation. Here’s where we would post info on how to do it… IF WE HAD ANY! The quest is bugged. Yep, we took down several Golden and Gold-Spotted birds that were definitely flying high, but none of them counted towards the progression. Many other players have been complaining about this, so it’s only a matter of time before it’s fixed. It also seems like this quest is preventing further quest progression.
Reward: 50 Golden Darts, 25 Crystal Darts, 500 Coins, 250 XP
Those are all the quests we have so far. We’ll keep updating the list as we discover the rest. In the meantime, check out our Beaks codes, and to stay up to date with Beaks, check out our Official Beaks Trello and Discord Links.
The Escapist is supported by our audience. When you purchase through links on our site, we may earn a small affiliate commission. Learn more about our Affiliate Policy
Anime Power decided to give their players a real treat for this Easter: the Easter 2025 Easter Event is here, and below is everything you need to know about it. From new Champions to some amazing Accessories,
Anime Power Easter 2025 Event
The Easter 2025 Event in Anime Power is located on the Easter Island, a mysterious land covered in Easter Eggs of different colors and pink trees. It has a bunch of new enemies, new champions, and new items overall. First, we need to see how to get to the Easter Island.
How to go to Easter Island
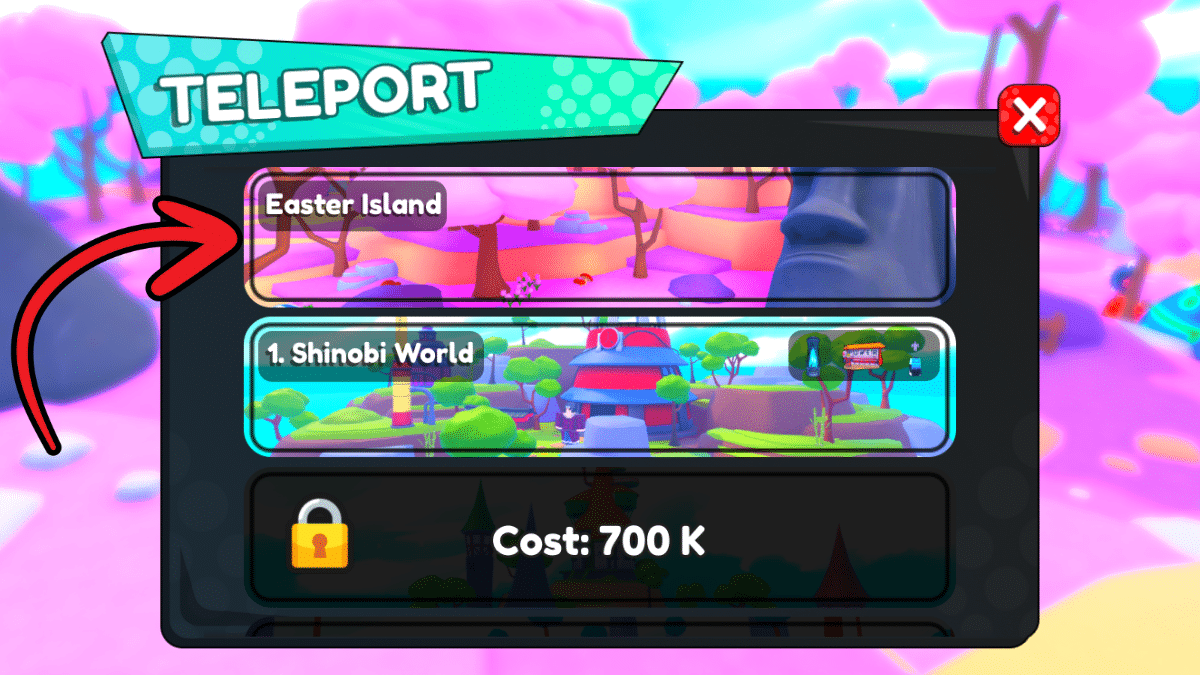
Easy as pie.
To travel to the Easter Island, you simply need to click on the Teleport button and navigate to the Easter Island, which will be the first option from the top. Once you click on it, you will be instantly teleported to the Easter Island, where you can start your Easter adventure.
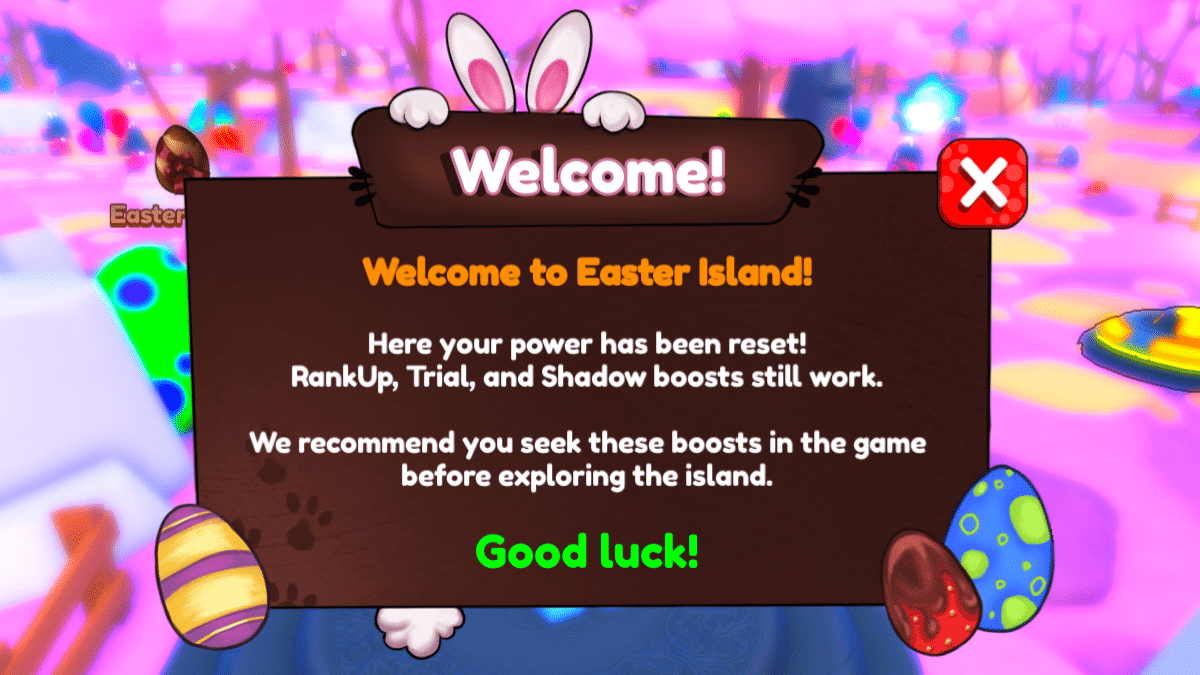
Good luck, indeed…
You will be greeted with a ‘Welcome!’ message that will explain that all of your power has been reset to 0 while you are on this island. But don’t panic, as this does not affect your Base Game level and power. You are allowed to bring your Champions, Swords, and Equipment, but your stats will be base-level. But do not worry, as leveling up on the Easter Island is fun and fast.
Easter Shop
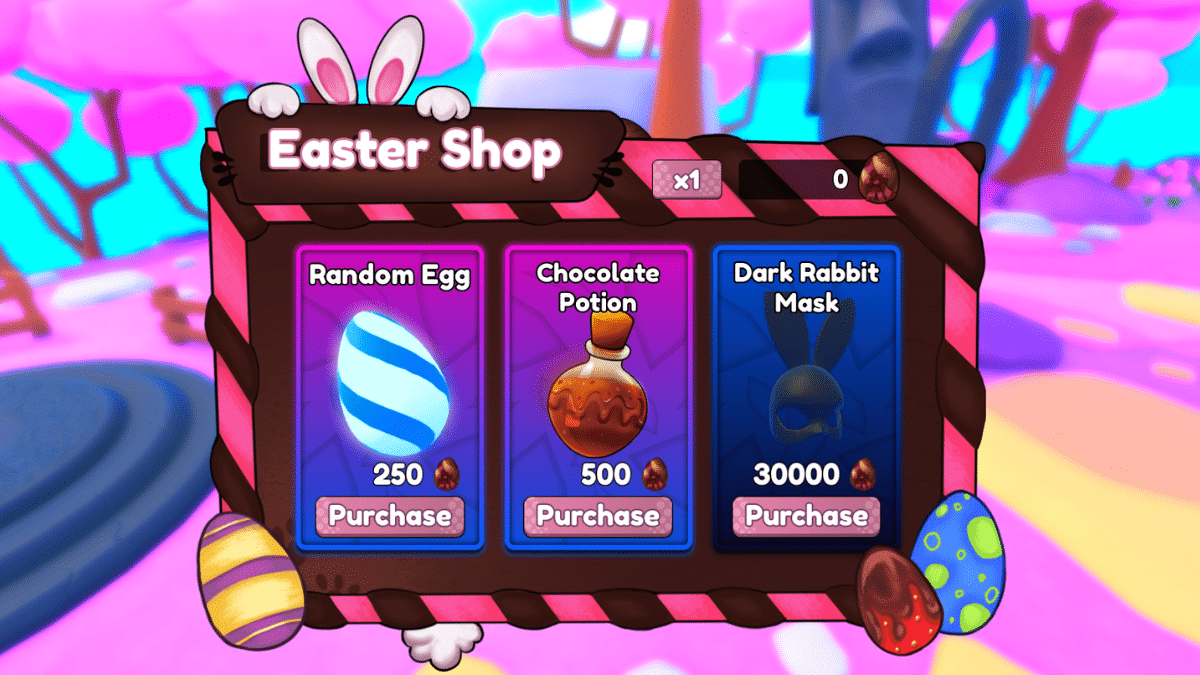
I know you’re here for the Mask.
When you get teleported to the Easter Island, on your left, you will be able to see the Easter Shop, offering unique and powerful items in exchange for Chocolate Eggs, which can be collected from playing on the island and from the Bunny Pass. Below is a detailed explanation of each item in the Easter Shop:
Random Egg
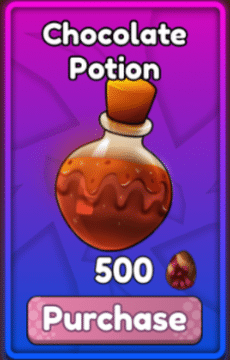
Chocolate Potion
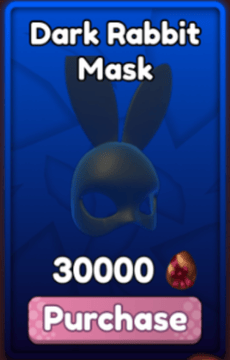
Dark Rabbit Mask
◉ Gives a Random Reward.
◉ Boost all of your stats by 2x for 5 minutes.
◉ 5.5x Coins ◉ 7x Power ◉ 7x Damage ◉ 2.5x Luck
The possible rewards from the Random Egg include: Gems, Fingers, Grimoires, Shadow Stones, Haki Shards, etc.
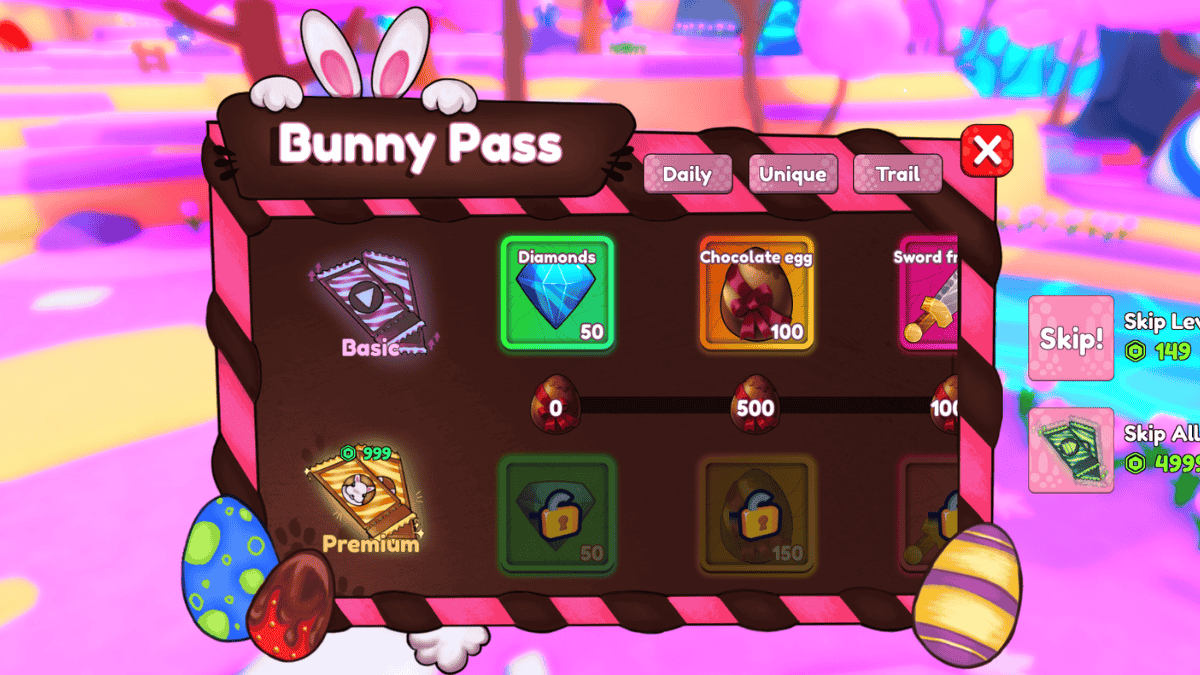
Easter 2025 Bunny Pass (Battle-Pass)
Some incredible rewards for the dedicated players.
Included in the new event is a unique new Battle-Pass, called the Bunny Pass. You can find this Battle-Pass right above the Power display on your screen by clicking on the icon. You can progress the Bunny Pass by completing Daily Quests, as well as Unique Quests. Here are the available rewards:
Gems
Chocolate Eggs
Sword Fragments
Haki Shards
Lineage Crystals
Shadow Stones
Fingers
Grimoires
Unique Accessories
Unique Champions
Wheel of Fortune Rolls (Normal & Easter)
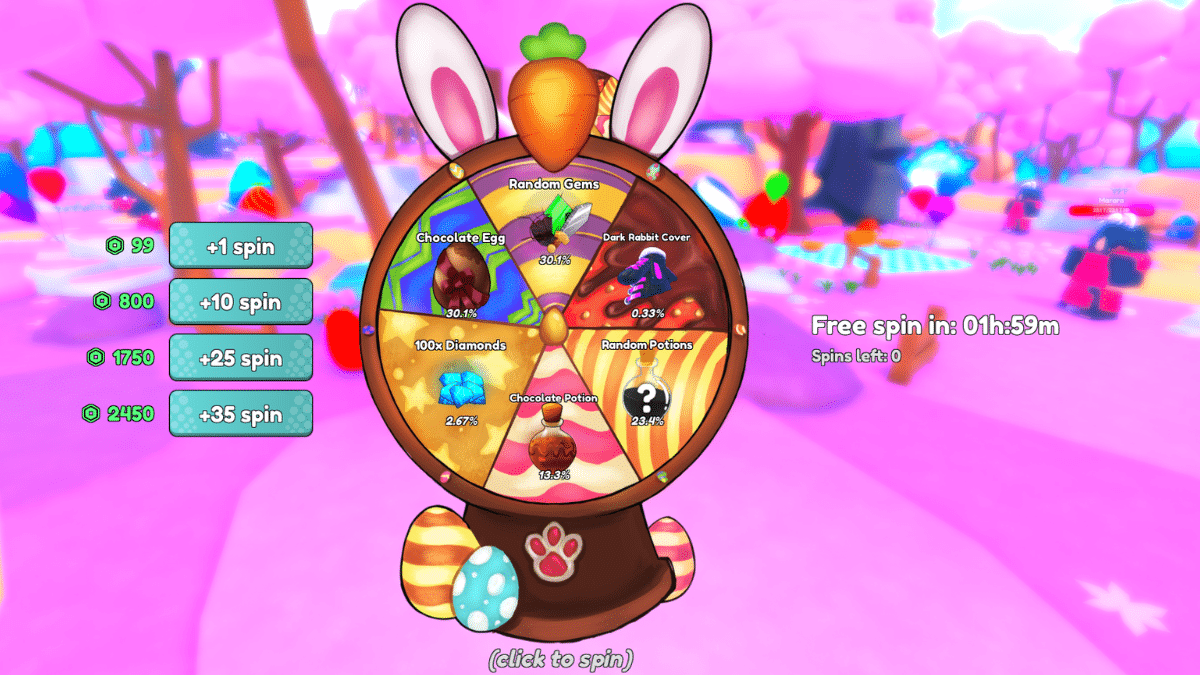
Easter 2025 Wheel of Fortune
These things are always rigged, right?
The Wheel of Fortune makes a return with this Easter Event. You get a free spin every 2 Hours, but you can also purchase them with Robux. Here are the possible rewards and their drop rates:
Reward
Drop Rate
Random Gems
30.1%
Chocolate Egg
30.1%
Random Potions
23.4%
Chocolate Potion
13.3%
100x Diamonds
2.67%
Dark Rabbit Cover
0.33%
Anime Power Easter 2025 Enemies
The Easter 2025 Event in Anime Power introduces a bunch of new enemies to fight, but actually beating them is a challenge. As you start with zero power, you have to climb your way back up again in order to defeat them. But defeating them yields some very good rewards, so it is worth it.
Easter Island Enemy List
Below is a complete and detailed list of all new enemies on the Easter Island:
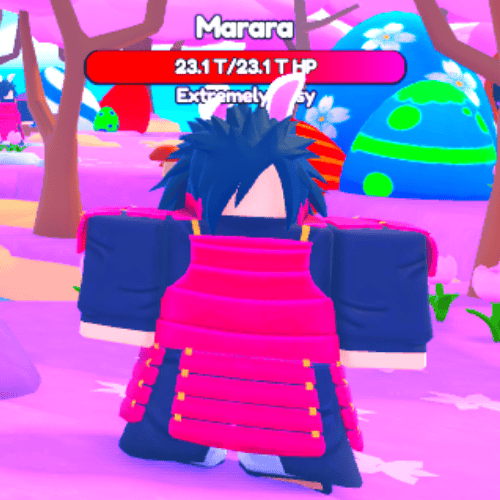
Enemy
Health
Marara
Extremely Easy 23,100,000,000,000 HP (23.1 Tr)
Obico
Easy 2,310,000,000,000,000 HP (2.31 Qq)
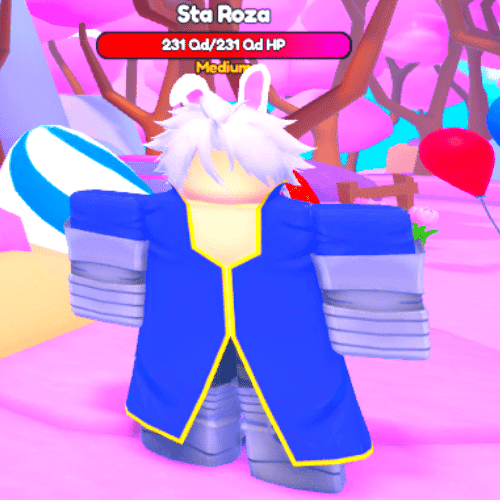
Sta Roza
Medium 231,000,000,000,000,000 HP (231 Qd)
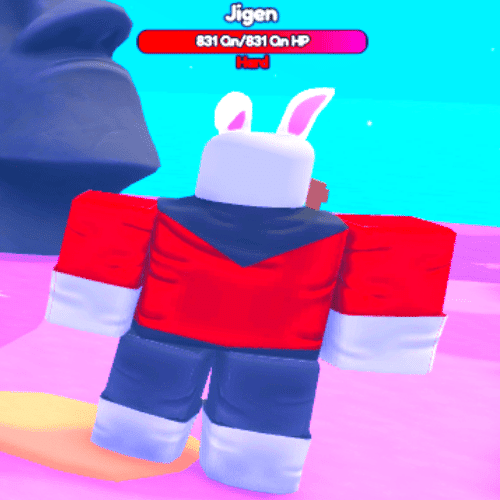
Jigen
Hard 831,000,000,000,000,000 HP (831 Qd)
Brola
Insane 53,100,000,000,000,000,000 HP (53.1 Sx)
Some of these have a ludicrous amount of health for a normal enemy, so we recommend trying to kill them with some friends or other players who are on the island at the same time as you.
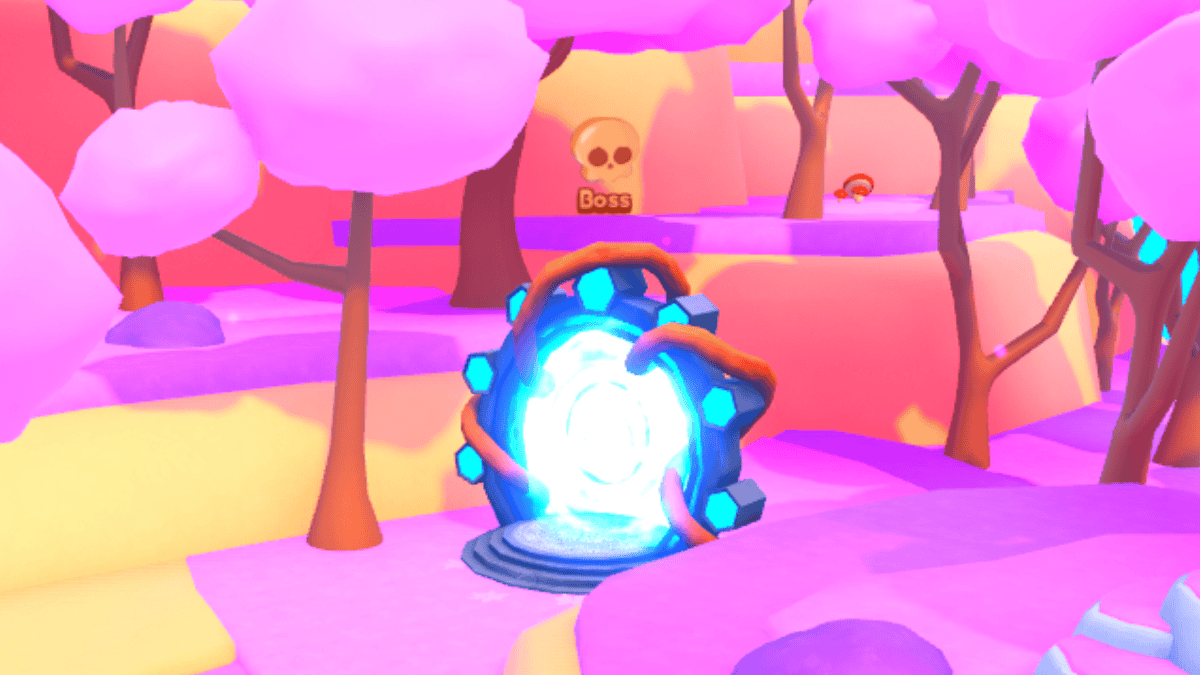
Easter Island Boss
Follow the yellow-stone road.
There is, of course, a Boss. To find the Boss Arena, you have to follow the right path that you will see right after you spawn. After a few Marara fights on the Easter Island, you reach a blue Portal. Entering the portal will teleport you to the Soruke Boss arena.
Better being a friend for this one.
The Boss of the Easter Island is Saruke, a behemoth with an unbelievable amount of HP: 20,000,000,000,000,000,000,000,000 HP. Beating him usually requires 3-6 people fighting at the same time, unless you are a god of Anime Power and can solo it. After defeating him, you will have a chance to get one of his drops:
Easter Egg Necklace – 15%
Bunny Mask – 5%
Easter Bunny Hat – 1%
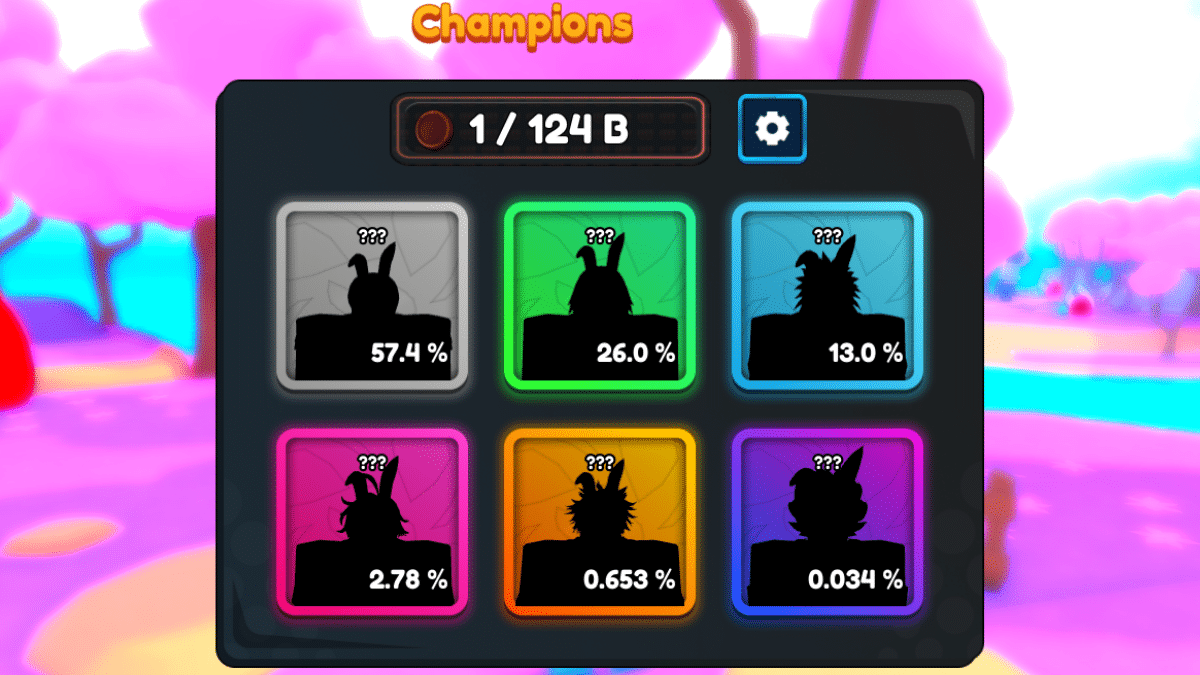
Anime Power Easter 2025 Champions
Who could they be?
As usual, the Easter Event brings us new Champions for which we can roll. They are, on average, better than their same-level counterparts from the base game. There is one that is the goal of everyone rolling: Vegega. He has a measly 0.034% drop chance, so if you want him, be ready to grind this area.
Easter Island Champions List
Below is a complete and detailed list of all the new Champions available on the Easter Island:
A weird mix, for sure.
Champion
Normal Luck Rarity
High Luck Rarity
Power
Namm
57.4%
42.9%
45
Sarura
26%
26.5%
60
Jivaya
13%
19.9%
110
Melioras
2.78%
7.67%
130
Ichito
0.653%
2.66%
150
Vegega
0.034%
0.197%
180
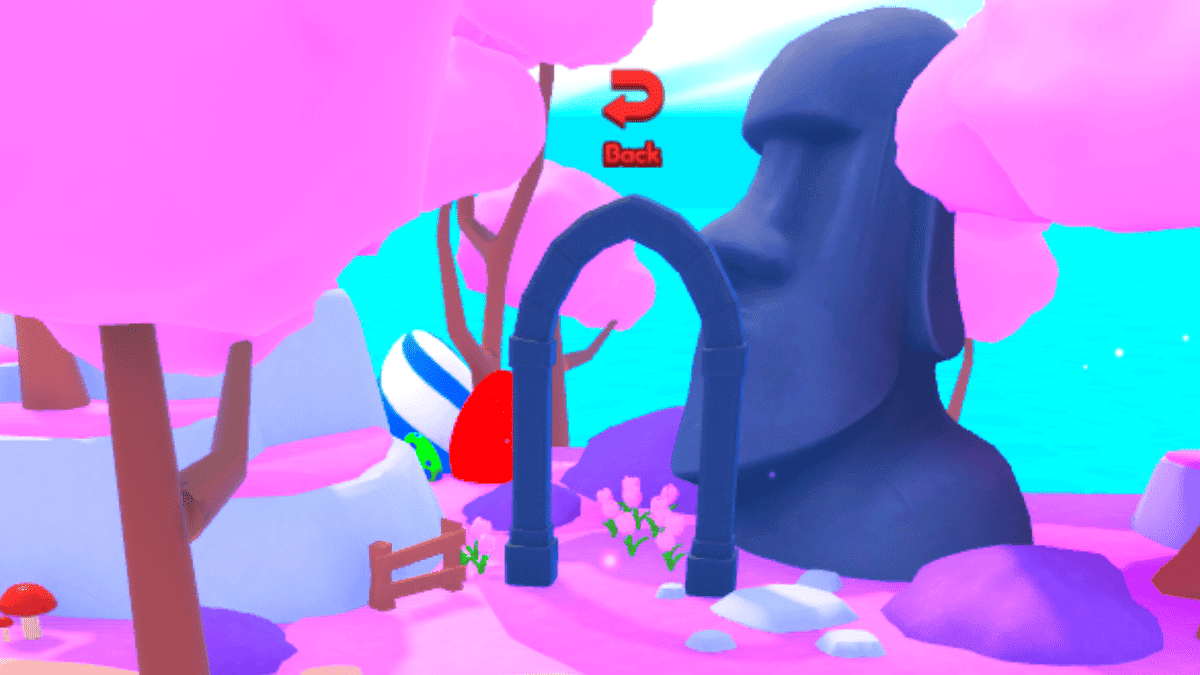
How do I Leave Easter Island?
Time to go back!
After you finish farming or you get everything you want, you can head back to the Base Game. To return, you need to find the ‘Back‘ gate. It is located on the left side of the spawn, and it teleports you back to the Shinobi World. If you don’t feel like walking or are in a hurry, you can also press the Teleport button and select where you would like to go.
And that is all for our Anime Power Easter 2025 Guide. Check out our Anime Power Codes article to grab some freebies and goodies that can help you progress the Easter Event more easily.
The Escapist is supported by our audience. When you purchase through links on our site, we may earn a small affiliate commission. Learn more about our Affiliate Policy
Many of you told us how much you appreciated us giving you a Buyer’s guide to our 2024 Fall Sale, so as we approach our Special Spring Sale that starts on Tuesday, April 1, Rachel and I have updated this Buyer’s Guide to try to give you some of that information to help out with your buying choices. We encourage you to use this information and the links below to build your sale carts on the GMT website between now and Tuesday when the sale begins. I hope you find this Buyer’s Guide useful.
Where Can You Find ALL the Eligible Sale Items?
We’re trying to make things a little easier for all of you this year, so can find all of the games you can buy in the sale in one department on the GMT Website. Just click Spring Sale 2025 (or choose it from the left side menu on any page in the “Browse by Series/Type” section except the front page on the GMT website) to see a list of every item that you can buy with the 40% off sale discount.
Which Games are Close to Going Out of Stock?
Here’s an alphabetical list of our lowest-stock games, with current quantities on hand for all games with less than 200 copies currently in stock:
NOTE: The following games have been “OUT OF STOCK” on our website for a while, but in our latest physical inventory, we’ve found some copies in the warehouse (quantities noted below). Good while stocks last:
Note that some of the games pictured may already be out of stock now (updated 4/1)
Which Games in the Sale have the highest retail prices?
Here’s a descending order list of our highest retail priced games, for those of you looking to optimize value. Price listed is BEFORE your 40% sale discount:
We hope you find this Buyer’s Guide useful and that you all get some 40% off games in the sale that will bring you many hours of enjoyment! – Gene & Rachel


![Ultimate Wagarashi Element & Skill Tree Guide [RELEASE]](https://histream.ir/wp-content/uploads/2025/05/wagarashi-elements-skill-tree-guide.webp.jpeg)


![Complete Ghoul://RE Kagune Tier List and Guide [2 MYTHICAL QUINQUES]](https://histream.ir/wp-content/uploads/2025/05/ghoul-re-kagune-tier-list-and-guide.png)
![Volleyball Ascended Abilities Tier List and Guide [UPD]](https://histream.ir/wp-content/uploads/2025/05/volleyball-ascended-abilities-tier-list-and-guide.png)


![Anime Power Easter Event Guide (2025) [EASTER] – All Enemies and Rewards](https://histream.ir/wp-content/uploads/2025/04/anime-power-easter-2025-event-guide.png)
 button and navigate to the Easter Island, which will be the first option from the top. Once you click on it, you will be instantly teleported to the Easter Island, where you can start your Easter adventure.