Updated on 20.6.2025. Added new species and changed order of existing ones on the tier list.
When you create your first character in Rune Slayer, you will automatically be given a random race. While you can’t change this race (without paying Robux), it’s still important to know what each race is good or bad at. To help you decide if you need to reroll, here is our Rune Slayer Race Tier list.
Before we begin, we want to make one thing clear: Races don’t mean much in the grand scheme of things. Even if you pull the worst race on this list, you can still play any class and be just as effective as someone who got the best race. Races are mostly for those who want to mid-max or those who want to look different. So, unless you are after a specific race or just want to look cooler, don’t stress too much over with race you get.
Dullahans are undead creatures with the power to leech life and reap souls. Their build makes them very resilient to attacks (just like a Half-Golems), while their passive and active abilities let them heal when killing enemies. They also have a chance of summoning a spectral Grim Reaper scythe, which tears down enemies.
2%
Infernim
HellBorn Passive Wall Climb Passive +10% Fire Resistance +1 Luck -5% Holy Resistance Additional passives based on the number of horns
Infernals are so powerful and evil that you won’t be able to join the Holy Sect. With their passives, they can summon Hellfire no matter which class they play. Depening on how many horns they have, they also get additional bonuses like extra Speed or even a better Fire Attack.
1%
A-Tier
Race name
Stats
Info
Chance to roll
Bunny
Bunny Dash Bunny Jump Carrot Summoning
As a Bunny you can dash further and jump higher. These already make you better than other races and will help you win fights. The Carrot Summoning is nice, but you shouldn’t rely on it, unless you have no other choice.
4,41%
Seraphim
-5% Fire Resistance +10% Holy Resistance +1 Luck Additional passives based on the number of wings
As a creature of pure good, you have more luck, and become unable to join the Demon Sect. You also get a passive based on the number of wings you have. Unfortunately, that’s where it becomes clear that Seraphim justn’t aren’t as good as the Infernim. You don’t get any cool attacks, you can’t fly, you just have a bit more luck, and wings that look cool.
1%
Ailuran
+8% Speed Boost +10% Fire Resistance +25% Cold and Heat Resistance +25% Jump Height +15% Fall Damage Reduction
Obviously, we had to put the Ailuran here because of their cute cat ears. Kidding aside, Ailuran move faster and jump higher than any other race in this game. This alone gives them a huge advantage when it comes to exploration and getting out of trouble quickly.
7,143%
Vampire
-15% on all stats during the day +20% on all stats during the Night You take 5% more damage from Holy attacks +1 Extra Luck You heal if you take bleed damage You heal 50% of your health if you cause bleed damage to your opponent
Vampires are cool, and you can even become one without rerolling your race, however, they are only cool during the night, and it’s not always night in Rune Slayer. If you can live with this, you’re going to love being a Vampire.
Chiroptrans are interesting. They are like demons, but not really. They attack with Holy magic but can also bite like vampires. Regardless, they look cool and they are a fun and useful race to play as.
7,143%
Slime
-7,5% Magic Resistance -7,5% Fire Resistance +25% Immunity
At first, slimes don’t seem that special. They are weak to magic and fire, and they don’t have any special defensive stats. However, when struck, Slime players can spawn smaller Slimes to fight for them, and can use a part of themselves to hit an opponent (works in a pinch). As a bonus, Slimes are super immune to status ailments.
5,294%
Half Golem
-5% Movement Speed +5% Damage Reduction +10 Maximum Weight +25% Robustness
As you can imagine, Half Golems are extremely resilient. They also take a bit less damage and can carry more items. The caveat is that they move a bit slower than all other races.
5,294%
Amphibu
Swim Boost 35 Additional Race passives
At first, the Amphibu may seem useless with their Swim Speed, but once you unlock their Racial passives, they become a lot more reliable. The racial passives can give them things like higher jump, a speed boost, and even a small attack buff. You are also free to pick which one you want.
10,714%
C-Tier
Race name
Stats
Info
Chance to roll
Ghoul
+5% Magic Attack Ghoulish Gall ability Additional Racial boosts
As a Ghoul you can attack better with Magic Attacks and you have a sneak attack, called Ghoulish Gall which can give you a jump start in a fight. You also get one of three Racial Upgrades which can give you a few minor stat boosts.
14,25%
Human
When under 50% Health, gain: +15% Damage Increase +15% Damage Reduction
Humans have the ability to gain an increase in their damage output and take reduced damage if they have less than half a health bar. Otherwise, Humans can manage their hunger better than other classes and gain Focus and Mana efficiency as they level up.
14,25%
Elf
+3% Speed +10% Cooldown Reduction +10% Stealth
Elves are nimble and elegant. While not the strongest for a tanky role, they make fantastic archers and great spellcasters. As they level, they also get extra Mana and Focus.
14,25%
Orc
+10% Health Regen +15% Max Hunger +20% Heat Resistance
Orcs are made for battle. Their health regenerates faster, they are more resistant to heat, and they are generally suited for heavy armor and melee weapons. The tradeoff is they need to eat more than other races.
14,25%
How to race reroll in Rune Slayer
When you log into Rune Slayer for the first time, you’ll be assigned one of the seven available races at random. If you aren’t happy with the race you’ve been given, you can buy a Race Reroll for 150 Robux. If you’re after a specific race, such as the Dullahan, make sure you have enough Robux for a bunch of Race Rerolls because it’s going to take a while.
As of writing this, there is no way to reroll a race after creating a character. You have to do it from the character creator.
That’s all there is to it. Again, unless you’re trying to mid-max, remember you can get by with any race you pull. If you’re wondering which class you should pick to go with your race, check out our The Ultimate Rune Slayer Class Tier List.
Shadowverse: Worlds Beyond offers a wide range of deck types that cater to different playstyles, from fast-paced combos to powerful late-game finishers. Whether you enjoy overwhelming opponents with Fairies, clearing the board with amulet synergies, or stacking Spellboosts for massive payoff turns, there’s something here for everyone. Each deck brings its own unique strategy and key cards that define how matches unfold. In this guide, we’ll take a closer look at the best decks and what makes them so effective.
Shadowverse: World Beyond Deck Tier List
Shadowverse: Worlds Beyond Decks, ranked from best to worst – Image bia TierMaker.
In the Shadowverse: Worlds Beyondtier list above, we can see that not all decks are made equal. Sure, you can adjust them to make them a bit stronger or weaker, but the general synopsis is the same. The Runecraft Spellboost Deck is dominating the Ranked Ladder right now, along with the Forestcraft Fairy Deck and the Havencraft Amulet Deck. If you want to climb, that is what you will need to use.
Shadowverse: Worlds Beyond Best Decks List
Here we will take a look at the top 3 Decks in the current Shadowverse: Worlds BeyondMeta, how they operate, which cards are the most important, and what the playstyle is from start to finish of the game.
Runecraft Spellboost Deck
This deck focuses on building up Spellboosts while keeping the opponent in check. Once your cards are powered up, things really start to flow. Blaze Destroyer becomes a serious threat at a lower cost, and Dimension Climb lets you refill your hand and regain all your play points, making it easier to keep up pressure. If you make it to 10 play points, Kuon, Fivefold Master can close things out with a strong Super-Evolve that targets the opponent’s leader directly.
Forestcraft Fairy Deck
This combo-focused Zoo deck centers around multiplying Fairies in your hand to unlock powerful effects. It takes advantage of cards like Bayle, Luxglaive Warrior, whose cost can drop to zero, and Killer Rhinoceroach, which builds up attack to strike directly at the opponent. Amataz, Origin Blader, also plays a key role by growing stronger while clearing enemy followers. To finish things off, legendary cards like Aria, Lady of the Woods, and Opulent Rose Queen shift the deck into a burn strategy, either by giving your pixies Storm or turning them into damage-dealing spells.
Havencraft Amulet Deck
This deck might seem like it’s built to stall while waiting for amulet countdowns to finish, but there’s a more exciting route. With Skullfane of Demise, you can destroy all your amulets at once, clearing the board and hitting the opponent’s leader in one move. If needed, Unholy Vessel helps ensure a clean sweep. After that, the deck shifts into offense, relying on Rodeo, Anathema of Judgment, and Jeanne, Saintly Knight to take control and limit the opponent’s options. And eventually, Lapis, Shining Seraph keeps coming back, making it increasingly difficult for them to stay in the game.
Those are 3 of the best Decks in Shadowverse: Worlds Beyond. The other decks come off short compared to these, so if you are planning to climb the Ranked Ladder, there is no point crafting them.
That is all for my Shadowverse: Worlds Beyond Deck tier list and guide. Let me know what your favorite Deck is in the comments below. Check out our Shadowverse: Worlds Beyond Codes to get Free Packs and Loot that can help you assemble your favorite deck.
Shadowverse: Worlds Beyond Best Deck FAQs
What is the best deck in Shadowverse: Worlds Beyond?
The best decks are the Runecraft Spellbook and Forestcraft Fairy decks.
How do I get the best decks in Shadowverse: Worlds Beyond?
You can Craft cards, you can open Packs, and you can get them from the Story or Gamepass.
What is the best deck for Ranked Mode in Shadowverse: Worlds Beyond?
The best decks for Ranked are Runecraft Spellbook and Havencraft Amulet decks.
The Escapist is supported by our audience. When you purchase through links on our site, we may earn a small affiliate commission. Learn more about our Affiliate Policy
In Absolvement, mastering powerful skills is key to surviving and thriving in its ever-shifting world. Each skill element brings its own unique identity to combat, offering distinct playstyles and tactical depth. From the raw force of Arcane to the creeping decay of Disease and the elusive power of Shadow, every element has its strengths and specialties. Understanding how these forces work is the first step toward becoming a true force on the battlefield, so follow along with my Absolvement Skills tier list and guide and start… Absolving.
Across all skill types, the strongest abilities often combine high base damage with powerful crowd control or utility. Shadowstep, Pestilence with Black Death, and Judgement with Execution Sentence stand out for their versatility and scaling in high-level play. Beginners will find value in skills like War Banner for team support, Ice Clone with Polar Caps for safety, and Chain Lightning for simple but impactful damage. Experienced players can take full advantage of complex synergies, such as Blood Plague with Epidemic or Soul Burst with DoT builds. Overall, most elements offer viable builds, but Shadow, Disease, and Frost currently offer the most flexible and punishing options when mastered.
Absolvement Physical Skills
Below is a complete and detailed list of all PhysicalSkillsin Absolvement, ranked by power:
Skill
Description and Upgrades
Launch a reinforced chain towards an enemy, pulling them closer, stunning them for 1.3 seconds. • Chain Rattle 1/1 (Uncommon) –Chain Pull now deals 5 Physical Damage to enemies around the area of impact. • Rappelling 1/1 (Rare) –Chain Pull can now be used to pull yourself towards terrain.
Toss out a bear trap towards your cursor, any enemy that steps on it will trigger the bear trap, dealing 10 Physical Damage and Stunning the enemy for 2 seconds. • Barbed Teeth 1/1 (Common) – Beartrap will now cause enemies to bleed 4 Physical Damage per second for 3 seconds • Steel Beartrap 1/1 (Rare) – Beartrap is now made out of reinforced steel, clamping harder and Stunning enemies 1 second longer
Quickly turn to the side and perform a shoulder slam directly into your enemy, dealing 14 Physical Damage. • Concussive Slam1/1 (Uncommon) –Shoulder Slam now pushes the enemy back when hit.
Arch your bow with the intent to pelt the area marked by your cursor with arrows, dealing 4 Damage per second for 6 seconds in the area. • Bombardment2/2 (Advanced) – Area of effect radius is increased by 2 studs. • Arrow Rain2/2 (Unique) –Volley lasts 1 additional second.
Plant your feet firmly in the ground and take multiple arrows from your quiver, rapidly firing them all and doing 5.5 Physical Damage per arrow. • Everlasting Quiver1/1 (Intermediate) –Rapid Fire now fires an additional arrow. • Aggressive Stance1/1 (Intermediate) –Rapid Fire’s windup is reduced by 10%.
Swing in a slow arc, stunning all enemies for 1.25s and dealing 11 Physical Damage. • Wide Arc5/5 (Common) – Increase the range of Cleave by one stud. • Followup1/1 (Mythical) – If Cleave hits at least 2 enemies, you can now press Cleave again to stomp.
Charge at the nearest enemy, rooting them for 0.5s and then stomping immediately after, dealing 10 Physical damage to all enemies hit nearby. • Siesmic Stomp3/3 (Common) – Increase Rush’s stomp AoE by 2.5 studs. • Shattered Earth4/4 (Uncommon) – Rush’s Stomp damage increased by 4%. • Earthquake1/1 (Rare) – Rush’s Stomp AoE now leaves behind an earthquake in the rubble, dealing 2% of the damage every second for 5 seconds. • Double Stomp1/1 (Unique) – Rush will now stomp an additional time. • Blindside1/1 (Mythical) – Enemies are now stunned instead of rooted by Rush.
Plunge your fist into your chest, sacrificing 20% of your Maximum Health to imbue yourself with blood. • Deep Wound1/1 (Uncommon) –Bloodbath will now apply one additional Bleed Stack. • Sanguine Returns1/1 (Unique) – 20% damage you deal with Bloodbath returns to you as Healing.
Draw your bow and take your time, planning to hit the enemy in the soft spot. This skill trades speed for accuracy and damage, dealing 13.5 Physical Damage. • Keen Eye1/1 (Unique) –Focus Shot is now guaranteed to Critically Strike.
Attempt to slice your enemy in half with a vicious slash, dealing 12 Physical Damage if an enemy is below 7.5% Health. Execute will instantly kill them. • Slaughtering Ire1/1 (Unique) – If Execute successfully KILLS an enemy, its cooldown is reduced by HALF. • Sudden Death1/1 (Mythical) – All skills now have a 5% chance to fully reset the cooldown of Execute.
Thrust your weapon forward, dealing 10 Physical damage and applying a bleed, dealing 2.33 Damage every second for 6 seconds. • Puncture4/4 (Intermediate) –Pierce’sBleed now deals 5% additional damage. • Gore?/? (Advanced) –PierceBleed lasts 1 second longer.
Fire a Serrated Arrow from your bow, dealing 7 Physical Damage and applying Bleed, dealing 3.1 Physical Damage a second for 6 seconds. • Arm and a Leg6/6 (Common) –Tendon Slice now reduces enemy damage by 5% whilst they are slowed. • Deep Cut3/3 (Intermediate) – Increase Slow Duration provided by Tendon Slice by an additional 3 seconds. • Achilles Tendon6/6 (Intermediate) –Tendon Slice reduces enemy Walkspeed by an additional 5%.
Fire a Serrated Arrow from your bow, dealing 7 Physical Damage and applying Bleed, dealing 3.1 Physical Damage a second for 6 seconds. • Deep Laceration4/4 (Common) – Increase Serrated Arrow’sBleed duration by 1 second. • Razor’s Bite3/3 (Rare) – The Bleed applied by Serrated Arrow deals 5% more Physical Damage. • Cutting Precision2/2 (Rare) –Serrated Arrow deals 15% more Physical Damage.
Overload your bow with multiple arrows at once, shooting three arrows in a cone pattern. Each arrow deals 4 Physical Damage. • Quickshot1/1 (Intermediate) –Multi-shot’s windup is reduced by 10%. • Broad Arrow1/1 (Intermediate) –Multi-shot knocks back enemies on hit. • Arcing Arrows2/2 (Advanced) –Multi-shot fires an additional arrow. • Bodkin Point1/1 (Advanced) –Multi-shot will pierce through one target.
Swing around quickly, slicing down on your enemy and dealing 9 Physical Damage. • Precision3/3 (Advanced) – Increase Reverse Slice Damage by 10%. • Fatal Strike2/2 (Masterful) –Reverse Slice now deals 5% more damage against Stunned targets. • Reverberating Slash1/1 (Masterful) – After using Reverse Slice, your next skill will cast Reverse Slice again for 30% of the original damage.
Physical skills in Absolvement focus on raw damage, crowd control, and mobility, using weapons, traps, and brute force to dominate enemies. Many of these skills apply Bleed effects, stuns, or area damage, offering both precision and chaos in combat. Among them, Execute stands out as one of the most powerful, instantly finishing off low-health enemies and potentially resetting its own cooldown with the right upgrades.
Absolvement Fire Skills
Below is a complete and detailed list of all Fire Skills in Absolvement, ranked by power:
Skill
Description and Upgrades
Set yourself ablaze, summoning fireballs through each swing and granting a minor speed boost at the cost of being burned alive. Use the move again to extinguish the flames. • Insulation 1/1 (Uncommon) – If Overheat is active, all freezes last 75% of their original duration • Speed Demon 1/1 (Rare) – Overheat will now increase your walk speed by an additional 10% while active • Cauterized Flesh 1/1 (Unique) – Overheat will now deal 10% less damage to you while active • Hellfire 1/1 (Mythical) – Overheat now deals 10% Additional Fire Damage.
Twirl with heat, casting a fiery tornado that travels away from you, burning enemies in its way. Any enemy that is in the way will be burned for 3 Fire Damage and will be set on fire. • High Heat 2/2 (Uncommon) –Whirling Flames now deal 7% more damage. • Accelerated Heat 4/4 (Uncommon) – Whirling Flames now travels 5% Faster.
Target an enemy, if they have burn stacks, detonate them, dealing 3.25 Fire damage per burn stack. Additionally, the blast will damage nearby enemies, dealing 3 Fire damage and increasing in radius per burn stack. • Crackling Fire (Common) – Ignition cast time reduced by 5%. • Firestarter (Rare) – Ignition will set the enemy on fire after it explodes. • Detonation Switch (Mythical) – Ignition will now instantly cast on the enemy and explode after a brief delay at the cost of a 25% Damage Reduction.
Charge a fire blast into your hand, project it forward at high speed, deal with 7 fire damages, and apply one burn stack. • Charred Armor 3/3 (Common) – Fire Blast now ignores 5% of the enemy’s armor Singed Skin 3/3 (Common) – Fire Blast deals 5% more damage. • Wildfire 3/3 (Rare) – Fire Blast will now spread a Burn Stack to a nearby enemy. • Pyromania 2/2 (Unique) – Fire Blast will now chain to another target that was not affected by Fire Blast.
Torch your arms in lively embers and slam your fist directly in your enemy’s face, dealing 8 Fire damage. • First Degree 1/1 (Common) – Flame Smash now burns the target for 1 Fire Damage per second for 5 seconds. • Hot Hands 4/4 (Rare) – Flame Smash’s Cooldown is reduced by 1 second. • Fuselighter (Mythical) – Flame Smash now causes the next fire skill to apply Two Burn Stacks.
Cast down an enormous meteor at your cursor, dealing 12 Fire Damage on impact. • Celestial Rain 1/1 (Unique) – Smaller Fireballs will rain down with Cataclysm, dealing 20% of the main damage if hit. • Cataclysmic Fragmentation 1/1 (Mythical) –Cataclysm will fragment into multiple volatile, fiery embers, dealing additional damage.
Fire an arrow laced with a highly explosive material, igniting and detonating upon impact, dealing 8.22 Fire Damage to the primary target and 5 Fire Damage to enemies nearby. • Nitroglycerine3/3 (Intermediate) –Explosive Arrow’s blast radius is increased by 3 studs.
Stomp the ground aggressively, igniting the ground beneath you and releasing a magnitude of ash, dealing 4 Fire damage and leaving a scorched ground for 5 seconds. • Smoldering Embers (Rare) – Ash Stomp tick damage increased by 2. • Carbon Monoxide (Uncommon) –Ash Stomp’s Radius now reduces enemy Walkspeed by 4. • Kindling (Rare) – Ash Stomp lasts 1 second longer.
Fire skills in Absolvement focus on aggressive, high-impact damage and area control through burning effects and explosive force. Many fire abilities build around applying and detonating Burn stacks, creating powerful combos and splash damage. Ignition stands out as one of the strongest options, capable of turning burn stacks into devastating bursts that hit multiple enemies at once.
Absolvement Frost Skills
Below is a complete and detailed list of all Frost Skills in Absolvement, ranked by power:
Skill
Description and Upgrades
Conjure a snowstorm around you for 10 seconds, dealing 1.8 frost damage a second and applying a chill stack. If an enemy has five chill stacks, encase them in solid ice for 2 seconds. • Winter’s Fury 2/2 (Rare) – Expand Everwinter’s AOE by five studs. • Eternal Frost2/2 (Unique) – Extend Freeze duration of Everwinter by 0.2 seconds.
Channel frost into your leg and quickly stomp on your enemy’s leg with the intent to break it, dealing 15 Frost Damage and knocking them down. • Chillblains 2/2 (Uncommon) – Frost Femur Breaker causes your target to take 5% More Fire Damage for 10 seconds. • Permafrost 1/1 (Uncommon) – Frost Femur Breaker applies an additional Chill Stack. • Frozen Shatter 1/1 (Unique) – If an enemy is Frozen, Frost Femur Breaker will now instantly remove the freeze, but deal an additional 10 Frost Damage.
Channel pure ice into an ice blade to give them a frozen uppercut, dealing 10.75 Frost damage and knocking them away from you. • Ice Slam 3/3 (Common) – Increases Frozen Uppercut’s damage by 5%. • Defrost 1/1 (Uncommon) –Frozen Uppercut no longer has a windup to summon an ice blade. • Frozen Fist 1/1 (Rare) –Frozen Uppercut will no longer use an ice blade to attack and will stun enemies for 1 second.
Lob an orb of pure frozen energy towards your cursor, dealing 8 Frost damage on a direct hit. Applies one Chill Stack. • Deep Freeze 1/1 (Rare) – Frost Nova now freezes enemies for 1.5 seconds longer. • Deep Chill 1/1 (Unique) – Frost Nova now applies two stacks of chill. • Frostbite 1/1 (Unique) – Frost Nova deals 15% more damage per chill stack. • Subzero Temperatures 1/1 (Mythical) – Frost Nova no longer requires your target to be chilled to freeze them.
Summon a frosty decoy in your likeness. When struck by an enemy, the ice clone will shatter, dealing 12.47 Frost damage to nearby enemies and applying Chill Stack. • Polar Caps 1/1 (Common) –Ice Clone will now self-detonate after 5 seconds. • Frozen Copier 5/5 (Common) – Reduces the cooldown of Ice Clone by 1 second. • Endothermic Reaction (Uncommon) – Increases Ice Clone’s damage by 10%. • Biofrost (Mythical) – The Ice Clone will now act as a summon, able to fight for you, parry, and dodge. On use, it spawns with a random weapon among all the obtainable ones.
The longer you hold down the skill, the more blades you summon. Use the move again to shoot them out. Each blade deals 7 Frost damage and applies one stack of Chill. • Frozen Arsenal (Common) – Allows you to cast one additional ice blade. • Subzero Slice (Uncommon) – Ice Blades damage increased by 5%. • Chilling Presence (Uncommon) – Decreases Ice Blades’s cast time by 10%.
Frost skills in Absolvement emphasize control, utility, and buildup effects through the use of Chill and Freeze mechanics. These abilities can slow, stun, or immobilize enemies, making them ideal for setting up combos or defending against aggressive foes. Many frost skills reward timing and patience, especially Everwinter, which creates a persistent storm that freezes enemies after enough exposure, locking them down for devastating follow-up attacks.
Absolvement Shadow Skills
Below is a complete and detailed list of all Shadow Skillsin Absolvement, ranked by power:
Skill
Description and Upgrades
Surround yourself in umbral shadows, obscuring the view of all within the room for 30 seconds, applying Darkness to EVERYONE in your vicinity.
Conjure a blade as dark as night and attempt to butcher your enemies soul, dealing 10 Shadow Damage. If the first flash connects to flesh, plunge the voidblade into the enemy’s torso, causing them to crumble and writhe in pain, dealing 19 Shadow Damage and applying insanity.
Imbue shadow damage into your weapon, slashing brutally into your enemy. Deals 6.5 Shadow damage. • Plain Sight ?/? (Rare) – Night Slash’s frontal stab now deals 4% more damage • Umbral Pin 1/1 (Unique) – Night Slash will now strike an additional shadow needle on backstab proc, dealing more damage
Cover an area with a dark miasma. Any enemy near the miasma will have shackles clamped onto them, dealing 8 Shadow Damage on application. • DarkSteel Wraps 1/1 (Rare) – Shackle’s duration increased by 2 seconds • Oppressive Binding 1/1 (Rare) – Shackle will begin to pull enemies towards the center of the miasma
Meld within the shadows, allowing you to sneak by enemies with ease. Taking any form of damage or dealing damage will remove stealth. • Nightstalker (Common) – Increase your Walkspeed by 5 while Stealth is active. (Max stacks 1) • Ambush (Rare) – Breaking Stealth with an attack increases its chance to critically strike by 50%
Sap the vitality and strength out of a nearby enemy, decreasing their damage by 20% for 15 seconds. • Greater Enfeeble 3/3 (Basic) –Enfeeble reduces the damage enemies deal by an additional 1%. • Repurposed Strength 1/1 (Mythical) – When successfully enfeebling an enemy, cast an AoE around yourself, granting the damage buff to nearby allies and yourself.
Throw a dagger made of shadow into your enemy and begin corrupting their mind. Over 10 seconds, deal 2 Shadow Damage a second. • Consuming Maw 1/1 (Rare) – Void Dagger damage is increased by 3%
Obscure yourself with a protective umbra, nullifying the next attack up to 15 Damage, but still being forced to endure any additional effects of the move. • Void1/1 (Advanced) –Null will now nullify all D.O.T effects so long as the initial hit was absorbed. • Nothing1/1 (Advanced) –Null now ignores all moves that apply hitstun, stun, and knockback whilst active. • Emptiness1/1 (Advanced) –Null now nullified 1 additional attack.
Manifest wraith magic and, after a short windup, teleport directly behind an enemy target. • Walk In Shadows1/1 (Advanced) –Shadowstep now grants an additional 25% Walkspeed for 3 seconds after using it.
Shadow skills in Absolvement specialize in stealth, disruption, and psychological pressure, often weakening enemies while setting up devastating follow-ups. These abilities thrive in darkness, applying debuffs like Insanity and Darkness while offering tools for evasion, ambush, and control. Reap stands out as a signature Shadow move, combining burst damage with a powerful secondary strike that applies Insanity, making it deadly when used at the right moment.
Absolvement Lightning Skills
Below is a complete and detailed list of all Lightning Skillsin Absolvement, ranked by power:
Skill
Description and Upgrades
Rapidly blitz your enemy with lightning strikes, dealing 4.25 Lightning Damage per hit. Quick Charge1/1 (Advanced) – Reduce the cooldown of Electric Barrage by 0.5 seconds for every lightning skill used whilst it’s on cooldown. • Smite1/1 (Masterful) –Electric Barrage’s follow-up grab now summons a Thunderstrike.
Electrify your leg and perform a low sweep attack with the intent to knock enemies over, dealing 10 Lightning Damage and ragdolling any enemy affected by it. • Lightning Reflexes1/1 (Basic) –Shock Sweep endlag is reduced. • Convulse1/1 (Unique) –Shock Sweep now applies “Magnetise”, Magnetise will deal 3 Lightning Damage every 3 seconds for 9 seconds, additionally, each proc will briefly Stun the target.
Charge a current to strike a nearby enemy, dealing 8 Lightning Damage and attempting to spark over to a new target to deal 6 Lightning Damage. • Chain Current 2/2 (Rare) – Chain Lightning now chains to 1 additional target • Lightning Link 1/1 (Unique) – Chain Lightning can now re-shock the same target 1 additional time • Lightning Rod 1/1 (Unique) – If an enemy is afflicted with Magnetise, Chain Lightning will consume the debuff to Stun the target for 2 seconds and deal 20 Additional Lightning Damage
Lob a grenade at your cursor. This grenade will detonate after 3 seconds and deal 9.25 Lightning damage. • Arc Flash 4/4 (Uncommon) –Shock Grenade damage is increased by 2%
Summon a pulsating magnetic field at your location for 12 seconds. It pulses every 3 seconds, dealing 4 lightning damage and applying “Magnetize” to nearby enemies. • Electrocution 4/4 (Uncommon) – Magnetic Pulse damage is increased by 3% • Grounding 1/1 (Rare) – Magnetise duration increased by 2 seconds
Summon a cloud that follows your cursor. After 2 seconds, it strikes its position, dealing 13.5 lightning damage to enemies below. • Negative Reaction1/1 (Uncommon) –Thunderstrike cast time reduced by 50%. • Song of Storms1/1 (Rare) – Thunderstrike will now summon an Additional bolt within the AoE of the cloud. Thunderstrike now deals 15% less damage per bolt. • Positive Reinforcement2/2 (Mythical) –Thunderstrike now applies a 0.5-second stun.
Imbue your arm with static energy, causing your next attack to deal 25% bonus Lightning damage and stun the target for 1 second. • Jolt 3/3 (Uncommon) – Increases Static Shock’s damage by 10% • Electrolysis 1/1 (Rare) – Static Shock will now leap to a target within 15 studs and deal 66% of the original damage
Lightning skills in Absolvement deliver fast, electrifying attacks that chain between enemies, stun, and apply the unique Magnetise debuff for combo potential. These abilities reward aggressive play and skill synergy, often chaining effects or enhancing follow-ups for maximum impact. Chain Lightning is a standout, capable of hitting multiple targets and dealing huge damage when combined with Magnetise, making it a core choice for controlling groups and punishing clustered enemies.
Absolvement Wind Skills
Below is a complete and detailed list of all Wind Skillsin Absolvement, ranked by power:
Skill
Description and Upgrades
Suffocate the target with gale magic, choking them and disrupting their breathing. Deals 2.7 Wind damage per hit over 5 hits. • Wind Crack3/3 (Intermediate) –Hypoxia now inflicts enemies with a 5% slowness debuff.
Summon a wind vortex around a target, dealing 6.5 Wind damage per second. After 2.5 seconds, if the target hasn’t escaped, it erupts for 10 Wind damage and knocks back enemies inside.
Conjure a slow-moving tornado that drifts in the direction you’re facing, pulling in nearby enemies and dealing 3 Wind damage per second. Lasts 8 seconds or until it hits a wall. Wind Implosion1/1 (Unique) –Vortex will now emit a sonic boom, dealing additional damage whenever it collides with a wall. • Never-Ending Tempest1/1 (Unique) –Vortex lasts 3 seconds longer.
Charge up slicing winds to summon hovering gale wisps, with more created the longer you charge. Pressing “Slicing Winds” again launches a wisp at a nearby enemy, dealing 4.72 Wind damage twice. • Shredding Gale2/2 (Mythic) –Slicing Winds now slices 1 additional time.
Unleash a forceful gale at an enemy, dealing 11 Wind damage and knocking them back. • Wind Cannon2/2 (Basic) –Wind Blast now has increased knockback. • Wind Crush1/1 (Unique) –Wind Blast will now deal 11Earth Damage if an enemy collides with a wall.
Commune with the winds to create a swirling gale around you for 9 seconds, dealing 1.66 Wind damage per second to nearby enemies. After 9 seconds, the winds create a violent updraft, launching enemies into the air and dealing an extra 6 Wind damage. • Extensive Winds3/3 (Intermediate) – Increase Updraft uptime by 1 second. • Tempest’s Wrath1/1 (Unique) – Pull enemies towards the center of Updraft every time they take damage. • Endless Tempest1/1 (Unique) – Updraft’s cooldown is reduced by 10% for every enemy launched into the air.
Wind skills in Absolvement focus on control, disruption, and movement, using powerful gales to push, pull, and disorient enemies. Many of these skills can manipulate positioning or apply damage over time, making them ideal for setting up combos or controlling the battlefield. Updraft stands out as a top-tier wind ability, combining steady AoE damage with a powerful launch effect and cooldown reduction potential, especially effective against groups.
Absolvement Water Skills
Below is a complete and detailed list of all Water Skillsin Absolvement, ranked by power:
Skill
Description and Upgrades
Summon a stationary whirlpool that deals 3.5 Water damage to any enemy drawn towards it, slowly pulling them toward its center. The whirlpool lasts for 10 seconds. • Hurricane3/3 (Intermediate) – The size of your Whirlpool is increased by 3 studs. • Waterspout1/1 (Advanced) – Upon reaching the epicenter, enemies will be ejected out of the Whirlpool. • Rip Current1/1 (Advanced) –Whirlpool’s range and pull strength are now doubled.
Summon a rising water current that floods the entire room for 30 seconds, applying the “Flood” modifier to everyone inside. • Suffocate1/1 (Advanced) – Whilst under the effect of Flood, enemies will begin to drown, causing them to take 0.66 Water Damage per second. • Extinguisher1/1 (Masterful) –Flood reduces All Fire Damage by 20% and increases All Water Damage by 20%. <- currently bugged • Marshwalker1/1 (Mythical) – While Flood is active, you now gain an additional 10% walkspeed.
Channel a beam of high-pressure water controlled by your cursor, dealing 1.5 Water damage per second. With the Hydropush upgrade, it applies a slight knockback while channeling. • Hydropush1/1 (Advanced) –Hydrolance now deals knockback. • Pressure Jet1/1 (Advanced) –Hydrolance is now significantly stronger. Hydrolance now has hyperarmor and cannot be cancelled by any typical means.
Guide a geyser to erupt from the ground, dealing 9.48 Water damage and launching enemies upwards. The geyser lasts 5 seconds, knocking back anyone who gets too close and dealing 7 Water damage. • Purity1/1 (Intermediate) –Geyser deals 20% less damage. In turn, you will no longer damage yourself or allies. • Rough Waters2/2 (Intermediate) –Geyser damage is increased by 4%.
Guide a wave with a powerful rip current that pulls in enemies, dealing 3 Water damage per second while they’re trapped. When the wave crashes into an object or wall, it dissipates, dealing an extra 5 Water damage to anyone still inside. • Tsunami3/3 (Intermediate) –Crashing Wave’s size is increased by 15%. • Rushing Waters2/2 (Advanced) –Crashing Wave’s speed is increased by 50%. • Backwash1/1 (Masterful) – When Crashing Wave clashes with a wall, it will return a smaller and weaker wave from the place of impact.
Water skills in Absolvement center around battlefield control, area denial, and attrition-based damage. These abilities excel at pulling enemies in, disrupting their positioning, and setting up combo opportunities while also offering utility like debuffing Fire or granting movement buffs. Flood is the most impactful water skill, altering the entire room with persistent effects and synergizing well with other Water abilities to amplify damage or cripple opponents over time.
Absolvement Nature Skills
Below is a complete and detailed list of all Nature Skillsin Absolvement, ranked by power:
Skill
Description and Upgrades
Strike the ground with a thorn-covered vine, dealing 14 Nature damage, knocking back any enemy it hits, and applying Knockback. • Vine Extension3/3 (Intermediate) – Increase the hitbox of Briarlash by 3 studs. • Rapid Bramble3/3 (Intermediate) – Reduce the cooldown of Briarlash by 2 seconds. • Grandbriar1/1 (Unique) –Briarlash now deals 6 Additional Nature Damage, knocks enemies back 30% further, and ragdolls enemies.
Wrap your ally in sturdy, enchanted bark, reducing their damage taken by 15% for 15 seconds. If no ally is nearby, Ironbark is cast on you instead. • Ivybark1/1 (Basic) – Whilst Ironbark is active, any enemy that strikes you will be inflicted with Poison. • Thorned Bark1/1 (Basic) – Whilst Ironbark is active, 15% of all damage taken is immediately returned as Nature Damage. • Steelbark2/2 (Intermediate) –Ironbark reduces damage taken by an additional 2.5%.
Summon a radius of tangling vines that deal 4.25 Nature damage, apply Slowness, and poison enemies for 1.11 Poison damage per second for 12 seconds. • Dense Flora1/1 (Intermediate) –Encroaching Vines will now slow enemies by 10% whilst they stand upon it. • Vinewrap1/1 (Unique) – Encroaching Vines now has a 10% chance per second to wrap around the enemy’s ankle, causing them to fall down
Summon a root to burst from the ground, dealing 10 Nature damage and knocking back nearby enemies. • Weeping Roots1/1 (Intermediate) –Root Burst will now leave behind a puddle of Water, dealing 5 Water Damage when enemies step in it. • Rootball2/2 (Intermediate) –Root Burst will deal 4% More Damage and has it’s knockback increased.
Lunge your venom-coated blade into a nearby enemy, dealing 12.5 Nature damage and applying 2 Poison damage per second for 10 seconds. • Corrosive Touch1/1 (Intermediate) – Envenom’s poison now reduces enemy armor by 10%. • Contagious Venom1/1 (Advanced) – Poison will now spread in a 10-stud radius from enemies hit by Envenom.
Summon a rejuvenating bloom that heals an ally for 4 Health per second for 4 seconds. If no ally is nearby, the bloom heals you instead. • Second Bloom1/1 (Advanced) – After Bloom expires, quickly bloom once more, healing the target for an additional 20% of the heal-over-time instantly. • Chlorophyll5/5 (Intermediate) –Bloom now heals for an additional 10%. • Genesis1/1 (Advanced) –Bloom’s final heal pulse now heals nearby allies. • Crown of Thorns1/1 (Advanced) –Bloom’s final heal pulse now deals damage to nearby enemies.
Fire a Poison-Tipped Arrow from your bow, dealing 6 Nature damage and applying Poison, dealing an additional 15 Poison damage over 12 seconds. If you don’t have a bow, one will be summoned before firing the arrow. • Toxic Infusion3/3 (Common) –Poison arrow deals6% more Nature Damage. • Venomous Suppression3/3 (Mythical) –Poison Arrow will also reduce enemy Healing Effectiveness by 25% for the entire duration of its poison.
Nature skills in Absolvement specialize in damage-over-time effects, battlefield control, and support through healing or defense. These abilities often apply Poison, Slowness, and Knockback, wearing enemies down while offering allies protection or recovery. Many skills also synergize through environmental manipulation or stat debuffs—Encroaching Vines and Envenom are standouts for zone control and armor reduction. Among the strongest is Bloom, which provides flexible healing with high scaling, while Poison Arrow excels at long-range suppression with its potent, lingering effects.
Absolvement Disease Skills
Below is a complete and detailed list of all Disease Skillsin Absolvement, ranked by power:
Skill
Description and Upgrades
Bring a fallen enemy back to life to fight by your side for up to 45 seconds or until they’re defeated again. Their power depends on the difficulty of the area where they were raised. • Unholy Stitching1/1 (Masterful) –Necropolis summons a stronger ghoul. summoned ghouls will have 10% More Health and last 33% longer. • Rotter1/1 (Masterful) –Necropolis no longer requires a nearby corpse to activate. Summoned ghouls will deal 15% Less Damage and have 15% Less Health. It will also last 66% of its original duration. • Festering Ghoul 1/1 (Unique) – The summoned ghoul from Necropolis is now a harbinger of the plague. • Army of the Dead1/1 (Mythical) – Necropolis now summons 2 additional ghouls. The cooldown is also reduced by 30 seconds
Hurl a sphere of decay at your cursor, dealing 5 Disease damage on impact and spreading rot in the area for 7 seconds. Enemies inside the rot take 1.77 Disease damage per second. • Fervid Infection 1/1 (Uncommon) – Increases Necrotic Rot’s damage by 10%. • Plague Detonation 1/1 (Mythical) – When Whirling Flames collides with Necrotic Rot, it will EXPLODE, dealing 20 Plaguefire damage and applying Rot
Swing a plague-laced blade to deal 11 Disease damage to nearby enemies. If they’re bleeding, they’re also infected with Blood Plague, which deals 8 Disease damage per second, up to 1.75% of their max health, until it ends. • Shared Suffering1/1 (Intermediate) –Blood Plague now affects your allies, increasing your damage over time by 15%. • Chronic Plague3/3 (Advanced) –Blood Plague’s duration lasts a second longer. • Patient Three1/1 (Mythical) –Blood Plague no longer requires the enemy to be bleeding to apply its effect. • Epidemic1/1 (Mythical) –Blood Plague will now Explode enemies on death and infect nearby enemies with Blood Plague.
Release a wave of plague around you, causing enemies in a wide area to take 2.15 Disease damage each second. • Pandemic5/5 (Uncommon) –Pestilence area of effect size is increased by 4 studs. • Necrotic Pestilence1/1 (Rare) –Pestilence now affects enemies with Rot. • Black Death 1/1 (Mythic) Pestilence now causes enemies to take 3 additional Diseasedamage per second for 10 seconds.
Infect your arm with a strange disease, dealing 13 Disease damage when you hit an enemy. • Fetid Slash 1/1 (Common) –Fetid Strike now applies Bleed.
Disease skills in Absolvement revolve around decay, infection, and overwhelming enemies with damage-over-time effects. These abilities spread Rot, Blood Plague, and Bleed, punishing enemies who linger or group up. Skills like Necropolis raise the dead to serve you, while Blood Plague and Pestilence ravage entire areas with stacking effects that can escalate into deadly chain reactions. The strongest standout is Blood Plague with Epidemic, turning enemy deaths into explosive outbreaks, making Disease an ideal element for attrition and area denial playstyles.
Absolvement Holy Skills
Below is a complete and detailed list of all Holy Skillsin Absolvement, ranked by power:
Skill
Description and Upgrades
Bless your weapon with holy light, turning all non-Holy skills into Holy-Hybrid ones for 13 seconds. • Light in the Dark1/1 (Advanced) – While Bless is active gain 20% Resistance to Shadow Damage. • Renew1/1 (Mythic) – When Bless expires, heal for 20 Health scaling with your Holy effectiveness.
Cleanse all debuffs from enemies, dealing 6.05 Holy damage for each one removed. • False Prophet1/1 (Masterful) –Rapture now deals 50% Shadow and 50% Holy Damage. • Absolvement1/1 (Mythic) –Rapture now deals double damage. Rapture now applies the “Sinner” debuff, dealing 4 Holy Damage per second for 6 seconds.
Summon a radiant orb that hovers over an area for 7 seconds, dealing 4.5 Holy damage per second to enemies within its light. • External Radiance1/1 (Advanced) –Radiant Light lasts 20% longer. • Dawnglory1/1 (Masterful) –Radiant Light’s radius increased by 10 studs. • Long Arm of the Law1/1 (Masterful) –Radiant Light now deals 33% less damage but applies hitstun upon striking an enemy.
Take a defensive stance, ready to catch the next attack. If successful, reflect the damage back as Holy damage equal to what you would’ve taken. • Rebound1/1 (Advanced) –Reflection’s counter damage is increased by 10%. • Everlasting Echo1/1 (Advanced) –Reflection’s counter window is increased by 25%. • Twin Mirage1/1 (Advanced) –Reflection will now counter an additional attack.
Judge an enemy by summoning a holy sword above them, which takes about 9 seconds to strike. When it hits, it deals 12 Holy damage, plus 2 additional Holy damage for every holy spell that recently injured the target. • Crusader1/1 (Masterful) – If Judgement is used to kill an enemy, the cooldown will instantly reset. • Martyr1/1 (Mythical) – While Judgement is active, you cannot be slain by conventional means. • Stay of Execution1/1 (Masterful) –Judgement now takes 2 seconds longer to pierce the enemy’s soul, but will apply 1 Additional Holy Damage per stack. • Execution Sentence1/1 (Masterful) – Judgement will now automatically pierce the enemy’s soul if there are 5 Holy Stacks on the blade.
Attach a healing beam to yourself or an ally, restoring 2.15 health per second. • Zen Energy 1/1 (Rare) – Enlightenment heals for 20% more • Inner Peace3/3 (Unique) –Enlightenment will now heal 1 additional target, but the healing will be split amongst the targets. Enlightenment also now heals for an additional 15%. • One’s Inner Eye 1/1 (Mythical) –Enlightenment will now cause all debuffs to fall off 500% faster.
Dash away from the enemy and charge Holy energy in your arms. Your next swing will fire a Holy projectile, dealing 11 Holy damage. • Expel Light1/1 (Intermediate) –Light Steps will now cast an additional bolt. • Transcendence1/1 (Masterful) – Dash distance from Light Steps increased by 15%.
Place a healing seal on the ground that restores 6 health per second to you and your allies within it. The seal lasts for 10 seconds. • Fortitude5/5 (Intermediate) –Lesser Heal now heals 5% more. • Panic Button4/4 (Advanced) –Lesser Heal’s cooldown reduced by 2.5s when below 25% health. • Sacred Field4/4 (Advanced) – While within Lesser Heal, all allies take 5% less damage. • Lesser Cleanse1/1 (Masterful) – While within Lesser Heal, every healing pulse will reduce all current debuff durations by 10%.
Holy skills in Absolvement focus on support, healing, and powerful retribution. The Bless ability transforms non-Holy skills into Holy-Hybrid ones, and Radiant Light and Lesser Heal bolster allies while dealing with enemies. Judgement serves as a critical skill for executing foes, especially with Martyr for tanking damage and Execution Sentence for quick kills. Rapture and Absolvement deal heavy Holy damage while cleansing debuffs, making Holy a perfect mix of defense, healing, and offensive power.
Absolvement Earth Skills
Below is a complete and detailed list of all Earth Skillsin Absolvement, ranked by power:
Skill
Description and Upgrades
Cover a large area around your cursor with quicksand for 7 seconds, dealing 6 Earth damage per second and slowing enemies. • Sand Expansion (Rare) – Expand Quicksand’s area of effect by three studs. • Sinking Depth (Uncommon) – Enhance Quicksand’s Slow by 10%. • Endless Mire (Rare) – Increase Quicksand’s duration by 2 seconds.
Curse an enemy, turning their leg ligaments to brittle stone. For 10 seconds, they take 1.5 Earth damage per second and are slowed by 10%. • Granite1/1 (Intermediate) –Curse of Stone replaces the brittle stone with hefty, dense granite. This decreases their movement speed by an additional 15%. • Slate5/5 (Advanced) –Curse of Stone replaces the brittle stone with sharp, fragile slate. This deals 1 Additional Earth Damage per second. • Concrete1/1 (Advanced) –Curse of Stone replaces the brittle stone with heavy, solid concrete. This roots enemies in place but causes them to take 60% Reduced Damage.
Reel back and slam your head into the enemy, dealing 13 Earth damage to them and 5 Earth damage to yourself. The headbutt also stuns the enemy for 1 second. • Stone Skull3/3 (Intermediate) –Earth Headbutt deals 10% less damage to you. • Titan’s Force2/2 (Advanced) –Earth Headbutt now Stuns 0.25s longer.
Create an earthen wall at your cursor to block enemies or ranged attacks. The wall has 10% of your maximum health, lasts 15 seconds, and vanishes once destroyed. • Stone Wall5/5 (Intermediate) –Earthen Wall is now reinforced with stone, increasing the base health by an additional 1%. • Crumble1/1 (Advanced) –Earthen Wall will begin to crumble and fall apart, dealing 2.5 Earth Damage to nearby enemies. While the wall continues to crumble, so will the health, losing 1% of its max health every second.
Earth skills in Absolvement focus on controlling the battlefield through stuns, barriers, and terrain manipulation. Quicksand traps enemies with continuous Earth damage and slows them, while Curse of Stone weakens enemies by slowing and dealing Earth damage, with additional effects like rooting them in place or reducing their damage output. Earth Headbutt is a powerful close-range attack that damages and stuns foes, with the potential to enhance its stun duration. Finally, Earthen Wall offers both defensive utility, blocking enemies and ranged attacks, while the Crumble upgrade adds an offensive element, dealing damage as the wall deteriorates.
Absolvement Arcane Skills
Below is a complete and detailed list of all Arcane Skillsin Absolvement, ranked by power:
Skill
Description and Upgrades
Shoot an Arcane Arrow from your bow, dealing 16 Arcane damage. If you don’t have a bow, one will be summoned before firing. • Arcane Infusion ?/? (Unique) – Arcane Arrow now deals 7% more Arcane Damage • Elemental Bypass 1/1 (Mythical) – Arcane Arrow will now pierce through elemental defenses and damage resistances.
Channel your energy to create a one-way teleportation gateway, transporting you to a chosen location. • Stabilizers (Unique) – Reduce the cooldown of Arcane Gateway by half • Telemancy (Mythical) – Arcane Gateway can now teleport allies as well
Convert all “Damage Over Time” effects on the selected enemy into Arcane Energy, turning their remaining duration and damage into Pure Arcane Damage with a 20% damage increase. • Soulslag: 1/1 (Mythical) – Soul Burst will now add an additional 15% duration on all debuffs when consuming debuffs.
Arcane skills focus on energy manipulation. Arcane Arrow deals high Arcane damage and can pierce elemental defenses with Arcane Infusion and Elemental Bypass. Arcane Gateway creates a teleportation portal, with Stabilizers reducing its cooldown and Telemancy allowing ally teleportation. Soul Burst converts damage-over-time effects into Arcane Energy, with Soulslag increasing the duration and damage of debuffs consumed.
Absolvement Hybrid Skills
Below is a complete and detailed list of all Hybrid Skillsin Absolvement, ranked by power:
Skill
Description and Upgrades
Strike the ground beneath you, summoning Corrupted Flame to erupt and deal 12.5 Shadow-Flame damage while applying a stack of Burn. • Abyssal Grasp2/2 (Mythic) – Enemies hit by Shadowflame Eruptionwill be Rootedfor 1 second. • Abyssal Lunacy1/1 (Intermediate) –Shadowflame Eruption now applies Insanity to enemies.
Plant your blade in the ground to summon 3 pillars of Holy Fire, each dealing 10 Holy Fire damage and applying a Burn stack. • Righteous Flames (Uncommon) – Holy Flame Charge deals 7% More Holy Damage but deals 3.5% Less Fire Damage • Burning Judgement (Uncommon) – Holy Flame Charge deals 7% More Fire Damage but deals 3.5% Less Holy Damage • Flame-Bathe (Rare) – Holy Flame Charge will now burn enemies for 1 second longer
Summon two sets of blades that swirl in sequence. The first set deals 6.8 Shadowstrike (Shadow + Physical) damage, while the second set deals 10 Shadow damage and stuns nearby targets for 2 seconds. • Plan A 1/1 (Rare) – Whirling Blades‘ initial attack will now do 100% More Damage, but reduce Whirling Blades‘ secondary attack by 25% Damage • Plan B 1/1 (Rare) –Whirling blades‘ secondary attack will now do 50% more damage, at the cost of reducing Whirling Blades‘ initial attack by 50% • Pulse3/3 (Unique)–Whirling Blades has 1 additional initial spin, but lowers the damage of the initial spin by 15%
Hybrid skills combine elements of different types for unique effects. Shadowflame Eruption strikes the ground, dealing Shadow-Flame damage while applying Burn and can root enemies with Abyssal Grasp or cause Insanity with Abyssal Lunacy. Holy Flame Charge summons pillars that deal Holy Fire damage and Burn, with upgrades like Righteous Flames and Burning Judgement enhancing Holy or Fire damage. Whirling Blades uses two sets of blades, one dealing Shadowstrike damage and the second stunning enemies. You can alter its attack balance with Plan A or Plan B or increase the number of spins with Pulse.
Absolvement Miscellaneous Skills
Below is a complete and detailed list of all Miscellaneous Skillsin Absolvement, ranked by power:
Skill
Description and Upgrades
While active and in combat, you regenerate health as usual. When not in combat, your health regeneration is increased by 33% for the duration of the skill.
Find inner peace, temporarily shielding your soul and reducing damage taken by 25% for 15 seconds.
Plant a warbanner into the ground for 20 seconds, boosting attack speed and damage by 15% for you and nearby allies. • Warmonger 5/5 (Common) – Reduce War Banner’s Cooldown by 1 second. • Agonising Shout 5/5 (Uncommon) – Players affected by War Banner will now deal +2% damage • Anulled Murmur 5/5 (Rare) – Players affected by War Banner now have +.2 attack speed • Anguishing Cry 3/3 (Unique) – Players affected by War Banner will now gain 1 Walkspeed • Warlord 1/1 (Mythical) – Your War Banner is now mounted atop your back. All bonuses and radius are now reduced by 40%, however, the radius is now permanent.
Let out a rallying cry, increasing your and your allies’ maximum health by 10% and armor by 15 for 30 seconds. • Cry of Heroism 4/4 (Rare) –Rally Cooldown reduced by 2.5 seconds
Study your enemy, revealing weak points in their defenses and increasing the damage they take by 9% from all sources for 10 seconds. • Lingering Weakness 5/5 (Uncommon) – Extend Expose Armor’s Debuff duration by 1 second
Toss an item at your cursor to create a distraction, causing enemies to investigate the noise and giving you a brief moment to slip by.
Miscellaneous skills offer utility and support. Health Regeneration improves based on combat status, with a 33% increase when out of combat. Inner Shield reduces damage taken by 25% for 15 seconds. War Banner boosts attack speed and damage for nearby allies, with various upgrades like Warmonger reducing cooldown and Warlord making the banner permanent but smaller in effect. Rallying Cry increases maximum health and armor for allies, with Cry of Heroism reducing its cooldown. Expose Armor weakens enemies, increasing damage taken by 9% with Lingering Weakness extending the debuff. Lastly, Distraction Toss creates a diversion, allowing you to slip by enemies unnoticed.
And that is all for this extensive Absolvement Skills guide and Tier List. For more guides, check out our Absolvement Sins Tier List for the best modifiers and Absolvement codes for free goodies.
Absolvement Skills Tier List FAQs
What is the best Skill in Absolvement?
The best Skills in Absolvement are Necropolis, Soul Burst, and Everwinter, because of their incredible damage potential and utility.
How do I get Skills in Absolvement?
You can get new Skills in Absolvement by leveling up your selected Class.
What is the best Skill Element in Absolvement?
The best Elements in Absolvement are definitely Arcane, Disease, and Physical.
Crystal of Atlan is officially out, and as an MMORPG, it allows you to choose from a variety of different classes. There are five characters to choose from, but each one can specialize into at least two subclasses. We’ve been messing around with the game even before the official launch, and we’re proud to bring you our ultimate Crystal of Atlan Class Tier List.
Crystal of Atlan Best Overall Class Tier List
Image via TierMaker / Remix by The Escapist
For this Crystal of Atlan tier list, we evaluated every character class, measuring their overall DPS, Survivability, Support, PvP capabilities, and usefulness while in a party.
S-Tier
Class
Info
Warlock
The Warlock is one of the best classes in Crystal of Atlan as it’s excellent at PvP and PvE content with his spells, debuffs, and overall damage. However, once he transforms he suddenly skyrockets to the top of the DPS charts. Even with lousy armor, a transformed Warlock does insane damage. With so many tricks up his sleeve, we had no choice but to put him here.
Scytheguard
If you want a class that can do just about anything, this is the class for you. The Scytheguard is mainly a support unit, but she is great in the front lines, can do some great crowd control. She is also a great healer, which always comes in handy whether you are playing solo or in a party. She can’t dish out as much damage, but she makes up for it in almost all other areas.
A-Tier
Class
Info
Berserker
If all you care about is dishing out melee damage and dominating the front lines, the Berserker is the class for you. Extremely powerful DPS, great mobility, and an absolute God at PvP. He’s somewhat lacking when it comes to his support abilities and can be outsmarted by a ranged unit. A great pick for a starter character.
Cloudstrider
Somewhat difficult to play, but a fantastic Class if you can master her playstyle. With the Cloudstrider, you can switch between all the different elements to take advantage of the enemy’s weakness. She is fast-paced, she can move around the battlefield a lot, and her moves just look amazing. She is great in PvP too, but she isn’t the tankiest character.
Starbreaker
Starbreaker does some devastating damage, and she is pretty tanky. If you get her in the frot lines, she can be an absolute beast with DPS. Her biggest problem is that she is slow. Her movement is slow, and her attacks need a second to charge. Because of this, she isn’t great at PvP, but in almost every other aspect, she is amazing.
B-Tier
Class
Info
Blademaiden
If you position her correctly because of her puppet, the Blademaiden can do a lot of damage, maybe even more than other classes. Unfortunately, if she isn’t positioned correctly, she lacks a lot. She is not tanky at all, and she can be easily overwhelmed in PvP. If you’re playing in a group, she is a great pick for extra damage.
Magician
The ultimate support character. Unfortunately, there is definitely a learning curve when it comes to mastering the Magician. His abilities are super useful, and can save the entire party if done right. However, when it comes to dishing out damage, and surviving, he’s lacking a bit. Magicians are great at PvP and are overall a lot of fun to play, if you can handle their shortcomings.
Bounty Hunter
Bounty Hunters use their guns to attack from a relatively safe distance. If you like to play ranged units, this is the one for you. She excels in group combat but reveals her glass-cannon nature when surrounded by enemies. She is still a lot of fun to play with and is a great asset when in a group.
Magiblade
The Magiblade is a great class if you don’t want to be a melee but still leave a bit of room between you and the enemy. He is super easy to play, and a great pick for a first character. Unfortunately, once you get to the endgame, you realize that he isn’t amazing at anything. Decent damage, decent mobility, okay tankiness, but there are just better classes out there. Still, don’t sleep on the Magiblade if you like the combat style, because it can be a lot of fun.
C-Tier
Class
Info
Elementalist
Under the right circumstances, the Elementalist is great. He can clear small groups of enemies and exploit their weaknesses. On the other hand, he isn’t very mobile, can get interrupted easily, and just isn’t great if there isn’t a group backing him up. If you don’t mind the squishy and stationary nature, the Elementalist is still a lot of fun.
Gunner
Gunner is great when she is in a party and casts her AoE abilities. Unfortunately, she lacks in almost any other aspect. She is too slow for PvP, her abilities aren’t varied, and she just can’t seem to catch a break with DPS. We’re confident the Gunner is going to get a major buff soon.
That’s all there is to our Crystal of Atlan tier list. Have fun playing and don’t be afraid to try out other classes, even if we put them lower on our tier list. Check out our Crystal of Atlan codes for free rewards.
The Escapist is supported by our audience. When you purchase through links on our site, we may earn a small affiliate commission. Learn more about our Affiliate Policy
One thing we love about Universal Piece is how the game allows you to progress in a multitude of different ways. Depending on what Fruit you use, you can make the game easier or harder for yourself. The same goes for weapons. If you aren’t big on powerful Fruits, you can always grab a trusty blade and destroy your enemies the old-fashioned way, especially with a good Sword. To help you pick the best blade, we made this Ultimate Universal Piece Sword Tier List.
Roblox Universal Piece Sword Tier List
Image via TierMaker / Remix by The Escapist
Down below, we’ll cover each sword currently in the game and list how to get them, and tell you a little bit about what we think of them.
SS-Tier
Sword
Obtainment
Info
Monarch Daggers
Can drop from System Breaker Boss (Solo Island; 0,85%) Can drop from Red Knight Boss (3%) You can also buy it for 2,250 Robux
The best set of swords in the game. Abilities cover a massive area, so it’s great for PvP and PvE farming. Amazing DPS.
S-Tier
Sword
Obtainment
Info
Hybrid Blade
Do the new raid and buy it from Prototype-01 You can also buy it for 2,050 Robux
A well-rounded end-game blade. It’s not as good as the Monarch Daggers, and it will probably get a buff.
Dual Sword
Drops from Dual Sword Master Boss (Solo Island; 4%) You can also buy it for 326 Robux
Great DPS, Good range, you can almost spam all the abilities Great for PvE
Flash Katana
When you have 10,000,000 Bounty you can buy it from the Flash Master on Solo Island
Does more damage than Dual Swords, but does more DPS Fun abilities Great for PvE
A-Tier
Sword
Obtainment
Info
Inverted Spear of Heaven
Defeat a player with a Skull You can sometimes buy it for 1,326 Robux
Great for bosses Has a low range, but the DPS is decent Not great for PvP
Smoke Pole
Buy from Retired Admiral (Burger Island) for 75x Burgers, 150 Gems, 450,000 Yen
A fantastic early game weapon. Pretty easy to get, too. You can use this until you get a higher tier weapons, and it won’t disappoint.
B-Tier
Sword
Obtainment
Info
Bisento
Buy from Bisent Seller (Solo Island) for 15x Joystick, 20,000 Gems, 3,000,000 Yen
A good weapon, but you get it much later in the game. Does more damage than the Smoke Pole, but the cooldowns aren’t great.
Dark Blade
Buy it for 326 Robux
Extremely mediocre, considering you can only get it by swiping. Only worth getting if you are just starting out and don’t want to grind.
Soulcane
Buy from Good Zombie (Zombie Island) for 10x Bone, Skeleton Head, 400x Gems
It’s not a good weapon, but it can freeze enemies, which is amazing. Great if you are in a party.
C-Tier
Sword
Obtainment
Info
Pipe
Buy from Pipe Seller (Burger Island) for 30x Burgers, 150 Gems, 450,000 Yen
Low damage, but ok abilities A bit better than the starter Katana
Katana
Buy from Katana Master (Starter Island) for 20x Ice Cream, 5,000 Yen
Pretty much your starter weapon Decent when you consider how early and easily you can get it. You should still switch to a better weapon ASAP.
D-Tier
Sword
Obtainment
Info
Dual Katana
Buy from Bone Collector (Zombie Island) for 15x Bone, 200 Gems, 750,000 Yen
Just bad in every way Low damage, bad abilities Don’t bother with this one (at least until it gets a buff)
There you have it. All swords currently in Universal Piece, ranked accordingly. Have fun swinging those blades, and if you haven’t already, check out our Universal Piece codes for some cool in-game freebies.
The Escapist is supported by our audience. When you purchase through links on our site, we may earn a small affiliate commission. Learn more about our Affiliate Policy
When talking about the best characters in Etheria Restart you have to consider all the different roles and game modes. I’ll be ranking characters based on how useful they are in a team composition per role for all game modes with PVE and PVP combined. Here’s my ultimate Etheria Restart tier list with the best DPS, Debuff, Support and Sustain rankings.
Etheria Restart Damage Tier List
Image by The Escapist
When it comes to the best DPS in Etheria Restart you want the ones that will either specialize in single target or AOE or have a balance of both. For PVP I generally prefer burst damage to take out key targets as fast as possible but sustain damage comes in just as useful for Thresholds and Union Bosses. Speaking of which you can clear story and general PVE with anyone so I’ll be focusing on how useful and powerful characters are in both Story and also Thresholds, Union Bosses, and PVP. Note that SSS-Tier doesn’t deal the most damage they are just the most useful DPS characters to have in a team comp. Below you’ll find my rankings for each character for both PVP and PVE.
SSS-Tier DPS
S-Tier DPS
Character
Ranking Reason
Khloros
• Khloros deals the most raw sustained damage in Etheria Restart • He struggles with providing team utility but that’s not his role • His amazing DPS and Debuffs is what you want him for • Just don’t bring him to DokiDoki since you need more burst there
Diting
• Diting deals the most single target burst damage from my tests • Include him in a team that can set him up to burst down key targets • You can pull off some crazy plays in PVP
Fangus
• Sania is queen of DoTs but Fangus is a close second • Great sustained damage • Brings lots of utility to the team with Delays and Follow-Ups • Not the best for DokiDoki like Khloros because you need more burst and AOE
Xiada
• Some of the best if not the best AOE sustained damage dealer in the game • Best for Doki Doki and all game modes that favor AOE damage • Not the best for Terrormaton
A-Tier DPS
Character
Ranking Reason
Rilmocha
• Rilmocha is the best character for DokiDoki and Terrormaton as well as one of the best PVP characters • Her combination of CC, Delays, and burst damage is incredibly useful for controlling the enemy • Just don’t bring her to Aurora, she’s useless there
Victor
• Now Victor is a huge tank and quite hard to kill • Best of all he gets more damage the lower his HP is and his Shields keep him alive • Best for Terrormaton but he’s generally useful anywhere
Rin (The Unbowed)
• Great sustained single and AOE damage • Overall a useful DPS with good Delay abilities • Not the best on Terrormaton
B-Tier DPS
Character
Ranking Reason
Tsutomu
• One of the best things about Tsutomu is that he can Dispel effects by stealing buffs with Vanishing Shade • He can also disable buffs and heals on enemies so use him for utility • This weird mix of utility and lower than average DPS makes him bad for PVP and Aurora
Oboro
• Has pretty mid damage so she’s not the best for DPS • She shines in comboing DoTs, Debuffs, and Delays • Don’t bring her to PVPs but she’s pretty good for Aurora and Union Bosses
C-Tier DPS
Character
Ranking Reason
Andrew (Odd)
• Bad DPS but can Debuff okay • I would skip
Andrew (Reason)
• More useful than Andrew Odd because the Reason version can Taunt
D-Tier DPS
Character
Ranking Reason
Sybil
• The worst DPS character in Etheria Restart in terms of numbers • Can reduce enemy Defence
Etheria Restart Support Tier List
Image by The Escapist
The best support in Etheria Restart is a title shared by Freya, Lily, and DokiDoki. They offer the best debuff cleansing and ally buffing. Beyontin is close since she can revive. Keep in mind that this list is mostly for Thresholds, Union Bosses, and PVP. Of course you can’t go wrong with this for general PVE farming but that’s the easiest mode in the game anyway.
SSS-Tier Support
Character
Ranking Reason
Freya
• One of the best supports in Etheria Restart • Can auto cleanse debuffs with Dreamwave and boost your Defence crazy high • Bring her everywhere except Aurora, she’s not the most useful there
Lily
• The best support in Etheria Restart overall for all Thresholds, Union Bosses, and even PVP • Drastically boosts your Turn Meter and Speed • Shadow Trick boosts critical damage as well for more DPS • Can follow up with Hat Trick which has Assist
DokiDoki
• Can buff up your team’s damage and speed to crazy numbers • The second-best support in Etheria Restart in my opinion after • Can even cleanse debuffs
Beyontin
• Can revive your team, period, SSS-Tier • She also buffs your attack and crit damage which is amazing • The only reason I prefer Lily or DokiDoki is because I would rather keep my team alive than count on the revive • That said, revives are really great to have as backup if you’re tackling harder content like Aurora or Terrormaton
S-Tier Support
Character
Ranking Reason
Tsukiyo Mi
• Tsukiyo Mi is an all around great support but her abilities aren’t as powerful support wise as SSS Tier • However, her Silence is broken for PVP and she’s probably one of the strongest PVP Supports in Etheria Restart because of that
Chiaki (The Echo)
• For everything but Aurora Chiaki’s Ave Maria immunity to Turn Meter reduction and steal effects is amazing • She can also cleanse debuffs • Not the most useful on Aurora so swap her out
A-Tier Support
Character
Ranking Reason
Turandot
• Has some decent damage and ATK and DEF buffs • Mainly she’s good because of her ACC+ skill Severing Blade which is amazing when upgraded • Bad on DokiDoki so bring a better support
Yang
• A decent support with the ATK and CRIT buff for allies but you want him for the Cleanse as well • Also a pretty good off-DPS since he can buff his own CRIT • Bad on Terrormaton so bring a stronger support
B-Tier Support
Character
Ranking Reason
Dorothy (The Wisher)
• Has some good damage buffs and also applies Life Leech to allies • Really useful on everything except DokiDoki
No. 41
• The opposite of Dorothy because she prevents enemy healing • Really strong on DokiDoki
C-Tier Support
Character
Ranking Reason
Cachi
• Can delay enemies with Justice Beam • You want him for the Stun through Heroic Strike as his strongest ability but it’s not that good except for PVP where’s it’s really strong
Etheria Restart Debuff Tier List
Image by The Escapist
The best Debuff characters in Etheria Restart are usually masters of a single debuff style whether it’s Delays or damage increases for your team like Heinrich. Plus, they can offer another form of utility or off-DPS. In general, the bad Debuff characters try to do many things but aren’t useful in either so look for AOE Debuffers or damage increase Debuffers in SSS and S-Tiers.
SSS-Tier Debuff
S-Tier Debuff
A-Tier Debuff
Character
Ranking Reason
Celince
• Celince might deserve higher placement but I just haven’t played her that much during the testing phases • She’s a weird mix of DoTs but not as good as Obol and debuffs but there might be better Debuffers • She can Silence well so I used her a lot for PVP
Cachi (The Guard)
• Cachi is an all-rounder that’s pretty good for all game modes • He debuffs CRIT rate and also SPD with Brave Charge being an amazing Delay skill • I love his AOE DEF buff the most so he might be a better Support than Debuff • Steadfast Dreamer also blocks debuffs and delays on allies
Lilith
• My favorite A-Tier debuff character (Not as strong as S-Tiers in most situations) due to a crazy mix of debuffs and damage procs • Lilith can also Stun with two skills • Not to mention Courteous Gesture has a chance to gain 1 extra turn
B-Tier Debuff
Character
Ranking Reason
Kazami Kazuyo
• Not as powerful of a Debuff character as the higher ups but she can Dispel buffs from enemies which is really good for Aurora and Terrormaton • Debuffs SPD and increases ally SPD
RC-77
• RC-77 is a decent mix of Stuns and Debuffs • Complete Overwrite is why he’s in B-Tier and not lower since that skill reduces DEF and ATK and can stun • He also debuffs Turn Meter with Anomalous Onslaught
C-Tier Debuff
Character
Ranking Reason
Asshu
• Such a weird mix of SPD debuffs, damage over time effects, and Silence • I prefer Debuffs who specialize in one or two things and Asshu is all over the place and master of none
D-Tier Debuff
Character
Ranking Reason
Vice
• Built to Taunt and then sustain through Strike and Heal by applying debuffs • It’s not the strongest playstyle with real Debuff utility • He tries to heal allies with Strike and Heal but he’ll usually not be full HP to reliably heal
Etheria Restart Healer/Sustain Tier List
Image by The Escapist
The best sustain/healer characters in Etheria Restart are in SSS and S-Tier like Lingluo’s heals or Valerian’s buffs, CC, and the death-protection. The rest are either not as powerful or excel in specific situations. Let’s dive into them all.
SSS-Tier Healer/Sustain
Character
Ranking Reason
Helkid
• Helkid is an amazing off-DPS unit with great survivability skills • Keeping Shourd Barrier active to boost other skills is the key to his playstyle • Can Stun and debuff ATK
Lingluo
• Lingluo is the best healer in Etheria Restart • Bring her to sustain your team and cleanse debuffs • A must-have on all game modes except Terromaton
Valerian
• Valerian sustains your team through minor heals, immunity to damage, and shields • Really strong on all game modes and a great alternative to Lingluo • She also has decent crowd control with Slumber
S-Tier Healer/Sustain
Character
Ranking Reason
Mia
• A bunch of heals and shields that you cannot go wrong with • That said, you want Mia for her debuff cleanse Cascade • You don’t need her on Aurora but she’s strong everywhere else
Sania
• Extremely flexibile since you can either heal well or revive if you need to with Forest Heart but the skill then has a higher cooldown • She also has mechanics with Twine Dance to keep her Turn Meter up so that you can act before bad stuff happens • You don’t need revives on Aurora but bring her everywhere else
A-Tier Healer/Sustain
Character
Ranking Reason
Chiaki
• Has pretty good heals • Her specialty is reducing DMG taken with Origami Guardians so she’s good on all modes except DokiDoki Threshold
B-Tier Healer/Sustain
Character
Ranking Reason
Dorothy
• Great single and full team healing • Has a full cleanse for a single target • Chiaki is a little bit strongest because she can reduce damage as well as heal but Dorothy has better healing on average
Rin
• Rin switches out heals for team shields • Her playstyle is about taunting enemies and shielding allies while reducing the damage they take via DEF buffs • This is pretty good on Terrormaton, Union Bosses, and Aurora but isn’t anything special on DokiDoki • I prefer healers for my sustain so Rin isn’t the strongest choice
Etheria Restart Reroll Guide
Here’s our quick Codes and Etheria Restart reroll guide:
No guest accounts in Etheria Restart so you’ll have to make a new email account per reroll attempt.
Finish the Prologue by using the Skip button to bypass all the cutscene story videos.
After Prologue you’ll get Lian from a forced pull (Lian is a really good DPS carry).
Then, do the Main Story until you finish Chapter 1 to unlock the Mail feature.
Once you finish Stage 1, 2, and 3 you’ll do 10 tutorial pulls on the Standard banner.
Then, you’ll be able to get rewards from mail, achivements, etc as well as use our Etheria Restart codes and reroll again if needed.
If you’re wondering what characters to roll for on which banner check out our Tier Lists above. In general, for LD good options are Lily for Support and Heinrich for Debuffing. For RGB, Tiamat is good for Sustain/DPS and Xiada for AOE damage with Rosa being excellent at burst. Check out the tier lists for more details.
That’s it for our complete Etheria Restart tier list and guide for DPS, Support, Debuff and Sustain characters. Don’t forget to check out our Etheria Restart codes so that you can grab free goodies.
The Escapist is supported by our audience. When you purchase through links on our site, we may earn a small affiliate commission. Learn more about our Affiliate Policy
Fighting Styles in Universal Piece play a big role in how you approach battles and progress through the game. Whether you’re just starting or looking to upgrade your skills, choosing the right style can make a big difference. Each style offers unique moves, strengths, and requirements, allowing players to find what suits them best. In this Universal Piece Styles tier list and guide, we’ll cover how to unlock each style, what makes them stand out, and which one ultimately comes out on top.
Universal Piece Styles Tier List
All Styles in Universal Piece, ranked from best to worst – Image via TierMaker
In Universal Piece, Styles scale with the Melee stat which also increases your energy. The auto-unlocked Combat Style is a solid starter choice but sits at C-tier due to its basic move and limited power, while Cyborg Style lands in A-tier thanks to its flashy tech-based attacks and strong damage. Cursed Fist Style stands at the top in S-tier, offering powerful combos and excellent versatility that make it the best option for serious fighters.
Universal Piece Styles List
Below is a complete and detailed list of all Styles in Universal Piece, ranked from best to worst:
Style
Moves
How to Get
Cursed Fists (Yuji)
M1 – Devastate Z – Cursed Combo X – Smash Fall C – Bursting Strike
Cursed Teacher (Shinuya Island) 5x Cursed Force 9.000G$ 7.000.000¥
Cybrog (Genos)
M1 – Strike Z – Plasma Gun X – Infernal Grasp C – Blazing Impact
Cyborg Style, inspired by Genos, features high-tech abilities such as the Plasma Gun and Blazing Impact, making it effective for burst damage and PvE scenarios. Cursed Fist Style, modeled after Yuji, is the best of the three due to its powerful and visually striking abilities like Smash Fall and Bursting Strike, offering superior damage, mobility, and overall combat effectiveness, justifying its high cost and advanced requirements.
How to Change Style in Universal Piece
He is just standing there… menacingly.
In Universal Piece, players can freely swap and change fighting styles by visiting the specific NPCs who teach them. The Combat Style is automatically given when you start the game, so you can always return to it without any cost. To switch to Cyborg Style, head to Cold Island and talk to the Cyborg Master after collecting 50 Cores, 100 Gold, and one million Yen. For the powerful Cursed Fist Style, visit the Cursed Teacher on Shinuya Island with five Cursed Force, 9000 Gold, and seven million Yen. Once unlocked, you can revisit these NPCs anytime to change your fighting style based on your playstyle or needs.
And that is all for my Universal Piece Style tier list and guide. Check out our Universal Piece Fruit Tier List to learn which one to use for maximum power.
What are Styles in Universal Piece?
A Style is a set of combat moves that defines how your character fights in battles.
What is the best Style in Universal Piece?
The best Style is Cursed Fists (Yuji) because of its explosive damage and versatility.
Can I change my Style in Universal Piece?
Yes, you can change your Style by going to a specific Style Teacher which are scattered around the map.
The Escapist is supported by our audience. When you purchase through links on our site, we may earn a small affiliate commission. Learn more about our Affiliate Policy
In the Anime Run Kingdom Roblox experience, choosing the right units can make all the difference. Some characters offer exceptional value through strong synergy, reliable performance, and unique playstyles that shape how teams are built. Whether it’s through powerful solo potential, healing support, or damage-focused roles, the top-tier units define the current Meta. This Anime Run Kingdom Unit Tier List and guide highlights key characters, such as Agua, Shadow, and Bokki, who are worth investing in and explains how they enhance your overall strategy.
Anime Run Kingdom Unit Tier List
All Anime Run Kingdom Units, ranked from best to worst – Image via TierMaker.
The current Meta in Anime Run Kingdomis built around strong team synergy and reliable performance in solo content. Units like Shadow stand out for their high damage without needing evolution, while support from characters such as Bokki can make even tough fights manageable. With the right setup, a tank like Zura can carry entire Raids, making these types of units essential for late-gameprogress.
Meta Units
These Meta Tier picks feature the most essential units in the game, each playing a key role in team success. From Agua’s top-tier healing to Shadow’s powerful non-evo DPS and Zura’s unmatched tanking, these characters shine especially in solo Raids when combined with supports like Bokki and evolved Breeza.
S-Tier Units
Kenpaki, Byekuya, and Zawa are among the strongest evolutions, offering balanced power but requiring long grinds for materials. For a quicker alternative, Kiwido and Azuno are solid picks with easier Battlepass-based evolutions.
Unit
Bond
Description
How to Get
11th Kenpaki (TYBW)
Soul Reapers
11thKenpaki is one of the top charge Evolution units, but evolving him requires grinding his stages for hours to gather materials.
Evolve the base unit.
Cokeku (Angel SSJ3)
Z Fighters
Cokeku offers solid performance as an Evolution unit, but, like the others, requires lengthy farming sessions for its materials.
Evolve the base unit.
Byekuya (TYBW)
Soul Reapers
Byekuya is competitive with the other top Evolutions, but evolving him involves a grind of 5 to 15 hours. All of these units work well for soloing content when paired with Agua, Zura, and Bokki for support.
Evolve the base unit.
Zawa (Bandana)
Strawhats
Zawa stands out as a strong Evolution choice, but also demands a significant time investment to farm evolution materials.
Evolve the base unit.
Sesoke (Curse Mark)
Villains
Sasoke is well balanced among the best Evolutions, though acquiring his evolution materials can take many hours of grinding.
Evolve the base unit.
Kiwido (Star King)
Beaters
Kiwido is a great evolution option if you’re looking to avoid heavy grinding. His evolution materials are unlocked at level 50 in the Battlepass, though keep in mind it’s only available through the Premium version.
Evolutions unlocked with materials from the Level 50 Battlepass.
Azuno (Stacia)
Beaters
Azuno is another solid evolution that’s much easier to get than most regular ones. You can grab her materials at level 50 of the free Battlepass, making her a convenient pick for players who want to progress quickly.
Evolutions unlocked with materials from the Level 50 Battlepass.
A-Tier Units
Epsolon is a top-tier tank just behind Zura and works best with Shadow for strong synergy. Freeren, Smush, and Eyehawk are the strongest Mythic DPS options, ideal if you don’t have evolved or event units.
B-Tier Units
Byekuya and Kenpaki are solid units that can shine with support but need a lot of stage grinding to evolve. Breeza is a reliable early DPS, while Huffy offers a decent tank option if you’re lacking stronger picks. For easier progress, Azuno and Kiwido are good evolution choices from the Battlepass, with Kiwido requiring the Premium version.
C-Tier and Below Units
These units are generally underwhelming and fall short compared to the top-tier picks. They’re okay as early-game fillers, but most are forgettable unless you’re aiming for Bond effects or just like the characters.
Unit
Bond
Description
How to Get
Soonade
N/A
She’s a solid alternative if you don’t have Agua and works well if you want to run a double healer setup. Ensure she is equipped with a healing set.
Banner
Alpho
Shadow Garden
This unit is the top DPS in the Shadow Garden set after Shadow and works well if you’re aiming for double Shadow Garden DPS to activate the Bond set bonus alongside Epsolon as tank and Shadow as main DPS.
Event Shop
Naroto (Sage Mode)
Team 7
Norato is considered the weakest evolution unit because of its high cooldowns and lower stats, but it remains a viable choice. However, the materials needed to evolve him are also quite rare.
Evolve the base unit.
Broccoli
Villains
Broccoli Z is a decent beginner Mythic tank, but tends to be outperformed by Epsolon and Zura since he’s more of a damage/tank hybrid rather than a dedicated tank. On the plus side, he’s easy to obtain.
Free
Yurr
N/A
Yurr makes a good secondary DPS option if you’re missing some of the top-tier units. Although some community opinions ranked her as S-Tier, that was based on a bug that’s since been fixed, so it’s best to set those expectations aside.
Banner
Delto
Shadow Garden
Delto is a fighter who has solid performance and synergy within the Shadow Garden set. She offers reliable damage and works well alongside key units to boost the team’s overall effectiveness.
Event Shop
Sword
N/A
Sword is a fighter unit who struggles a bit in battles due to underwhelming stats and abilities, making him a less reliable choice compared to others.
Summon
Astra
N/A
Astra, like the others in this tier, is generally underpowered and best viewed as a beginner option or a unit to avoid if you have better choices available.
Summon
Liveua
N/A
Liveua is quite squishy, which limits her effectiveness and places her among the less powerful Mythic options.
Summon
Gone
N/A
Gone struggles mainly due to very long cooldowns, making him one of the weaker Mythic units in this tier.
Summon
Redward
N/A
Redward has improved with recent buffs, but he still remains a lower–tier choice compared to others.
Summon
Anime Run Kingdom Best Units for Beginners
For beginners, Freeren is one of the best starting options, thanks to her strong damage and ease of use. Weguto and Azuno are also solid early picks, offering accessible evolutions and balanced performance without heavy grinding. These characters help new players build a reliable team as they work toward higher-tier units.
How to Get Units in Anime Run Kingdom
Do NOT roll for Astra.DO buy all of these.
You can get new Units in Anime Run Kingdom by summoning on the Banners, purchasing them from the Event Shops, Raids (Just Breeza for now), Login Rewards, and Challenges. Summoning from the Banner of your choice will run you 25 Gems for a Single Pull or 250 Gems for a Ten Pull. If you are looking to buy Units from the Event Shop, you will have to participate in the current Event and gather Event Points by beating waves.
That is all for my Anime Run Kingdom Unit Tier List and Guide. Share your top units and teams in the comments below. Check out our Other Roblox Articles to learn more and find more similar games.
Anime Run Kingdom Unit Tier List FAQs
What are the best META units in Anime Run Kingdom?
The best Meta units in Anime Run Kingdom are: Agua, Shadow, Breeza (Evo), and Bokki.
What is the best DPS Unit in Anime Run Kingdom?
The first place is tied between Shadow and 11th Kenpaki.
What is the best Support Unit in Anime Run Kingdom?
Agua, without a question.
What is the best Tank Unit in Anime Run Kingdom?
The best Tank Unit is Zura, because of his Summons that grant protection for the whole team.
How can I farm Gems in Anime Run Kingdom?
The best way is to replay the highest level you can beat, or spam the current Event.
The Escapist is supported by our audience. When you purchase through links on our site, we may earn a small affiliate commission. Learn more about our Affiliate Policy
We’re also trying to sort out a super-premium tier offering with a lacquer wooden game box – although we haven’t puzzled out economic manufacturing.
Having options, add-ons, and premium upgrades adds value for your customers.
Price Discrimination
Despite the nefarious sounding name, price discrimination is about allowing consumers to pay what they want for the goods that they want.
It is the other side of the coin to offering consumers more options. They will self-discriminate based on their preferences. For instance, consumers who can afford more premium options, and find value in them, will spend more money on those items.
When some portion of backers pledge for higher tier levels, or add-ons, it raises the average revenue and (ideally) profit per backer. This allows for faster funding velocity, but also aids in a number of areas such as making advertising more profitable (and so a campaign can afford higher costs per click).
Discoverability & Momentum
It’s important not to underestimate the power of Kickstarter’s algorithm – we found that 52% of backers discover our Nut Hunt campaign through Kickstarter, versus 43% through organic or direct non-Kickstarter sources.
Updated: We last updated the Rope Battles Ropes and Items tier list on May 27, 2025.
Without a good Rope, you will have a hard time facing anyone with a bit more experience in Rope Battles on Roblox. The Items can help you out immensely as well. However, with so many of them available to unlock, it’s not easy to choose which ones to spend your hard-earned Coins and Diamonds on. So, to help you out with this, we prepared the following Rope Battles Ropes and Items tier list.
Rope Battles Ropes Tier List
All Ropes in Rope Battles ranked from best to worst — Image via TierMaker.
In the Rope Battles Ropes tier list above, we ranked each Rope based on its ability, stats, and overall usefulness when fighting other players. In general, expensive Ropes have better abilities, and that is what makes them stand out from the rest. You can find the list of all Ropes in Rope Battles, along with their pros and cons, right below.
S-Tier Ropes
Rope
Stats
Pros & Cons
Cost
Fire
Length: 18 Damage: 55 Struggle: 12s
+ Burns enemies and leaves flame fields on the ground + High Damage + Decent Length − Short Struggle duration
150💎
Cable
Length: 18 Damage: 55 Struggle: 12s
+ You electrocute enemies when hitting them + High Damage + Decent Length + Amazing for putting enemies onto the train rails − Short Struggle duration
150💎
Snow
Length: 18 Damage: 35 Struggle: 14s
+ Freezes enemies + Decent all around + Best Rope you can buy for Coins
500C
A-Tier Ropes
Rope
Stats
Pros & Cons
Cost
Infection
Length: 18 Damage: 35 Struggle: 12s
+ Enemies you kill get turned into zombies + Decent Damage and Length + You have to defeat an enemy before its ability activates − Short Struggle duration
Wheel
FishingRod
Length: 25 Damage: 35 Struggle: 15s
+ You can fish with it + Amazing Length + Decent Damage and good Struggle duration − No abilities that help you fight others
750C
VIP
Length: 20 Damage: 40 Struggle: 12s
+ Increased Coin generation + Best Rope for farming Coins + Good Damage + Very good Length − Short Struggle duration
VIP
Kite
Length: 25 Damage: 35 Struggle: 15s
+ You can tie the enemy to a kite + Great for annoying enemies + Amazing Length + Good Damage and Struggle duration
199$R
B-Tier Ropes
Rope
Stats
Pros & Cons
Cost
Grapple
Length: 22 Damage: 60 Struggle: 15s
+ Let’s you grab the side of an enemy + Very good Length and Damage + Good Struggle duration − Ability is not that useful
350C
Blood
Length: 18 Damage: 35 Struggle: 12s
+ Inflicts a Bleed effect on enemies + Decent Length and Damage − Short Struggle duration
500C
Wind
Length: 18 Damage: 50 Struggle: 12s
+ Increased movement speed after hitting an enemy + Good Damage and Length + Useful for dodging − Short Struggle duration
200C
Bomb
Length: 15 Damage: 70 Struggle: 12s
+ You can attach a timed bomb to enemies when you rope them + Amazing Damage − Only decent Length and short Struggle duration
250C
C-Tier Ropes
Rope
Stats
Pros & Cons
Cost
Chain
Length: 15 Damage: 60 Struggle: 15s
+ It’s more difficult for enemies to escape when you successfully rope them + Amazing Struggle duration with the ability + Very good Damage − Short Length
100C
Big
Length: 21 Damage: 50 Struggle: 12s
+ Increased hitbox and faster Rope throw animation + Good Range and Damage − Short Struggle duration
50C
Small
Length: 10 Damage: 50 Struggle: 12s
+ Very fast Rope throw animation + Decent Damage − Short Length and Struggle duration
50C
Common
Length: 18 Damage: 50 Struggle: 12s
+ Decent Damage and Length − Short Struggle Duration − No special abilities
Free
Rope Battles Items Tier List
All Items in Rope Battles ranked from best to worst — Image via TierMaker.
The above Rope Battles Items tier list ranks each Item based on its damage, cooldown, AoE, and use difficulty. Even though you will use your Rope much more than Items, they can easily turn a 1v1 in your favor or let you escape from tricky situations. You can see some pros and cons of each Item in the list below.
S-Tier Items
Item
Stats
Pros & Cons
Cost
Molotov
Damage: 65 Cooldown: 8
+ Amazing Damage and Range + Deals damage over time + Good for zoning enemies + Large AoE
80💎
Mine
Damage: 65 Cooldown: 8
+ Amazing Damage + Hard to spot if placed correctly − Small AoE
Wheel
A-Tier Items
Item
Stats
Pros & Cons
Cost
Beer Bottle
Damage: 48 Cooldown: 6
+ Very good Damage + Short Cooldown + Long throw range − It’s difficult to hit enemies with it
150C
Spring
Damage: 16 Cooldown: 8
+ Knocks enemies down + Decent AoE − Low Damage
250C
Banana
Damage: 15 Cooldown: 8
+ Knocks enemies down + Kinda difficult to avoid − Low Damage
250C
B-Tier Items
Item
Stats
Pros & Cons
Cost
BowlingBall
Damage: 20 Cooldown: 8
+ Good Range and decent Damage + Knocks enemies down − Somewhat difficult to hit enemies with it
40💎
Thumbtack
Damage: 24 Cooldown: 8
+ Decent Damage and AoE − Easy to avoid
Free
Bear Trap
Damage: 25 Cooldown: 8
+ Decent Damage − Easy to avoid − Small AoE
50C
How to Get New Ropes and Items in Rope Battles
To unlock a new Rope, approach one of them on display and interact with it.You can unlock new items through the Items menu.
You can unlock new Ropes and Items in Rope Battles while in the main lobby area. All Ropes are available on display at the side opposite the arena entrance, while the items can be purchased in the Items menu. Most Ropes and Items cost Coins. However, some rarer ones can be obtained using Diamonds or by spinning the gacha Wheel.
How to Farm Coins and Diamonds
There are many ways to earn Coins and Diamonds in Rope Battles. However, the most efficient methods for farming these currencies are:
That concludes our Rope Battles Ropes and Items tier list. Feel free to share what you think is the best Rope and Item combo in the comment section below. For more of our Roblox content, make sure to check out the Roblox hub here on The Escapist.
Rope Battles Ropes and Items Tier List FAQs
What are the best Ropes in Rope Battles?
The best Ropes in Rope Battles are Fire, Cable, Snow, Infection, and FishingRod.
What are the best Items in Rope Battles?
The best Items in Rope Battles are Molotov, Mine, Beer Bottle, and Spring.
Do you permanently unlock Ropes and Items when you purchase them in Rope Battles?
Yes, every Rope and Item you buy is unlocked permanently, and you can switch between them whenever you want.
The Escapist is supported by our audience. When you purchase through links on our site, we may earn a small affiliate commission. Learn more about our Affiliate Policy
![The Definitive Rune Slayer Species Tier List [TUNDRA & BEACH EXPANSION]](https://histream.ir/wp-content/uploads/2025/06/Rune-Slayer-Tier-List-updated-Species.png)


 Infernim
 Bunny
Bunny Seraphim
 Vampire
 Chiroptran
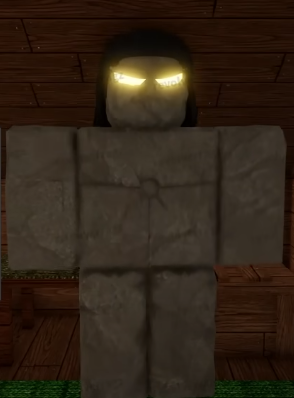
 Amphibu
 Ghoul
Ghoul

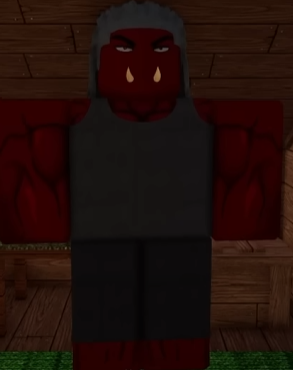

![Complete Absolvement Skills Tier List and Guide – Roblox [OPEN TESTING]](https://histream.ir/wp-content/uploads/2025/06/absolvement-skill-tier-list.png)
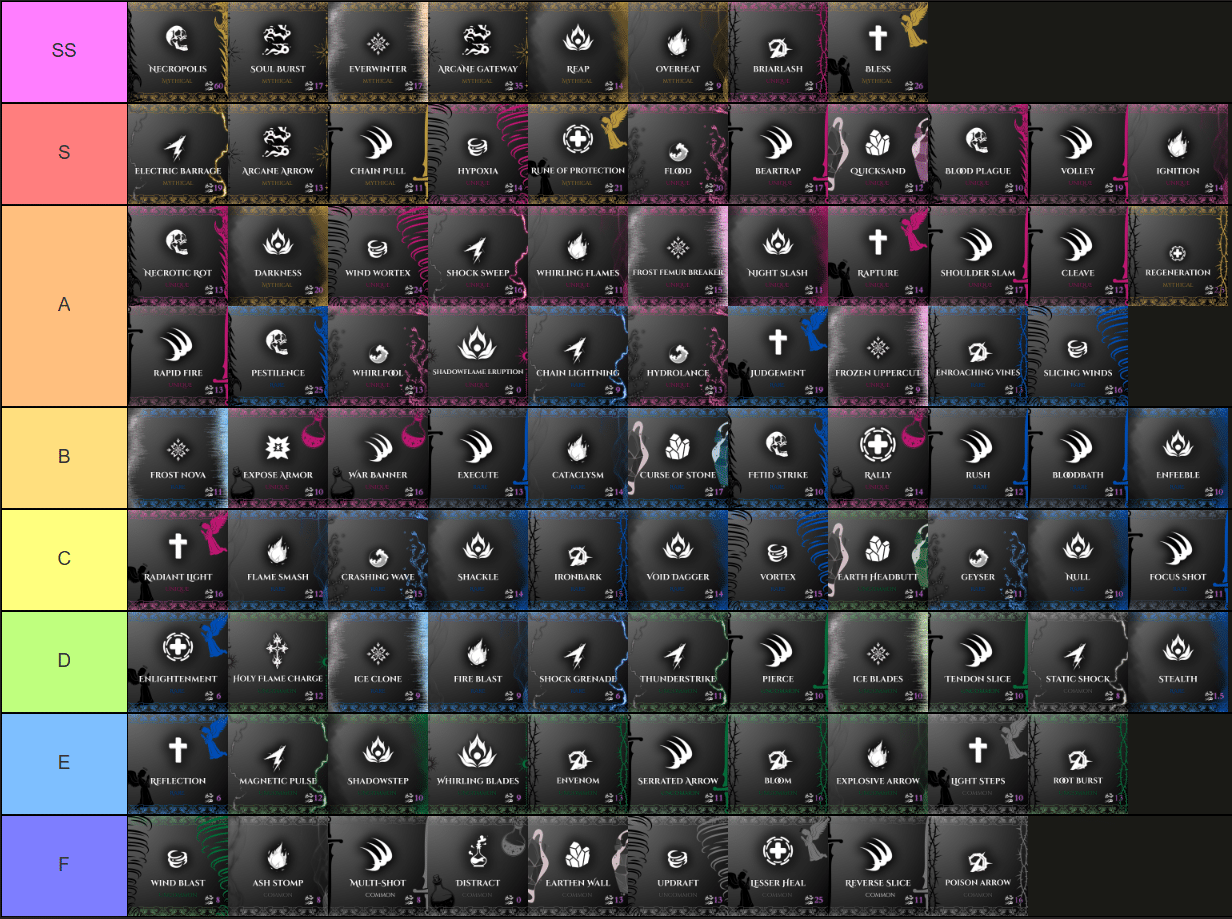


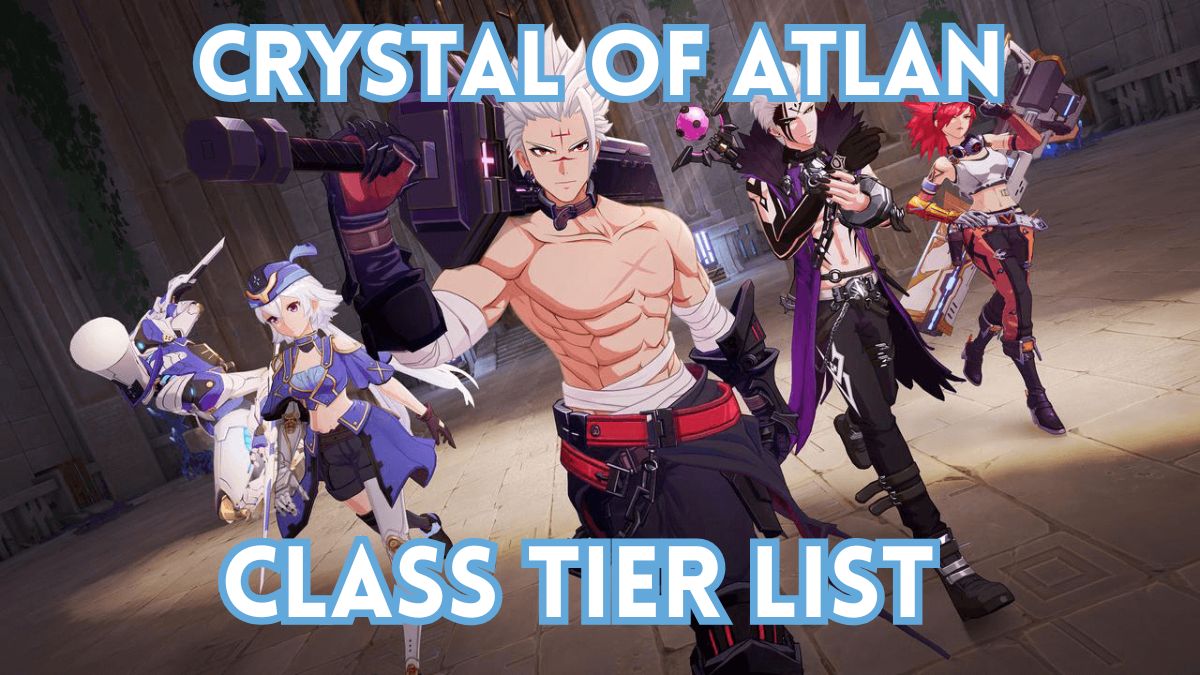
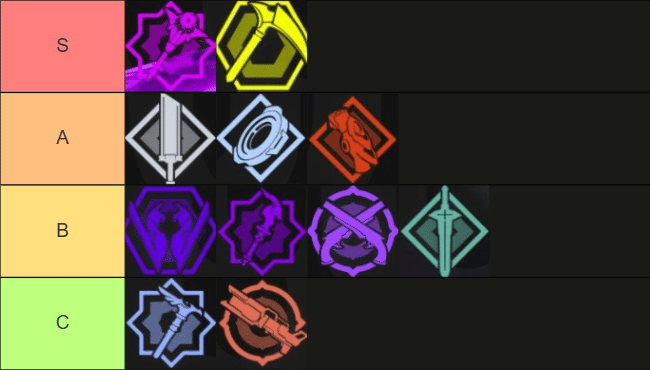
![Ultimate Universal Piece Sword Tier List [SLAYERUPD]](https://histream.ir/wp-content/uploads/2025/06/Universal-Piece-Sword-Tier-List-cover.jpg)
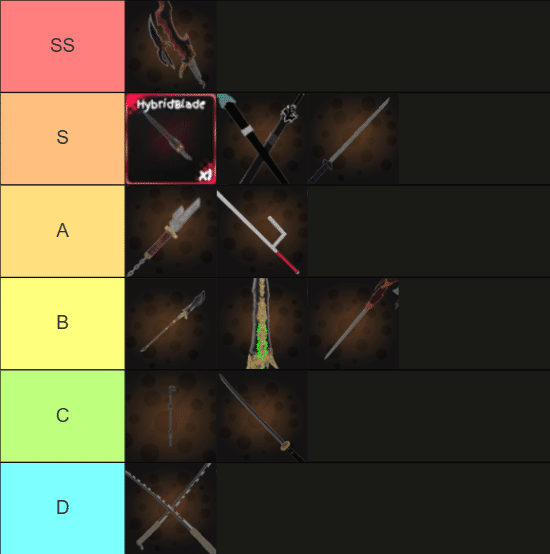
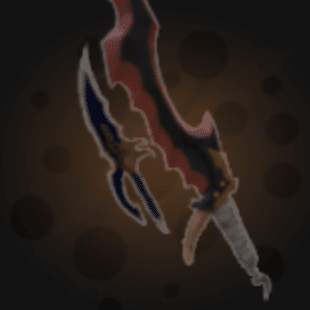
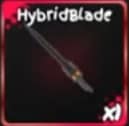

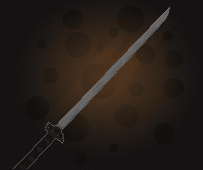
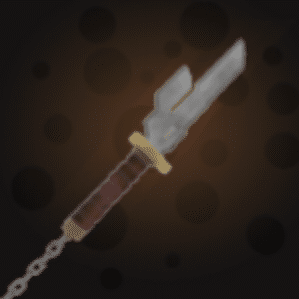

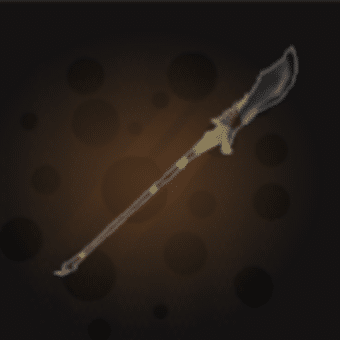
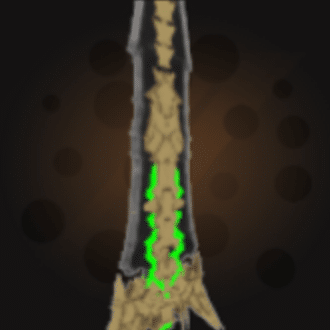
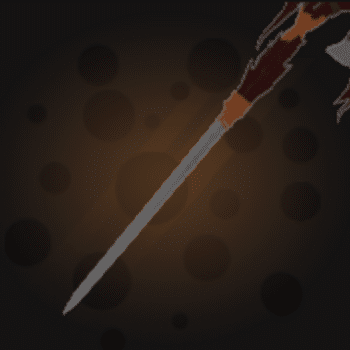
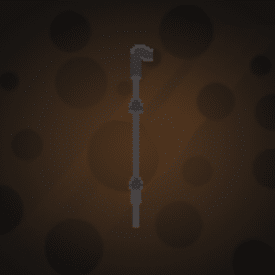

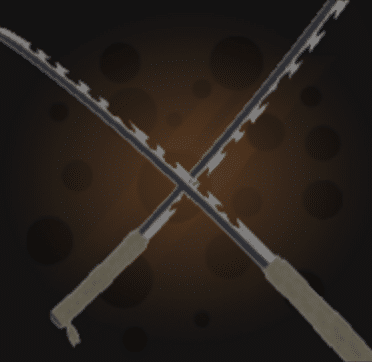
![Complete Etheria Restart Tier List & Reroll Guide [RELEASE]](https://histream.ir/wp-content/uploads/2025/06/etheria-restart-tier-list-and-reroll-guide.jpg)
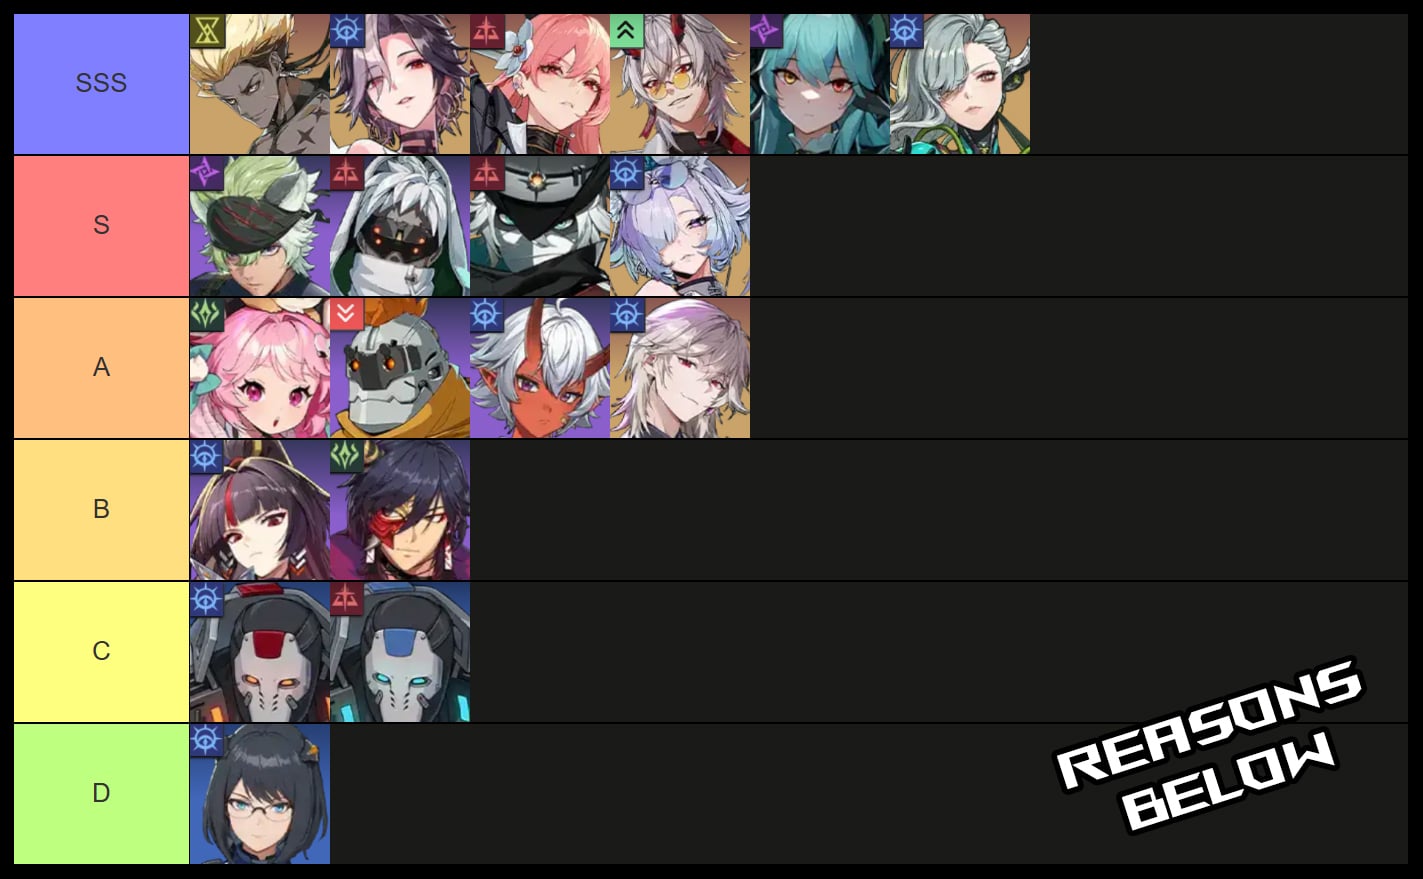


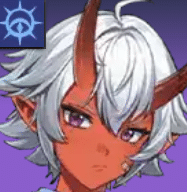


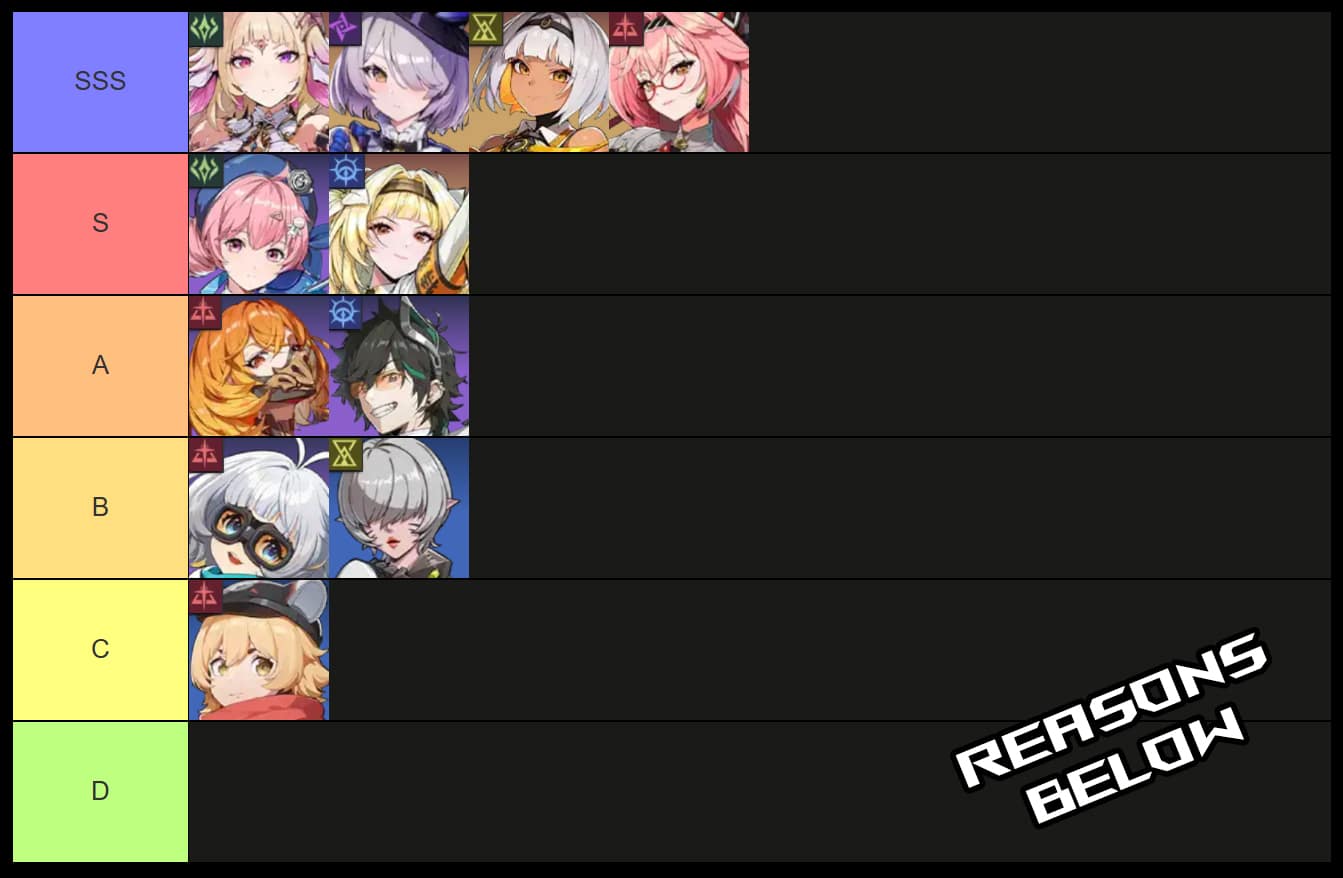


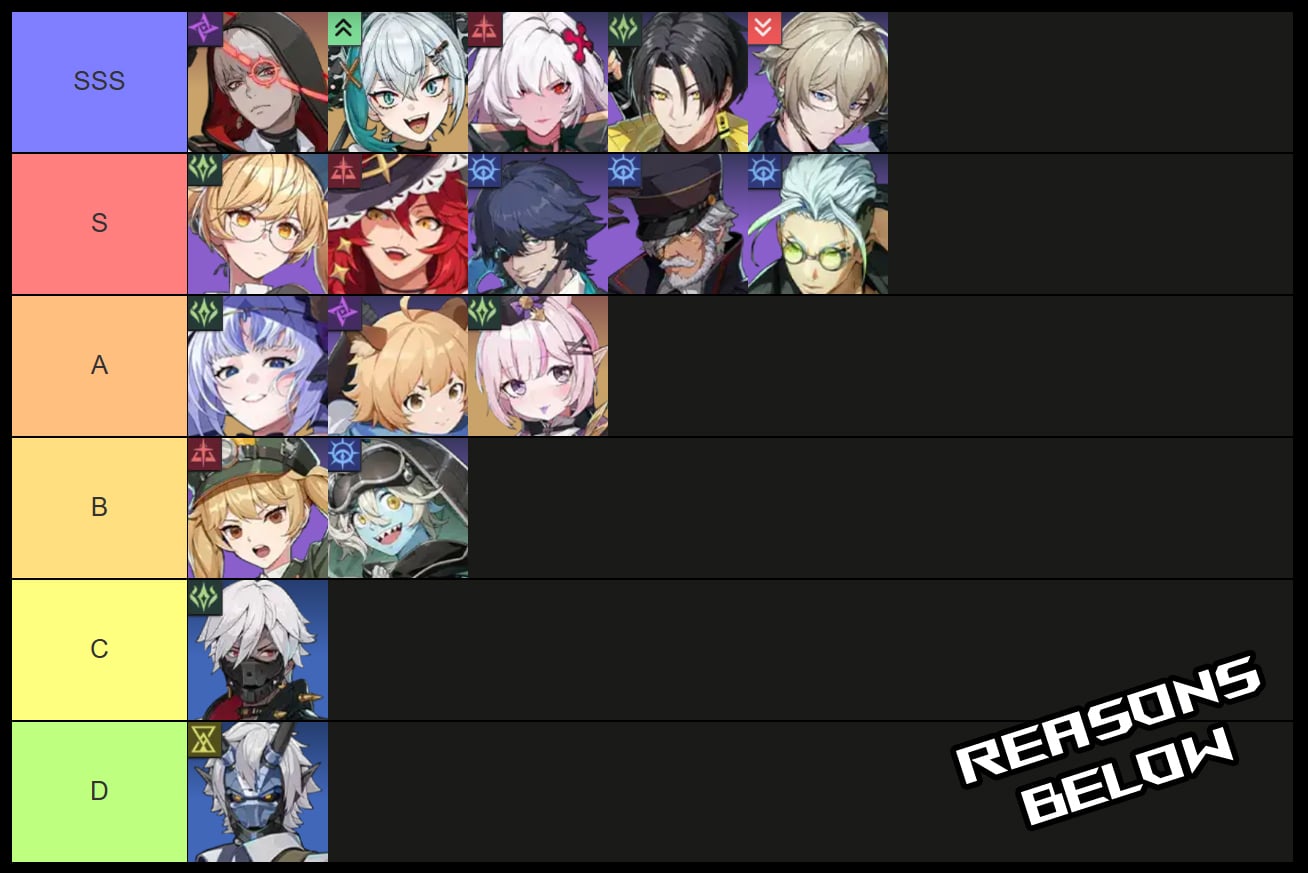


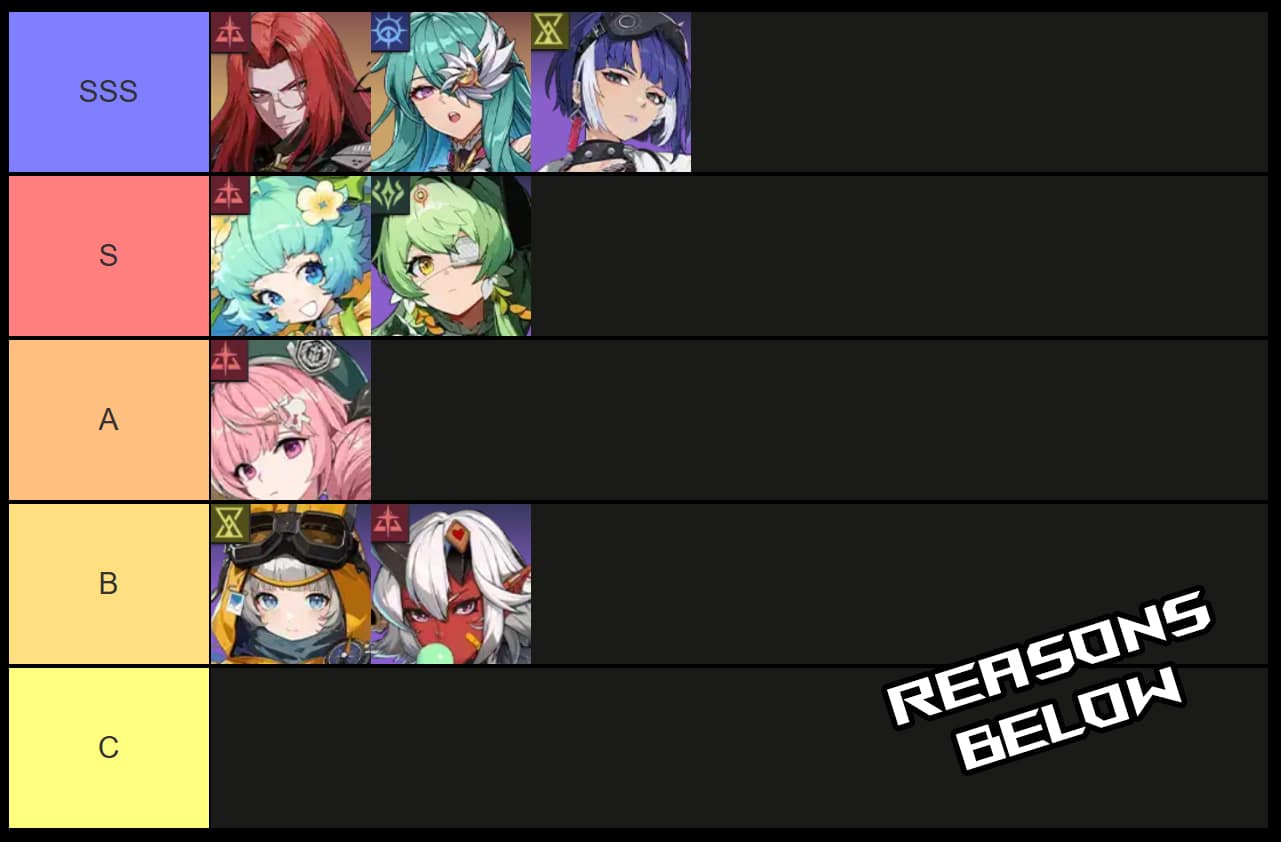


![Complete Universal Piece Styles Tier List and Guide [UPDATE 0.5]](https://histream.ir/wp-content/uploads/2025/06/unversal-piece-style-tier-list-and-guide.png)
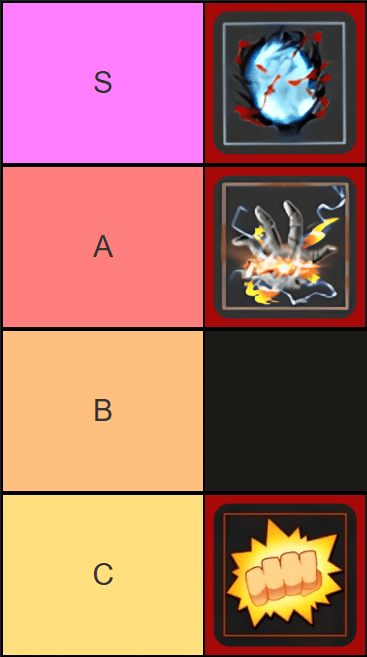


![Ultimate Anime Run Kingdom Unit Tier List and Guide [RELEASE 🎉]](https://histream.ir/wp-content/uploads/2025/06/anime-run-kingdom-unit-tier-list-and-guide.png)


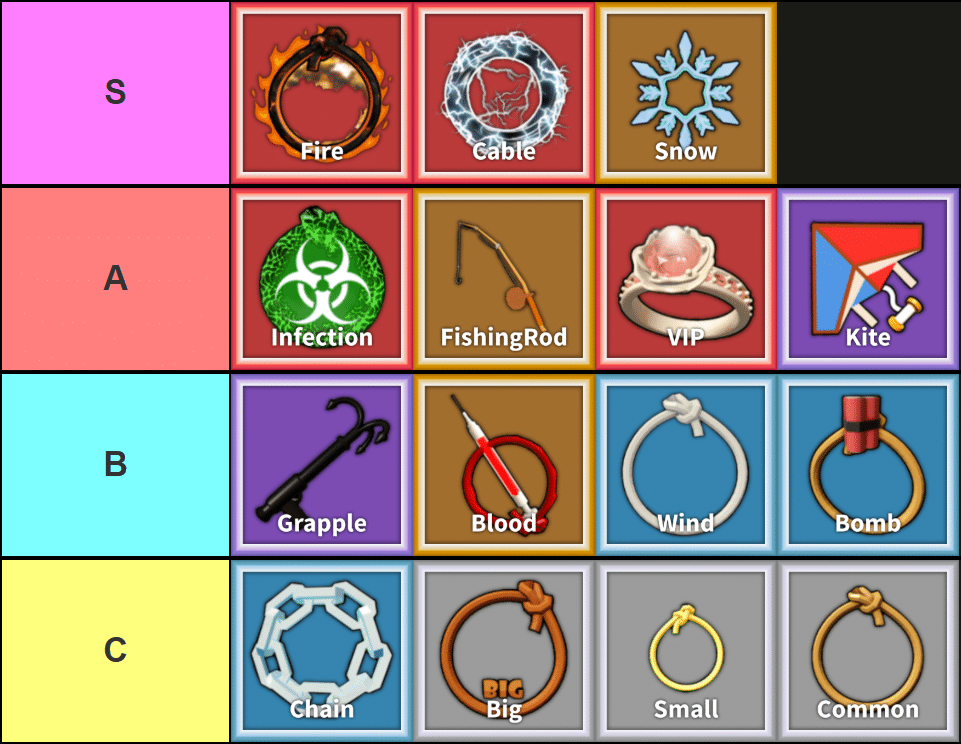


Published: Jun 5, 2025 06:51 am