Some effects state that damage “can’t be prevented.” If unpreventable damage would be dealt, any applicable prevention effects are still applied to it. Those effects won’t prevent any damage, but any additional effects they have will take place. Existing damage prevention shields won’t be reduced by damage that can’t be prevented.
A method used by memory experts states that to remember a whole deck of 52 cards is to create yourself a memory palace with at least 18 rooms that will be used forever. Why do we need 18 rooms? What is its purpose?
I have another question that highlights the importance of correctly wording card text and/or the need to read the text of previous editions of many Magic cards (and not only the available Oracle Text).
Let’s suppose Active Player has a Wardscale Dragon in play from several turns, and it’s the only creature in play.
It’s the draw phase, and immediately after drawing the card, the Defending player –
who has 4 life remaining only –
decides to play his last Magic card:
specifically, a reprint from one of the more recent sets.
Defending player knows perfectly the text of the White Dragon card the Active player owns, and therefore hopes to save himself by casting Fog before the Attack phase,in order to avoid it,since he can’t cast no more spells during the attack phase
(before damage is assigned).
He believes everything is fine, because the recent card text doesn’t mention the need to cast Fog during the Attack phase.
So, he tries to prevent any damage while also evading the protection from spells provided to Active Player by the White Dragon.
The Active player, however, shows to the Defending Player a Fog card from the very early Magic sets, which clearly states that a Player must:
“play [Fog] any time before attack damage is dealt.”
This old card text admits that Fog has to be cast during the Attack Phase (before damage is assigned).
The defending player, however, still complains, pointing out the complete absence of a specific Fog Ruling in its latest reprints.
“At the beginning of your end step, if a land entered the battlefield under your control
this turn and you control a prime number of lands, create Primo, the
Indivisible, a legendary 0/0 green and blue Fractal creature token,
then put that many +1/+1 counters on it. (2, 3, 5, 7, 11, 13, 17, 19,
23, 29, and 31 are prime numbers.)”
Whenever a creature you control with power 4 or greater enters, draw a card.
Does Garruk’s Uprising (and other cards like it) see Primo when it is first created as a 0/0 or do they only see it after the +1/+1 counters are added to it?
With Ashes of Creation Alpha 2 Phase 3 finally on the cusp of launch, developer Intrepid Studios has lifted the lid on arguably its most significant features, towns and crates. The highly ambitious MMORPG is about to make its settlements much bigger and more impressive, and is introducing a new in-game representation of goods transportation that will be a key part of player guilds building and managing these towns. To talk through the features, creative director Steven Sharif and director of communications Margaret Krohn are joined by director of design Bill Trost and senior game designer Chris Justo.
As Intrepid continues to hone Ashes of Creation, the step into its next phase of alpha testing makes a major jump forward with the introduction of level-four nodes (the individual regions on each server realm). This will allow players to build full-scale towns to rival even the developer-made equivalents found in many of our best MMORPGs. The livestream starts with discussion about the ongoing improvements Sharif previously mentioned when he announced the Phase 3 delay, including the Anvils starting area, server performance, time-to-kill, and the first-time user experience. The real meat we’re here for begins at the one-hour mark, however.
“This is exciting because we haven’t had an update to node stages in quite some time,” Sharif remarks. The team recently cut one of its planned tiers, ‘metropolis,’ from the settlement progression, meaning that towns are now the penultimate stage before we eventually reach full-scale cities. Right from the start, towns are immediately a huge change from the current villages, as our in-game preview starts outside the towering stone walls of a place named ‘Kal Torhum’ and its imposing main gate.
“Towns are significantly bigger,” Justo says, doubling the size from the two in-world ‘cells’ of villages up to four for towns. When factoring in static, in-node housing, that number could well double again. I’m immediately taken by the scale as the developers ride through the entryway; stone-brick buildings line the cobbled streets, and it strongly reminds me of visiting old medieval towns across the United Kingdom. Sharif has something else in mind, however, calling quick attention to the packs everyone is carrying on their backs.
This is the crate system in action, a fundamental new part of Ashes of Creation that’s a more grounded overhaul of cargo. These boxes range from personal crates to store your own gear to construction crates filled with building materials, and commodity crates that can be taken to ports, other nodes, or into lawless zones as requested to earn rewards. Crates are designed “to make more and more things feel like they are happening in a real world,” Trost explains, although adds that this comes with the caveat of “always favoring gameplay over reality.”
Crates represent resources being physically moved around Verra, and come in various sizes. You’ll be able to transport them on your back as you travel, or put them onto ships or caravans. They’re visible in game, meaning other players can see what you’re carrying, although killing someone to steal their supplies is considered a hostile PvP action and will inflict the same corruption mechanics as any regular instance of troublemaking in Ashes of Creation.
The team are carrying construction crates today, and Justo leads them over to a laboratory in town wrapped in scaffolding and tarps. It’s close to completion of an expansion, and a menu shows that just three crates are required to finish the project. In total, it looks like three different resource types have been delivered already – 100 crates of one, 33 of another, and 64 of the 67 needed from the variant being submitted now. Once everything’s turned in, there’s a short period while the upgrade finishes.
Sharif then opens the node menu and looks through Kal Torhum’s bulletin board, where he can inspect all of the building plots individually. Here you can see the required weekly maintenance costs, along with big upgrade trees for each structure that let you choose how you want to specialize. “We’re going to need a lot more crates,” Trost jokes. You’ll also see smaller ‘node XP’ construction projects that appear automatically around the town, which will provide a bump of experience to the overall node when completed.
Next, we look at a commodity crate, more specifically a ‘Crate of Succulent Fruit.’ This, the tooltip explains, can be delivered to the market commodity vendor in a given node to sell it for gold. With a click, Sharif pulls up a pricing comparison, showing how far away each node is and what it’s currently prepared to pay for the goods in question.
The towns are certainly impressive, offering a level of player-led creativity that outstrips anything seen in the new World of Warcraft housing or FF14’s Island Sanctuary. I’m most reminded of my time building a guild stronghold in Neverwinter, but on an even bigger and bolder scale. There’s still a long, long way to go before Ashes of Creation reaches its full release, but what’s already here makes me eager to see if Intrepid can pull it off.
Ashes of Creation Alpha 2 Phase 3 launches on Tuesday August 26. Taking part in the ongoing alpha requires a key starting at $100, which also includes future beta access, a month of game time, and $15 worth of Ashes of Creation’s in-game marketplace currency, Embers.
In the meantime, the best building games will let you put those construction skills into practice. Want to make sure you’re able to do all that scale justice? Perhaps it’s time to grab the best graphics card for your budget in 2025.
You can follow us on Google News for daily PC games news, reviews, and guides. We’ve also got a vibrant community Discord server, where you can chat about this story with members of the team and fellow readers.
If I attack with Jor Kadeen, can I play Embercleave for 5 (-1) before the attack trigger resolves, making them a 4/4 and drawing 1? or do I have to pay the full 6 and play it earlier?
The attacking/blocking phase timings have changed multiple times in my play memory.. so more generally, are creatures considered attacking immediately when they are declared attackers, do their triggers need to resolve first (step change), or something else?
Jor Kadeen, First Goldwarden has a trigger “Whenever Jor Kadeen attacks ..” and Embercleave counts attacking creatures “This spell costs {1} less to cast for each attacking creature you control.” and can be played instantly due to Flash.
Jor Kadeen is also clear in their rulings that their desirable calculation is done once during ability resolution (hooray) “The value of X is determined only once, as the triggered ability resolves. If the number of equipped creatures you control changes after that time, it won’t change the bonus granted.”
Thornbite Staff has “Whenever a creature dies, untap this creature” as one of its equip effects, and Fanatical Firebrand has “T, Sacrifice this creature: It deals 1 damage to any target.”
Since Fanatical Firebrand Tokens would have Haste, would that untap Kiki-Jiki when I sacrifice a token of Fanatical Firebrand, causing it to loop?
If so, would that also work with Bile Urchin, or any creature with a zero-cost “Sacrifice this creature” effect, like Flame-Kin War Scout?
Destiny 2 players have been begging for a shooting range to test their builds ever since the Tribute Hall was removed back in Shadowkeep. Bungie has finally delivered in The Edge of Fate. It doesn’t disappoint either, offering everything you could want from such a feature, allowing you to damage test with your various builds to get just the right damage and rotations.
While impressive, the Shooting Range can be a little overwhelming at first. There’s a lot to it, and learning how to make the most of it all is essential to ensure you’re optimising all the information you can glean from it. However, if you can master it, it will make you an infinitely better player, so it’s well worth understanding. Here’s everything you need to know.
The Escapist recaps
Destiny 2: The Edge of Fate was released on July 15th, 2025.
The expansion kicks off a new saga for the Destiny narrative, called ‘the Fate Saga’.
In Destiny, big damage numbers are what every self-respecting Guardian wants, and the Shooting Range lets you hone that process.
This new feature is excellent for trying new ideas and putting your new builds to the test
The Shooting Range is full of great options, but it can be overwhelming to get your head around all of it.
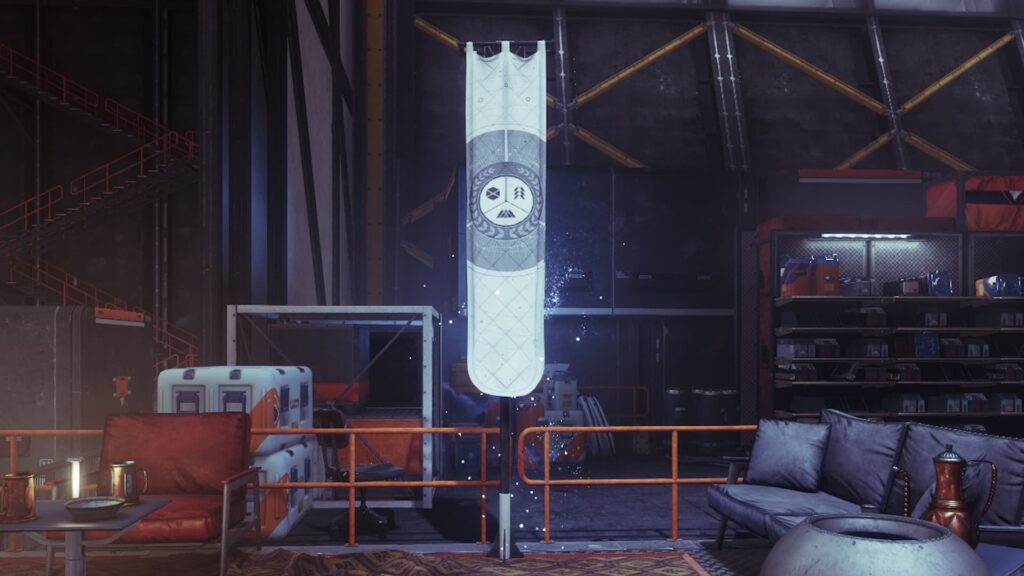
Rally Flag
This work just as you’d imagine any rally flag might. Image credit: Bungie
The first thing you’ll want to do is rally at the flag found on the right side of the Shooting Range. Doing so will refresh your abilities and give you max ammo for all of your weapons. Using this does not consume any Raid Banners, so feel free to rally as many times as you want.
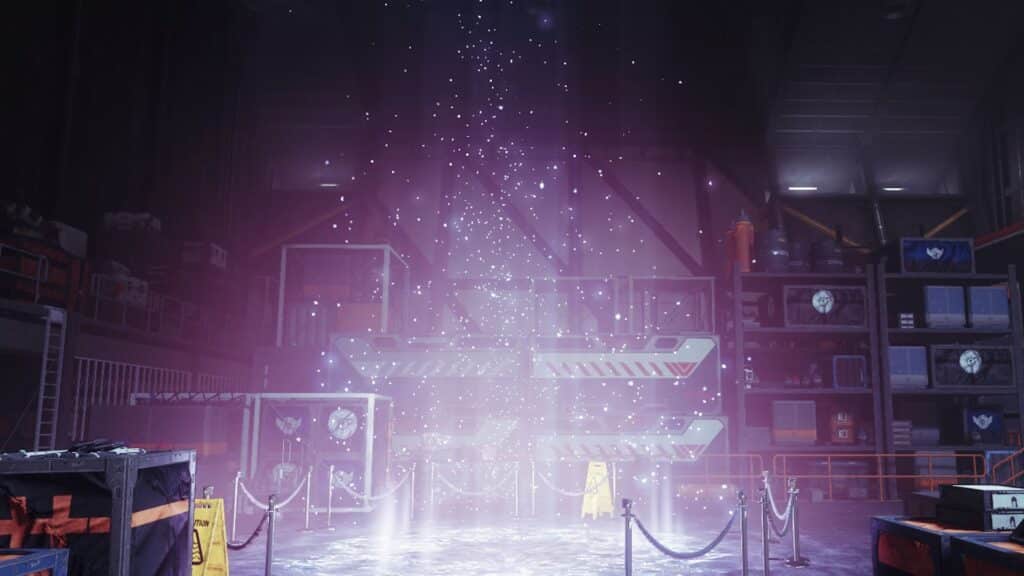
Prismatic Wellspring
This is your one-stop to activate transcendence. Image credit: Bungie
While rallying resupplies almost everything, it won’t give you Transcendence. For that, you’ll need to stand in the Prismatic Wellspring on the left of the entrance to build up both Darkness and Light energy.
This can be utilized on both Prismatic builds and other subclasses, but the energy will decay rapidly unless you are using Prismatic. After entering Transcendence, you deal 5% more damage, take 20% less damage, gain access to a class-specific grenade, and have significantly increased ability regen.
Self-damaging Laser
In some instances, being low health can activate perks, so using this, you can test those numbers out. Image credit: Bungie
Directly opposite the Flag Rally, you’ll find a self-damaging laser that can be used to lower your health quickly. This is useful for testing the effects of perks or Exotics that are only relevant when you have reduced health, like Heal Clip and Mechaneer’s Tricksleeves.
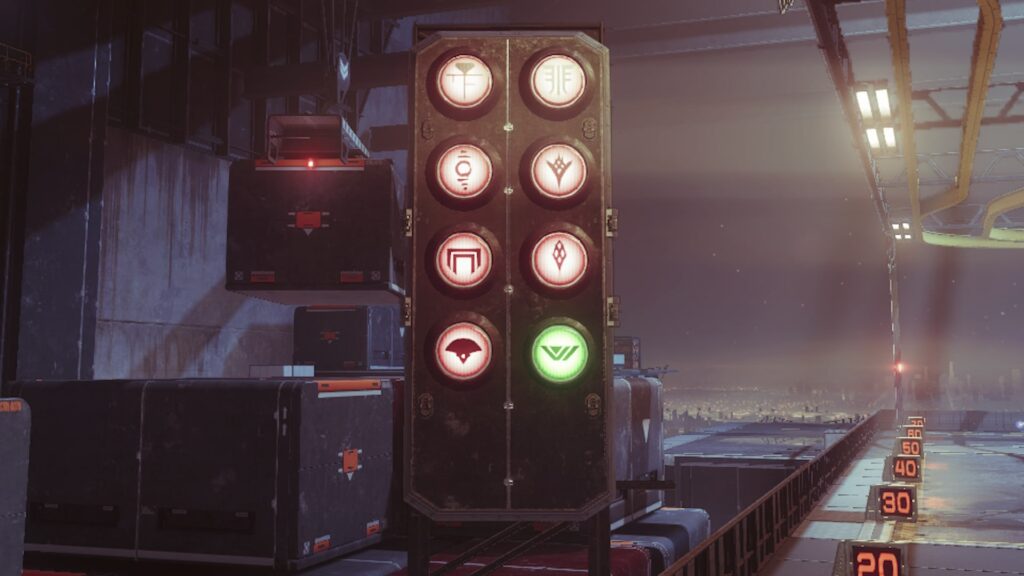
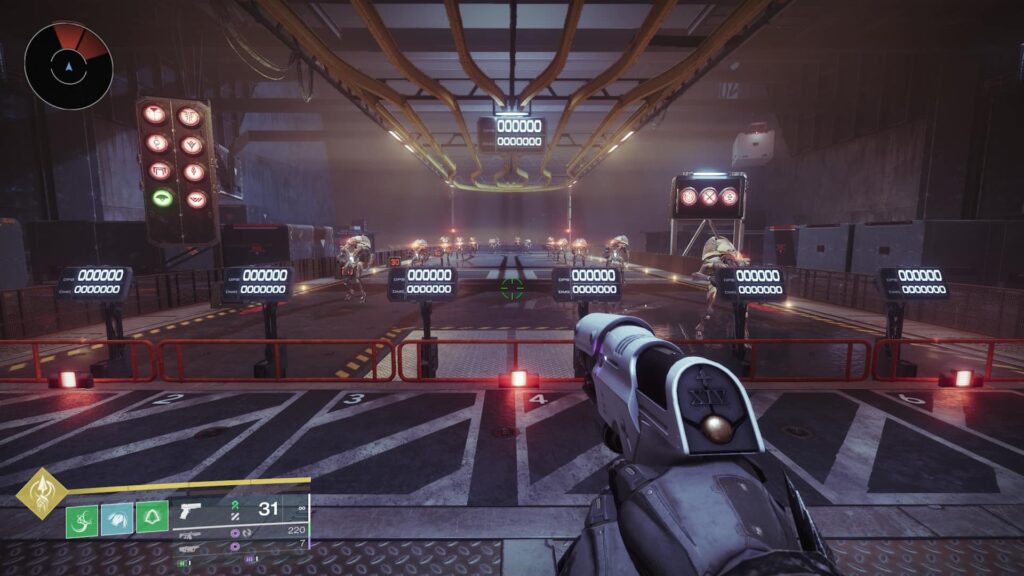
Enemy Factions
Want to test your build against a specific enemy action? Here’s how you choose that. Image credit: Bungie
To the left of the Shooting Range, you’ll see a board with the symbols of eight different enemy factions. Shooting these symbols will spawn enemies from that faction, allowing you to test out your build against one of the following: Cabal, Dread, Fallen, Hive, Scorn, Taken, Vanguard Training, and Vex.
Notably, the bottom right symbol spawns Target Frames that have infinite health. This is ideal for DPS testing, as they can never die regardless of how much damage you deal. In contrast, most other enemy types have limited health and won’t be much use for figuring out what DPS rotation works best.
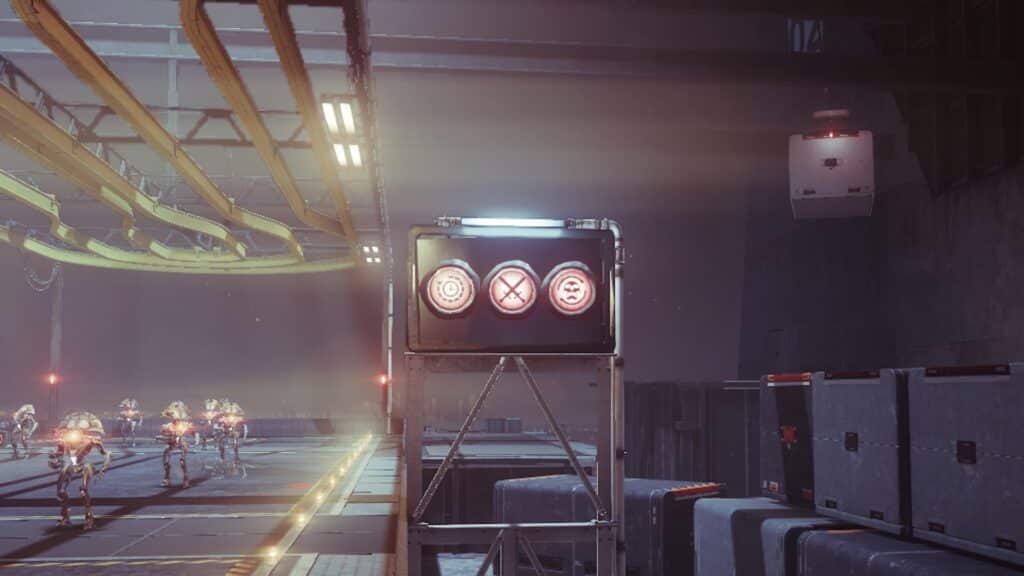
Enemy Options
This is excellent for using your build against enemies who actually want to hurt you. Image credit: Bungie
To the right of the Shooting Range, you’ll see a different board with three symbols. Activating these will trigger various effects, with the first symbol resetting your DPS Scoreboard, the second symbol activating enemy behaviour, and the third symbol clearing all combatants from the range.
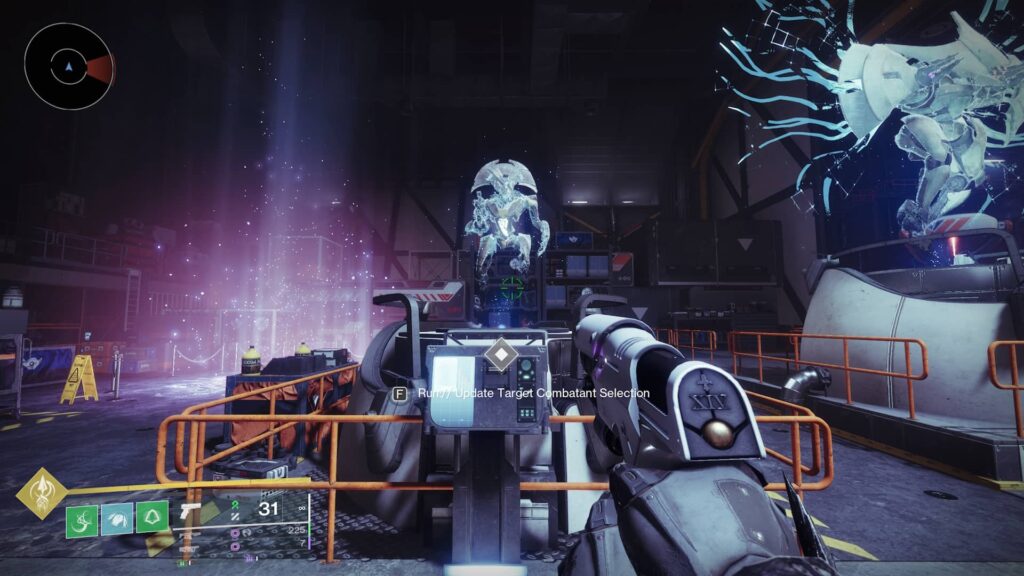
Combatant Selection
Choosing the right enemy for the right test is important. Image credit: Bungie
There are five large plinths scattered throughout the Shooting Range that can be used to spawn specific types of enemies. To use these, interact with them after choosing any Enemy Faction except for Vanguard Training. For example, you could select Vex and then use these plinths to spawn in Goblins, Minotaurs, or Wyverns.
Not only does this let you test out your build against a range of combatants, but your damage dealt also takes into account each enemy’s unique traits. For example, most bosses take around 30% less damage from weapons, which is accurately reflected in the Shooting Range.
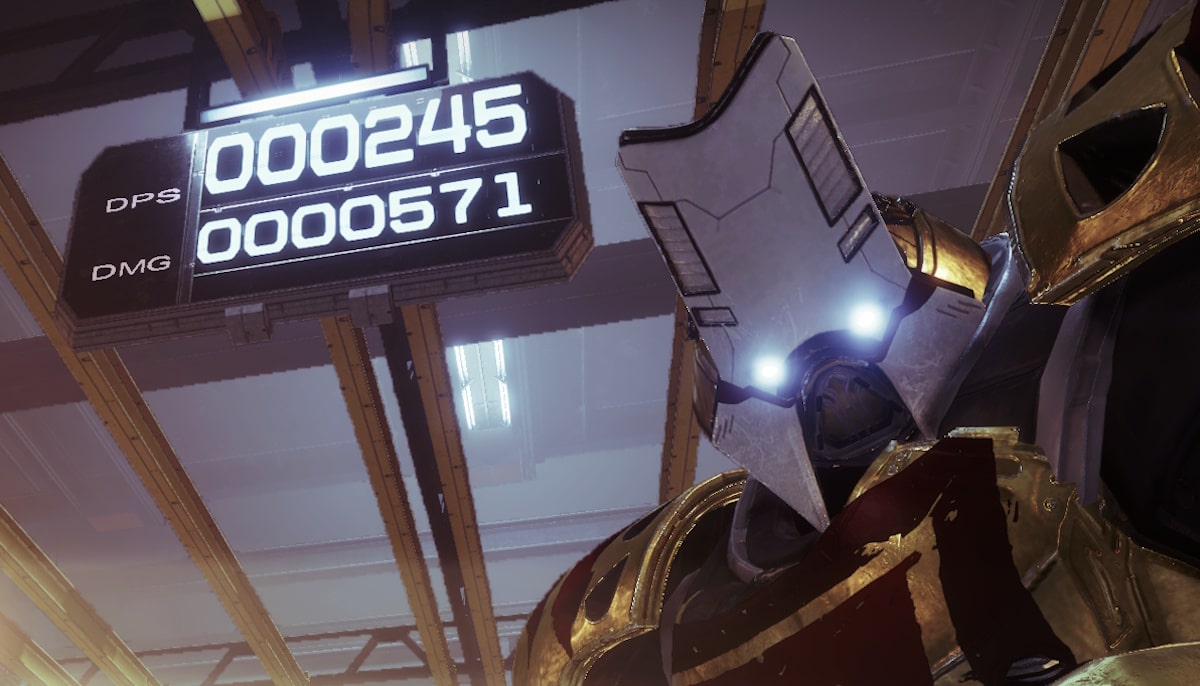
DPS Scoreboards
Knowing how much damage you’re doing is very important when it comes to finding your best builds. Image credit: Bungie
Hanging above the Shooting Range, there is a large scoreboard that tracks damage per second (DPS) and total damage (DMG). This is one of the most important features in this area, as it allows you to test and compare the potency of different builds, weapons, and perks against one another.
Additionally, there are six smaller boards found below the large board. These track DPS and DMG for up to six different Guardians in the Shooting Range. This is convenient for Fireteams looking to test their team damage and the specific impact of various buffs and debuffs that are more team-oriented.
Display Distance on Target
Sometimes distance matters to your damage, so this is a great way to put it to the test. Image credit: Bungie
This panel is found on the far left of the Shooting Range and can be toggled to show how far away an enemy is when you aim at them. The main use for this is for testing PvP weapons, as understanding damage fall-off in the Crucible is essential to becoming a better player.
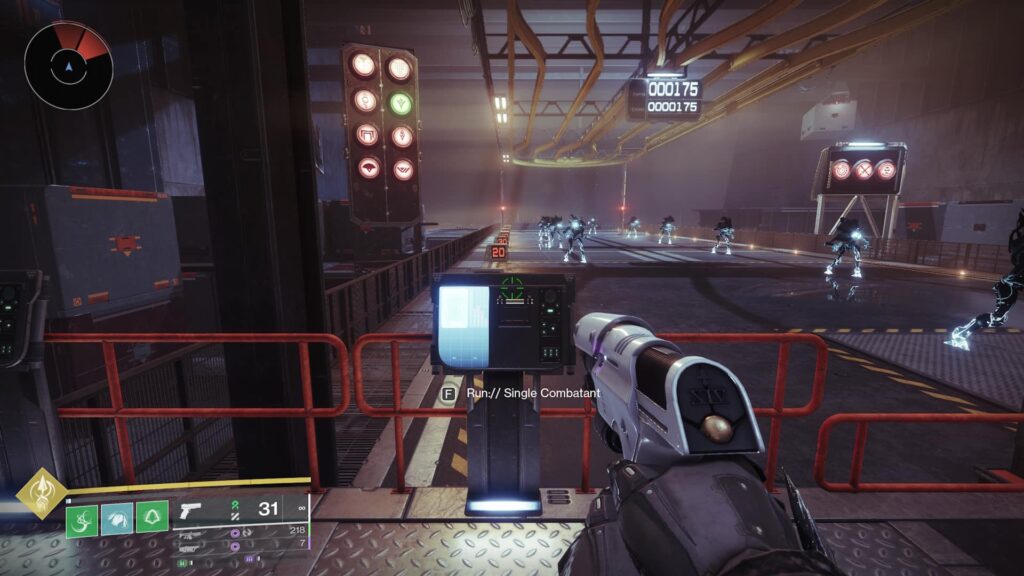
Single Combatant
This is the panel you’ll want to hit if you want to go against one enemy. Image credit: Bungie
This panel is also found on the left of the Shooting Range, and activating it spawns in a single combatant of your choosing. More specifically, the enemy that spawns will always match the Enemy Faction and Combatant Selection previously set.
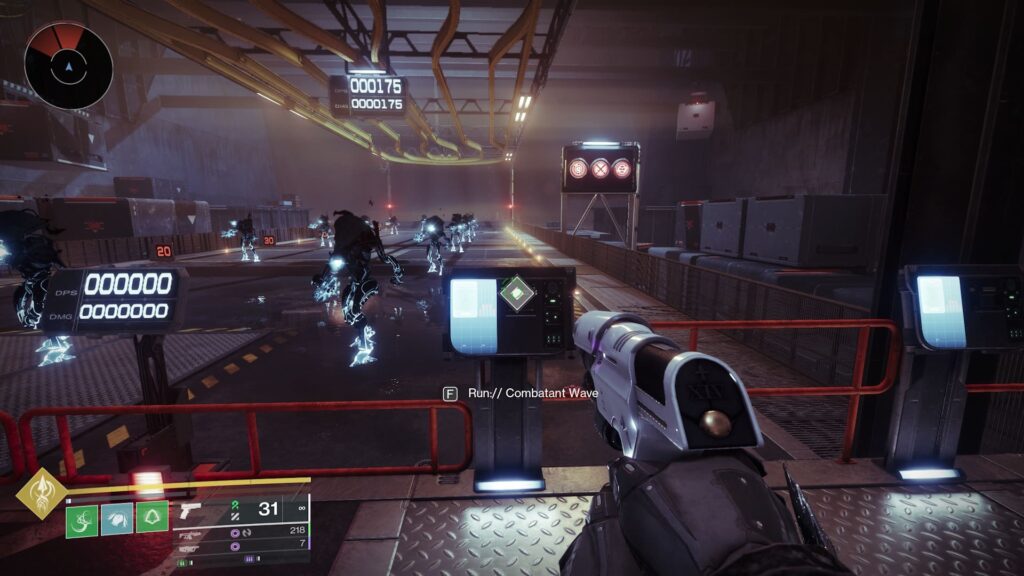
Combatant Wave
It’s not all boss damage; at times, you’re likely going to want to see if your build can deal with many enemies. Image credit: Bungie
Found on the right-hand side of the Shooting Range, this panel spawns in a wave of combatants of your choosing. Much like the Single Combatant panel, the enemies that spawn will match the Enemy Faction and Combatant Selection previously set.
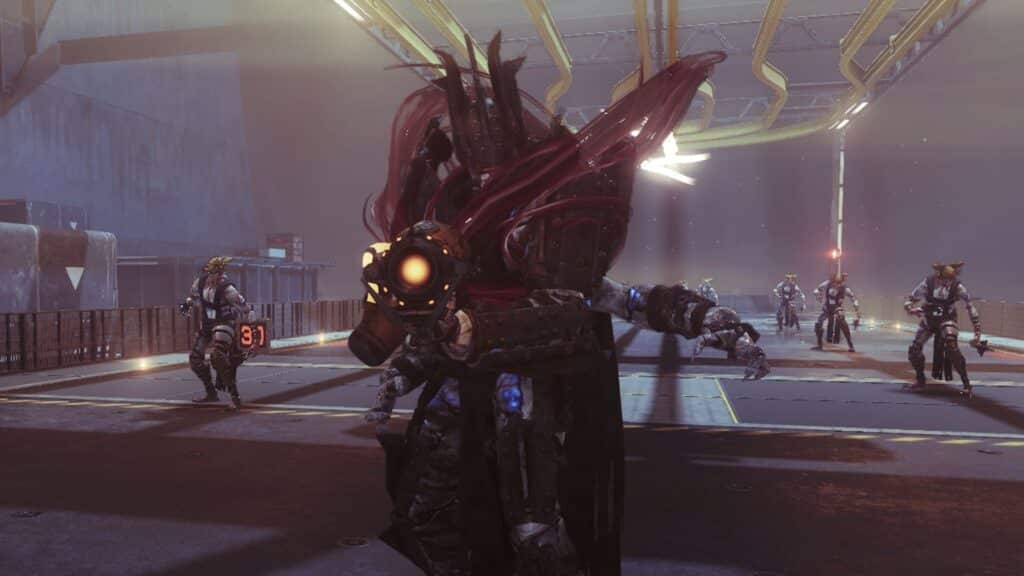
Champion Combatant
Champions are always tough, so making sure you can deal with them goes a long way. Image credit: Bungie
This panel is located on the far right of the Shooting Range, and activating it will spawn a Champion based on whatever Enemy Faction is selected. Interacting with this panel multiple times cycles between Barrier, Overload, and Unstoppable Champions, with each faction having access to at least two of these.
More so than anything else, this can be used to figure out exactly what stuns you have access to on a given build. It’s especially handy for figuring out if Anti-Champion artifact mods work with whatever Exotic or weapon you want to use, which isn’t always as obvious as you would think.
Ask The Escapist
Is the Shooting Range free for everyone?
Yes. The Shooting Range is available to all players, whether they have paid for any content or not. It exists in the Tower and is selectable through that menu.
Is this the first Shooting Range in Destiny 2?
Sort of. Back in Season of Oppulance, there was the Tribute Hall, which had some use as a Shooting Range. This is a far more extensive feature now, though.
When will the next expansion launch?
After The Edge of Fate, the next expansion, Renegades, is expected to launch on December 2, 2025.
The Escapist is supported by our audience. When you purchase through links on our site, we may earn a small affiliate commission. Learn more about our Affiliate Policy
Destiny 2 didn’t make things easy for Hunter mains over the last year or so, but The Edge of Fate changes that with one meta build standing out thanks to the absurd levels of survivability it offers. This game-changing loadout has been made possible by the new armor tiers, which have been introduced in the new expansion, introducing a range of powerful effects.
The trade-off is that with buildcrafting being more complex than ever, it’s also more difficult to figure out what you should be using. So many systems have changed in The Edge of Fate, it can be a little overwhelming. To help you out, we’ve broken down the specifics of a build that excels in everything from entry-level content to the toughest Mythic missions.
The Escapist recaps
Destiny 2: The Edge of Fate released on July 15th, 2025.
The expansion kicks off a new saga for Destiny narrative, called ‘the Fate Saga’.
Hunters has always been the nimble Guardians, able to do massive damage and jump around the battlefield in order to avoid damage
While perhaps not as strong as Titans currently, there are still many viable Hunter builds that are well worth your time to consider.
Last year, Prismatic released, which takes elements from all subclasses and mixes them. Since then, it’s been very meta across all three classes.
Best Destiny 2 Prismatic Hunter Build: Liar’s Handshake
Liar’s Handshake is a classic melee-based Hunter exotic. Image credit: Bungie
One of the biggest problems with a lot of Hunter builds in Edge of Fate is that they lack survivability, especially when compared to what Titans and Warlocks have to offer. This can make them tricky to take into harder content, something that you’ll need to do to get higher-tier loot.
This meta build looks to solve this by utilizing Liar’s Handshake, an incredibly strong Hunter Exotic that not only empowers Arc melee attacks but also heals you after scoring melee final blows. While this Exotic is powerful enough on Arc builds, it becomes even better when paired with Prismatic.
Not only does this combination work great for dealing with tanky combatants, but it also makes you incredibly durable. With the build detailed below, you’ll have access to a ton of healing, invisibility, Woven Mail, and even decoys, giving you endless options to stay alive and complete just about any content.
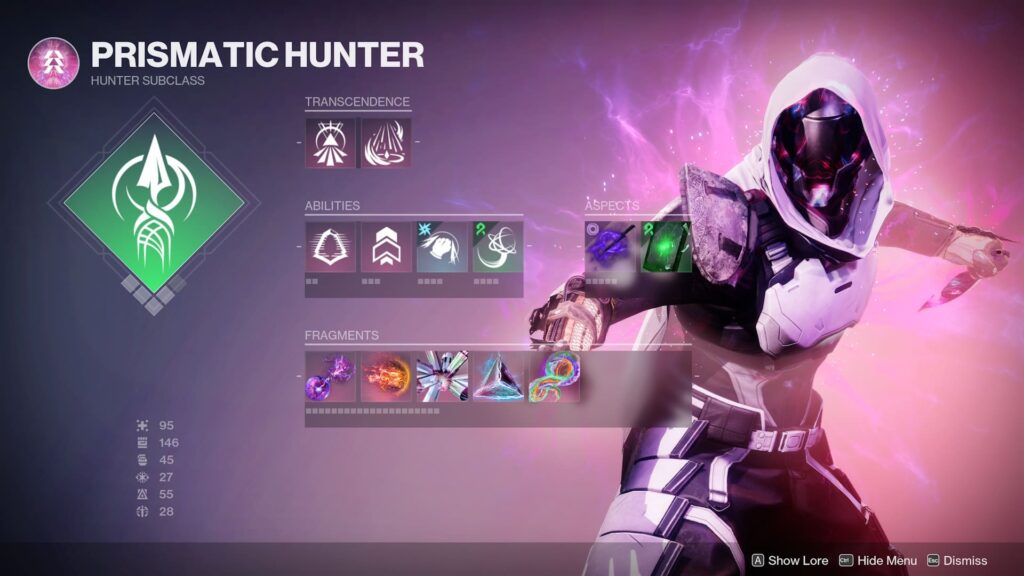
Abilities, Aspects, & Fragments
This build will give you survivability, which can be hard to come by on Hunter. Image credit: Bungie
Abilities
Subclass: Prismatic
Super: Silkstrike
Class Ability: Gambler’s Dodge
Movement: Triple Jump
Melee: Combination Blow
Grenade: Grapple
Aspects
Stylish Executioner: Defeating a target affected by any elemental debuff grants invisibility and Truesight. After a finisher, your next melee attack while invisible Weakens targets.
Threaded Specter: Activating your Class Ability leaves behind a decoy that draws the attention of nearby combatants. After taking enough damage, the decoy detonates, dealing damage and releasing Threadlings that seek out nearby foes.
Fragments
Facet of Blessing: Melee final blows start health regen. While transcendent, melee final blows start health regen for nearby allies too.
Facet of Dawn: Powered melee hits against targets make you and nearby allies Radiant.
Facet of Hope: While you have an elemental buff, your Class Ability regenerates more quickly.
Facet of Protection: While surrounded, you are more resistant to incoming damage. This effect is boosted if you are Transcendent.
Facet of Purpose: Picking up an Orb of Power grants various buffs based on the damage type of your equipped Super.
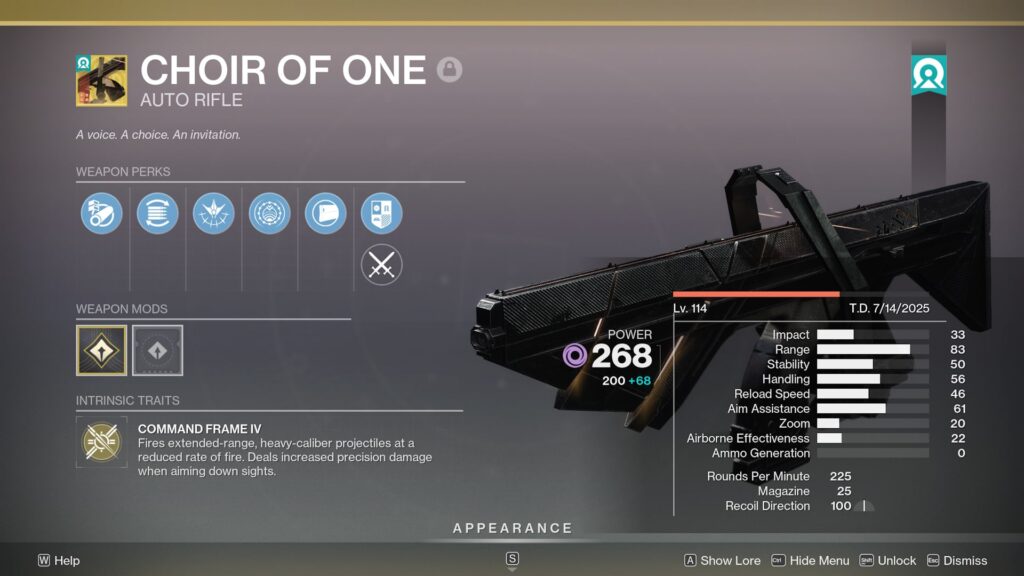
Weapons & Exotics
The Choir of One is an excellent, all around Exotic, that is almost always useful. Image credit: Bungie
Here’s our suggestion for every weapon you should consider using with this Hunter Build:
Kinetic: The ideal Kinetic weapon is a Strand primary that has access to Swashbuckler. For example, Better Devils, Breachlight, and Qua Nilus II will all get the job done. Alternatively, any Spread Shot Hand Cannon with One-Two Punch works great to empower Liar’s Handshake.
Energy: Choir of One is one of the best Exotic weapons and an exceptional fit on this build. It provides high damage, impressive versatility, good ammo economy, and grants a reliable source of Invisibility via Stylish Executioner if you have the Destabilizing Rounds catalyst unlocked.
Heavy: Any meta Void heavy weapon will suffice, as the only priority is to make the most of element-specific armor mods like Void Siphon, Void Ammo Generation, and Void Weapon Surge. Some strong options include Commemoration, Edge Transit, Falling Guillotine, and Mistral Lift.
Best Armor Set & Stat Priority
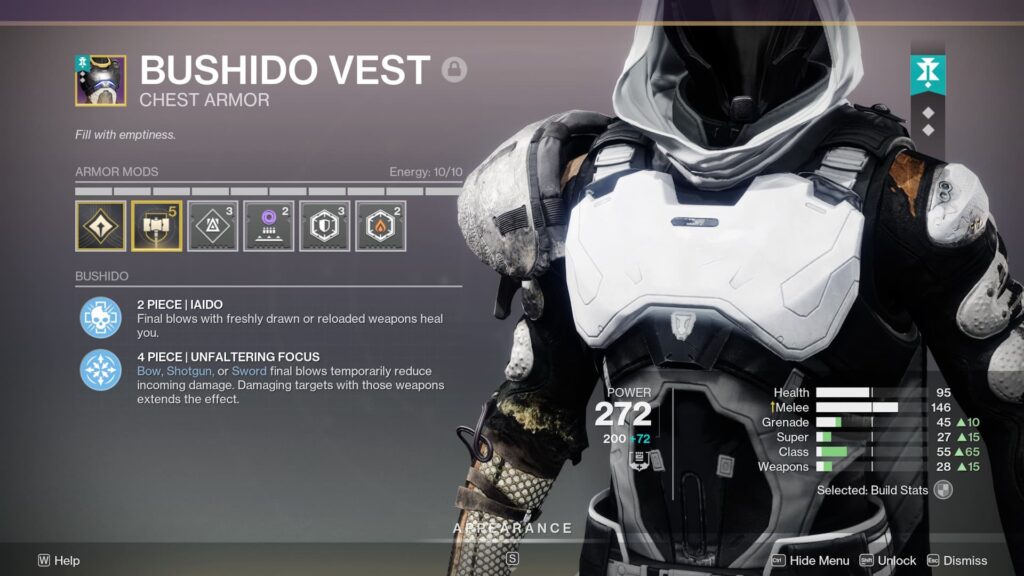
Armor Set: Bushido (Brawler)
Stat Priority: Melee > Class > Grenade > Weapons > Health > Super
The new set bonuses are really useful in The Edge of Fate. Image credit: Bungie
The Bushido armor set is excellent, with its Iaido set bonus healing you after any final blow with a freshly drawn or reloaded weapon. This provides an extra level of sustain that can be triggered at will, and it only requires two Bushido armor pieces.
While not as important, Unfaltering Focus can be useful too. Requiring four Bushido armor pieces, it reduces incoming damage after final blows using a Bow, Shotgun, or Sword. The main benefit of this becomes apparent when used alongside a Shotgun with One-Two Punch or with a Sword in activities like Crota’s End and Pit of Heresy.
As for stat priority, Melee is by far and away the most important stat on this build. A high melee stat shortens Combination Blow’s cooldown and increases its damage, allowing you to finish off targets and heal up with ease. For this reason, you’ll want to prioritize using armor pieces with the Brawler archetype where possible.
Otherwise, aim for a Class stat of at least 50 and then use any remaining stat points on Grenade. Having a reasonably high Class stat is essential, as it allows Focusing Strike to refresh Gambler’s Dodge’s cooldown after every final blow, which is essential to upkeep this build’s core gameplay loop.
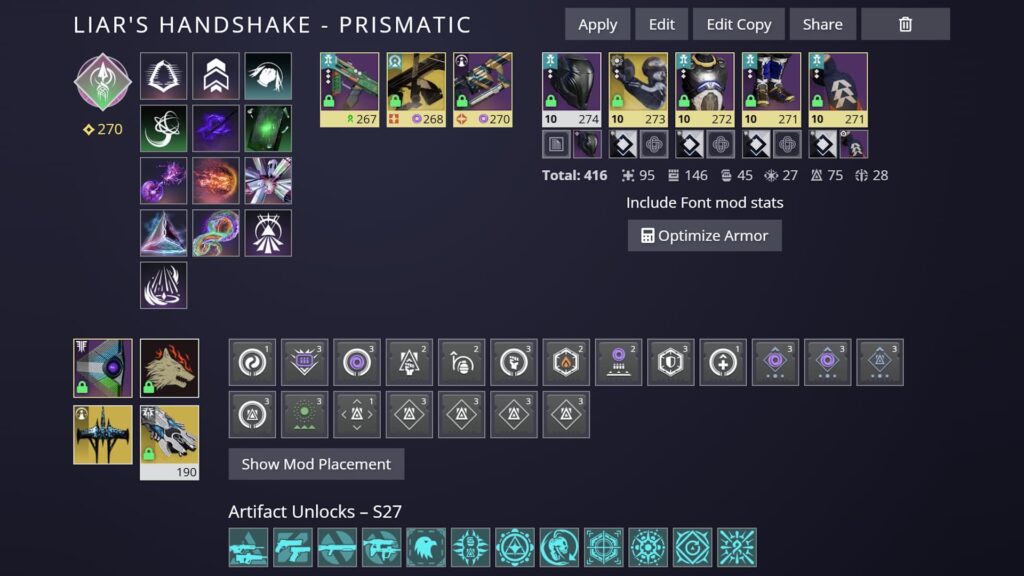
Armor Mods
Here’s what the build looks like with all fragments. Image credit: Bungie
Helmet
+10 Class Mod (3)
Heavy Ammo Finder (3)
Void Siphon (3)
Harmonic Siphon (1)
Gauntlets
+10 Class Mod (3)
Heavy Handed (3)
Impact Induction (2)
Focusing Strike (2)
Chest
+10 Class Mod (3)
Void Ammo Generation (2)
Concussive Dampener (3)
Resistance Mod of choice (2)
Leg
+10 Class Mod (3)
Recuperation (1)
Void Weapon Surge (3)
Void Weapon Surge (3)
Class Item
+5 Class Mod (1)
Reaper (3)
Time Dilation (3)
Class Font (3)
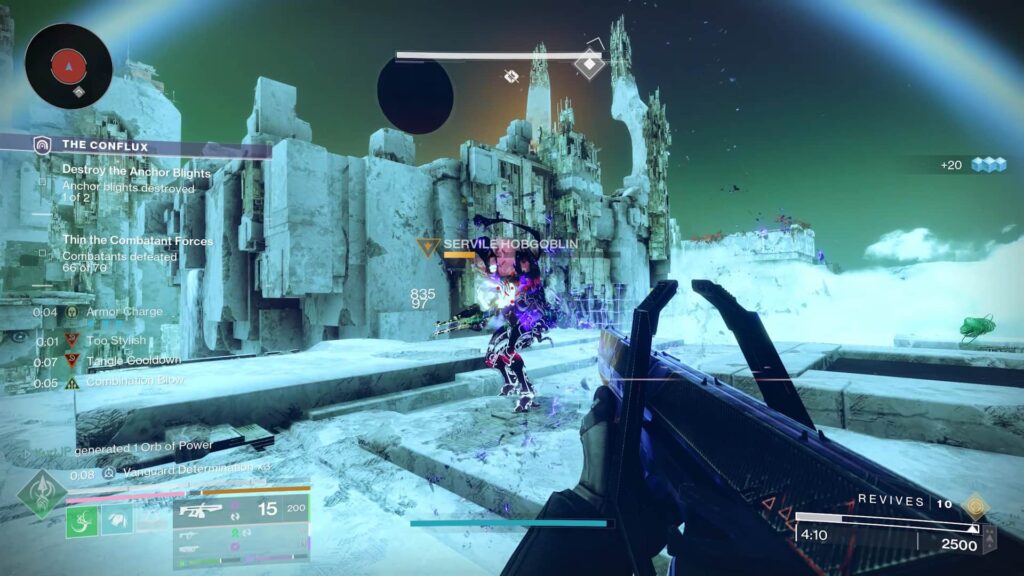
Gameplay Loop
This build will have you tearing through enemies across difficulties. Image credit: Bungie
To make the most of this build, you’ll want to follow this gameplay loop, which aims to maximize survivability by making the most of the chosen Exotic, abilities, and weapons:
Use Choir of One as a jack of all trades Exotic to clear adds and take down tankier combatants.
When in danger, get a melee final blow to heal up and immediately activate Gambler’s Dodge to drop a decoy. This will refresh Combination Blow.
In most situations, you’ll then want to either destroy the decoy to deal damage or retreat to safety while the enemies are distracted. Alternatively, landing another melee final blow will refresh Gambler’s Dodge, allowing you to repeat this cycle.
As you play, collect Orbs of Power to heal up with Recuperation and become Invisible using either Choir of One or getting final blows with Grapple. Doing so grants Woven Mail, providing 45% damage reduction while active, which stacks with the 20% granted from Transcendence and the 15% from Facet of Protection.
By combining the healing benefits of Liar’s Handshake, Orbs of Power, and the Bushido armor set, you will be able to stay topped up on health. Throw in this build’s reliable source of Invisibility, Woven Mail, and the constant decoys, and you become an unkillable Guardian who can clear even the toughest content on offer.
What’s great about this build is that it is by no means reliant on the seasonal artifact. None of the available artifact mods are needed at all, although the likes of Shieldcrush, Shoulder to Shoulder, and Elemental Coalescence help make you even tankier.
Ask The Escapist
Are there other builds that are great for Hunters?
Yes. Solar Celestial Nighthawk Hunters are always going to be great when it comes to boss damage, and there are also several strong Arc builds that can provide some interesting utility.
Should you play as a Hunter over a Warlock or Titan?
What class you play as is very subjective. Hunters can provide a lot of damage and utility, so they are often useful in most situations, and their mobility undoubtedly makes them very fun to play.
When will the next expansion launch?
After The Edge of Fate, the next expansion, Renegades, is expected to launch on December 2, 2025.
The Escapist is supported by our audience. When you purchase through links on our site, we may earn a small affiliate commission. Learn more about our Affiliate Policy
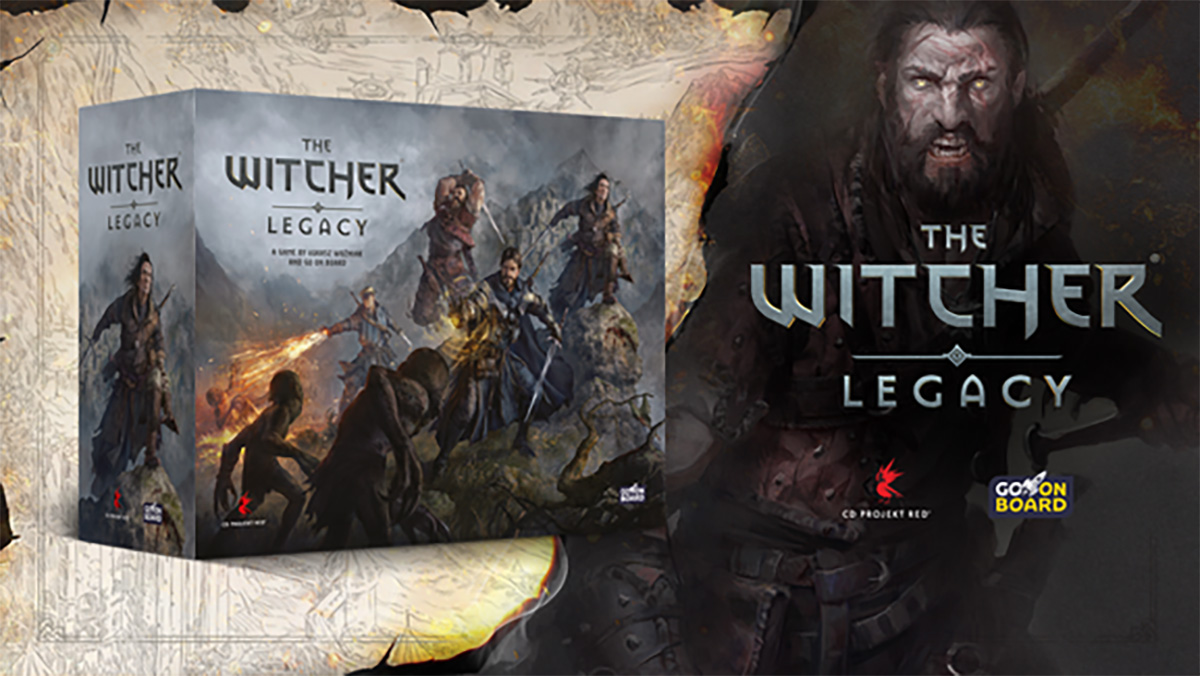
The Witcher universe is a cool place to inhabit, and CD Projekt Red and Go On Board have both just jointly announced the next tabletop board game set within its realms.
The Witcher: Legacy is the third Witcher-world board game that the two companies have collabed on, and this latest adventure is a story-driven tale for 1-4 players.
In solo or cooperative modes, they take on the role of Wolf School witchers and hunt down those responsible for a brutal attack that left the school devastated, but not fully destroyed.
The blurb describes it thus: “The game takes place in the kingdom of Kaedwen, where players will explore vast lands, battle monsters, train their skills, and manage limited resources — all the while seeking to unravel a conspiracy that threatens the very existence of witchers.”
So, we aren’t actually getting too much information there about how things will play out, but it already has 1500 followers on its page, and the news has only been out for a mere flash in the eye of time.
The Gamefound page for The Witcher: Legacy is now live, and whoever follows the project now and later participates in the crowdfunding campaign will receive an exclusive Gorgon monster miniature, a creature that has never before appeared in any Witcher video game.
One of the previous Witcher board games, The Witcher: Old World, ranks in the top 10 biggest boardgame crowdfunding campaigns of all time and sold an incredible 192,000 copies.
Both parties will be hoping for a repeat of that success while we wait for more news on the next video game in the popular series.
The Escapist is supported by our audience. When you purchase through links on our site, we may earn a small affiliate commission. Learn more about our Affiliate Policy


Published: Jul 31, 2025 11:38 am